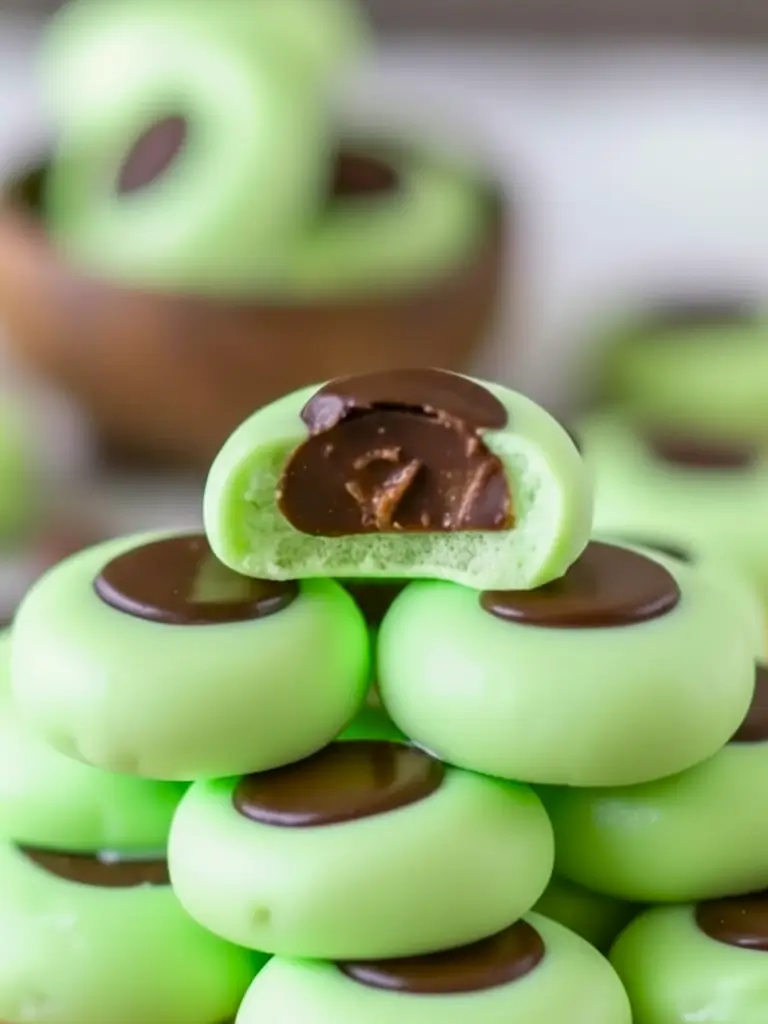
If there is one confection that instantly transports me back to my grandmother’s kitchen during the holidays, it is the classic Cream Cheese Mint. However, today we are elevating that nostalgic favorite into something truly spectacular: Chocolate Mint Cream Cheese Buttons.
Imagine the smooth, melt-in-your-mouth texture of a buttery mint fondant, paired with a snap of rich dark chocolate in the center. These aren’t just candies; they are bite-sized pieces of heaven that perfectly balance the cooling sensation of peppermint with the indulgence of semi-sweet chocolate.
Whether you are looking for a show-stopping addition to your Christmas cookie box, a pastel-perfect treat for a spring wedding shower, or just a sweet morsel to enjoy with your afternoon coffee, this recipe is your new go-to. The best part? It is entirely no-bake, comes together in under 30 minutes, and looks like it came straight from a boutique confectionery.
Table of Contents
Why You’ll Love This Chocolate Mint Cream Cheese Buttons Recipe
- Zero Baking Required: This is a 100% no-bake recipe. It frees up your oven for other dishes and is perfect for hot summer days or busy holiday cooking marathons.
- Textural Perfection: The base is similar to a soft fondant or a buttercream truffle creamy, dense, and smooth while the chocolate center adds a necessary bite and richness.
- Highly Customizable: While we are using a classic mint green and peppermint flavor profile here, this base recipe is a blank canvas for any color or extract you desire.
- Make-Ahead Friendly: These candies actually improve with age as the flavors meld and the texture firms up, making them ideal for prepping weeks in advance.
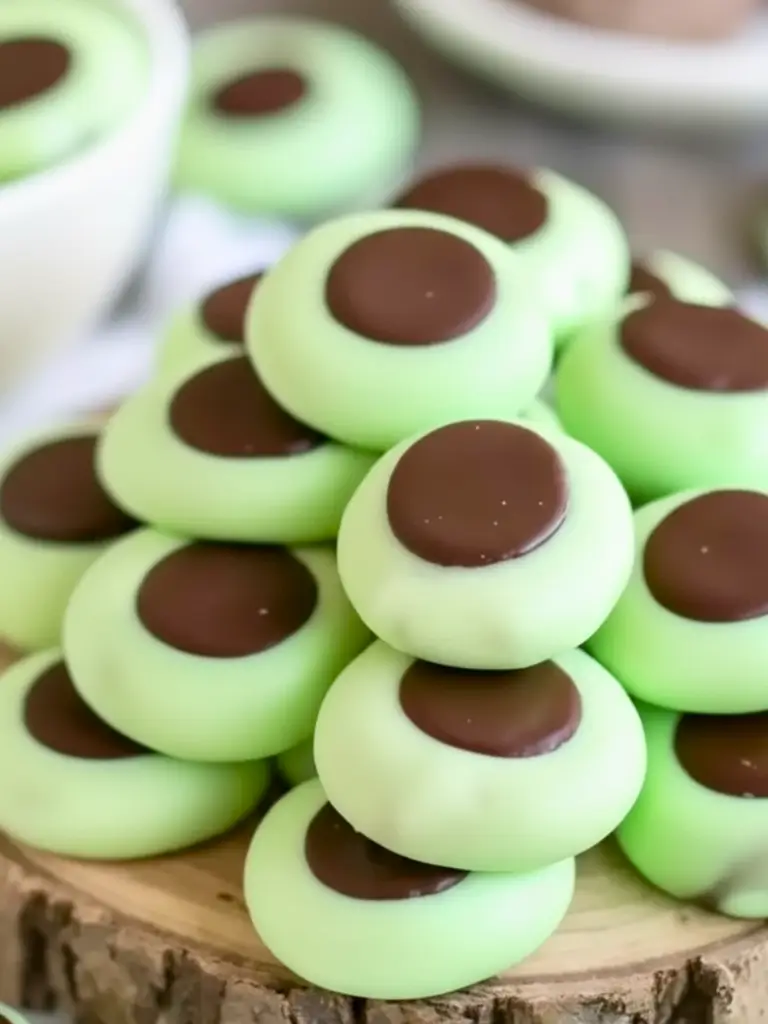
- Visual Appeal: The vibrant pastel green against the dark chocolate creates a stunning contrast that pops in photos and on dessert platters.
Ingredients (Chocolate Mint Cream Cheese Buttons Recipe)
The beauty of this recipe lies in its simplicity. You likely have most of these ingredients in your pantry right now.
The Mint Dough Base
- Cream Cheese: (4 oz / 115g) This must be softened to room temperature. Full-fat brick style works best for stability; avoid the tub variety or “whipped” styles as they contain too much water.
- Unsalted Butter: (1 tbsp) Also softened. This adds a velvety mouthfeel and cuts the intense sweetness of the sugar.
- Powdered Sugar: (4 cups / 500g) Also known as confectioners’ sugar. It provides the structure for the candy.
- Peppermint Extract: (1/2 to 1 tsp) Be careful here use peppermint extract, not generic “mint” (which can taste like spearmint toothpaste). Adjust to taste.
- Green Gel Food Coloring: I recommend gel paste over liquid drops. Liquid drops can alter the consistency of the dough, making it sticky. Gel provides vibrant color without adding moisture.
The Chocolate Center
- Semi-Sweet Chocolate Chips: (1/2 cup) High-quality chocolate is key since it is the focal point. You can also use dark chocolate couverture.
- Coconut Oil or Heavy Cream: (1 tsp) A tiny amount of fat helps the chocolate melt smoothly and prevents it from blooming (turning gray) once it sets.
Instructions
Making these buttons is a fun, tactile process that is great for getting kids involved in the kitchen.
1. Cream the Base
In a large mixing bowl (or the bowl of a stand mixer fitted with the paddle attachment), combine the softened cream cheese, softened butter, and peppermint extract. Beat on medium-high speed until the mixture is completely smooth, airy, and free of lumps. This usually takes about 2–3 minutes. Note: If your cream cheese is cold, you will end up with lumps in your final candy.
2. Incorporate the Sugar
Turn the mixer to the lowest speed. Gradually add the powdered sugar, one cup at a time. It will look dry and crumbly at first do not panic! As the moisture from the cream cheese hydrates the sugar, it will come together into a stiff dough similar to playdough. Tip: Scrape down the sides of the bowl frequently to ensure everything is incorporated.
3. Color the Dough
Once the dough has formed, add a small toothpick-amount of green gel food coloring. Mix until the color is evenly distributed. If the dough feels too sticky to handle, add a tablespoon more of powdered sugar. If it is cracking too much, knead it with warm hands to soften the butter slightly.
4. Shape the Buttons
Dust your hands lightly with powdered sugar. Pinch off teaspoon-sized amounts of dough and roll them into smooth balls between your palms. Place them on a baking sheet lined with parchment paper. Once rolled, use your thumb or the back of a round measuring spoon to gently press down into the center of each ball, creating a “button” shape with a well in the middle. If the edges crack significantly, just smooth them back together with your fingers.
5. Fill with Chocolate
In a microwave-safe bowl, combine the chocolate chips and coconut oil. Microwave in 20-second bursts, stirring vigorously between each burst, until smooth and glossy. Transfer the melted chocolate to a piping bag (or a Ziploc bag with the corner snipped). Carefully pipe a dollop of chocolate into the indentation of each mint button. You can tap the tray gently on the counter to help the chocolate settle flat.
6. Serve
Place the tray in the refrigerator for at least 30 minutes to allow the chocolate to set and the mints to firm up. Serve chilled or at room temperature.
Expert Tips for Success
- Humidity Matters: Powdered sugar is hydroscopic, meaning it absorbs moisture from the air. If you are making these on a very rainy or humid day, you may need an extra 1/4 to 1/2 cup of powdered sugar to get the dough to a workable consistency.
- The “Toothpaste” Danger: Peppermint extract is potent. Start with 1/4 teaspoon, taste the dough, and add more. It is easy to add, but impossible to remove!
- Smooth Piping: If you don’t have a piping bag, you can use a teaspoon to fill the centers, but a bag gives you that clean, professional round circle of chocolate seen in the photos.
- Cracking Edges: If your buttons crack when you press your thumb into them, the dough is likely too dry. Knead it in your hands for a minute; the heat from your palms will melt the butter slightly and make the dough more pliable.
Variations
- Lemon Cream Cheese Buttons: Swap the peppermint extract for lemon extract and use yellow food coloring. Use white chocolate for the center instead of dark.
- Almond Wedding Mints: Use almond extract and leave the dough white (no coloring). Top with a whole almond or a dab of pearl-dust glaze.
- Holiday Oreo: Crushed Oreo crumbs can be kneaded into the white dough (omit the mint) for a cookies-and-cream version.
- Vegan Option: Use a high-quality vegan cream cheese (like a cashew base) and vegan butter. Ensure your sugar is vegan-certified (bone-char free).
Frequently Asked Questions
How should I store these? Because they contain cream cheese, it is best to store these in an airtight container in the refrigerator. They will last for up to 2 weeks.
Can I freeze them? Absolutely. Layer them between sheets of wax paper in a freezer-safe container. They freeze beautifully for up to 3 months. Thaw them in the fridge overnight before serving to prevent condensation from affecting the sugar surface.
Why is my dough sticky? This usually happens if the butter was melted rather than softened, or if liquid food coloring was used. Simply add more powdered sugar, a tablespoon at a time, until it is no longer tacky.
Can I dip the whole mint in chocolate? Yes! If you prefer a “York Peppermint Pattie” style, chill the shaped buttons (without the indentation) until hard, then dip the entire candy into melted dipping chocolate.
Chocolate Mint Cream Cheese Buttons
Ingredients
Method
- In a stand mixer, cream together the softened cream cheese and butter on medium-high speed until perfectly smooth and emulsified.
- Add the pure peppermint extract and mix on low until incorporated.
- Gradually add the sifted powdered sugar one cup at a time. Beat on medium speed until the mixture forms a stiff, smooth dough.
- Transfer the mixture to a piping bag and pipe quarter-sized buttons onto parchment-lined baking sheets.
- Place the baking sheets in the freezer for at least 2 hours, or until the buttons are completely solid.
- Melt the dark chocolate and coconut oil together in the microwave using 30-second increments, stirring until smooth and glossy. Let cool for 5 minutes.
- Working in batches, dip the frozen cream cheese buttons into the melted chocolate, tapping off the excess. Place back on the parchment paper to set.
- Store in an airtight container in the refrigerator until ready to serve.