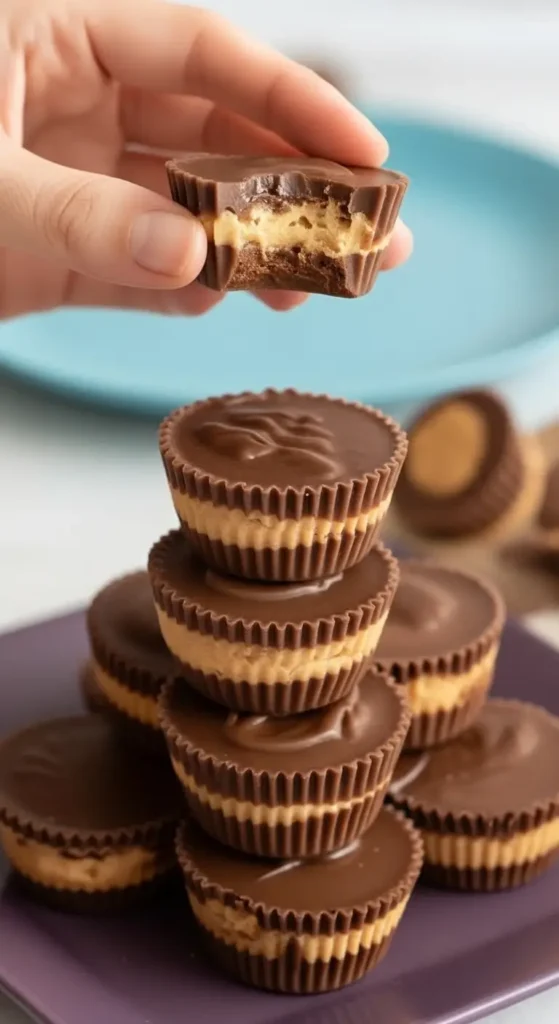
There is a moment of pure bliss that happens when you bite into the perfect chocolate treat. First, the audible snap of the chocolate shell, followed by a creamy, salty peanut butter filling, and then—surprise!—a satisfying, airy crunch that changes everything.
I’m Chef Luna, and after 40 years in professional kitchens and running high-volume bakeries, I can tell you that texture is the difference between a “good” dessert and an “unforgettable” one. While I adore a classic smooth peanut butter cup, these Chocolate Peanut Butter Crunch Cups elevate the experience entirely.
Whether you are looking for a high-value holiday gift or just a 3 PM pick-me-up, this recipe is your new secret weapon. It’s no-bake, requires only five ingredients, and honestly? It puts the famous orange-wrapper candy to shame. Let’s get cooking!
Table of Contents
Why You’ll Love This Best Chocolate Peanut Butter Crunch Cups
If you are intimidated by candy making, put those fears aside. This recipe is designed for success, even if you’ve never tempered chocolate in your life.
- Texture Heaven: The combination of the hard chocolate shell and the crispy, rice-cereal-spiked peanut butter filling is addictive.
- No-Bake Ease: No oven required. This is the perfect recipe for hot summer days or when your oven is occupied with holiday roasts.
- 5-Ingredient Magic: You likely have everything you need in your pantry right now.
- Customizable: Easily adaptable for gluten-free, vegan, or dairy-free dietary needs without sacrificing flavor.
- Crowd Pleaser: I have served these at elegant dinner parties and children’s birthday bashes; the plate always comes back clean.
Ingredients Needed For Homemade gourmet candy
The quality of your ingredients matters here. Since there are so few, each one needs to shine.
- Semi-Sweet Chocolate Chips (2 Cups): I prefer semi-sweet (around 60% cocoa) to balance the sweetness of the filling. You can use high-quality bars chopped up or premium chips like Ghirardelli or Guittard.
- Creamy Peanut Butter (1 Cup): Chef’s Note: Use a standard commercial brand like Jif or Skippy. Natural peanut butter (the kind that separates) is too oily for this recipe and can cause the filling to weep.
- Salted Butter (1/4 Cup): Softened to room temperature. This adds a velvety mouthfeel to the filling. If using unsalted butter, add a pinch of sea salt.
- Powdered Sugar (1/2 Cup): This stabilizes the peanut butter and adds just the right amount of sweetness.
- Crisp Rice Cereal (3/4 Cup): The star of the show! Rice Krispies work best here. They stay crunchy even when mixed with the peanut butter.
How to Make Chocolate Peanut Butter Crunch Cups
Follow this method closely. The layering technique is simple, but patience is key to getting those clean, professional edges.
1. Prepare Your Molds Line a standard muffin tin with paper liners. For smaller, bite-sized treats (which I recommend for parties), use a mini-muffin tin.
2. Create the Chocolate Base Melt 1 cup of the chocolate chips. You can do this in a double boiler or in the microwave (30-second intervals, stirring in between).
- Why? Microwave heating can create hot spots. Stirring distributes the heat and prevents the chocolate from seizing or burning.
- Spoon about 1-2 teaspoons of melted chocolate into the bottom of each liner. Tilt the pan slightly to coat the bottom evenly. Place in the freezer for 10 minutes to set.
3. Mix the Crunch Filling While the base chills, mix the softened butter and peanut butter in a medium bowl until completely smooth. Sift in the powdered sugar and stir until combined. Finally, gently fold in the crisp rice cereal.
- Why? Folding gently ensures you don’t crush the cereal, preserving that essential texture.
4. Add the Filling Remove the tin from the freezer. Roll the peanut butter mixture into balls (or use a small cookie scoop) and press them gently onto the frozen chocolate base. Flatten the top slightly so the next layer of chocolate sits flat.
5. The Final Coat Melt the remaining 1 cup of chocolate chips. Spoon the chocolate over the peanut butter layer, smoothing it out to the edges to “seal” the peanut butter inside.
6. The Final Set Tap the muffin tin firmly on the counter 2-3 times.
- Why? This pops any air bubbles and levels the chocolate for a professional, glossy finish.
- Refrigerate for at least 30 minutes before serving.
Expert Tips for Success Easy no-bake holiday treats
I have made thousands of these cups. Here are the troubleshooting tips I share with my culinary students:
- The “Shine” Hack: If you want your chocolate to look glossy like a professional chocolatier made it, add 1 teaspoon of coconut oil or shortening to the chocolate while melting. It mimics the look of tempered chocolate.
- Avoid Water: Ensure your bowls and spoons are completely dry. Even a single drop of water can cause melting chocolate to “seize” and turn into a gritty, clumping mess.
- The Ratio: If you love a higher crunch factor, you can increase the rice cereal to 1 cup, but the filling will be slightly crumbly.
- Salty-Sweet Balance: If you are a fan of savory-sweet desserts, sprinkle a few flakes of Maldon sea salt on top of the wet chocolate before the final chill.
Serving and Storage Tips Best chocolate peanut butter ratio
- Room Temperature: These are best served at room temperature (if it’s not too hot out!). Remove them from the fridge 10 minutes before eating for the creamiest texture.
- Fridge: Store in an airtight container for up to 2 weeks.
- Freezer: These freeze beautifully! Keep them in a freezer-safe bag for up to 3 months. It’s a great way to have an emergency dessert on hand.
Frequently Asked Questions
Can I use almond butter or cashew butter? Absolutely. Just ensure it is a “no-stir” variety. If you use natural almond butter, you may need to add an extra tablespoon of powdered sugar to absorb the excess oil.
Are these gluten-free? Most crisp rice cereals are gluten-free, but always check the label (some brands use barley malt). If you use certified GF cereal, this recipe is 100% gluten-free.
Why is my chocolate cracking when I bite into it? That’s actually a good thing! It means your chocolate has set properly. If you want a softer bite, mix a teaspoon of coconut oil into the melted chocolate layers.
Can I make these vegan? Yes! Use dairy-free chocolate chips (like Enjoy Life brand) and vegan butter. The peanut butter and rice cereal are naturally plant-based.
Conclusion
These Chocolate Peanut Butter Crunch Cups are more than just a sweet treat; they are a textural masterpiece that is surprisingly easy to execute. The contrast between the smooth chocolate and the crackling filling is pure culinary joy.
I’d love to hear from you! Did you add the sea salt on top? Did you swap the nut butter? Leave a comment and a star rating below it helps other home cooks find this recipe!

Best Chocolate Peanut Butter Crunch Cups
Ingredients
Method
- Line a standard 12-cup muffin tin with paper liners. (Pro Tip: Use a mini-muffin tin for 24 smaller, bite-sized treats).
- Melt the Base: Place 1 cup of the chocolate chips in a microwave-safe bowl. Microwave in 30-second intervals, stirring in between, until completely smooth. Spoon about 1-2 teaspoons of chocolate into the bottom of each muffin liner. Tilt to coat evenly. Freeze for 10 minutes.
- Make the Filling: In a medium bowl, mix the peanut butter and softened butter until smooth. Stir in the powdered sugar until fully combined. Gently fold in the crisp rice cereal so the grains don’t get crushed.
- Assemble: Remove tin from freezer. Scoop about 1 tablespoon of the peanut butter mixture, roll it slightly into a ball, and press it into the frozen chocolate base. Flatten the top gently.
- Top and Set: Melt the remaining 1 cup of chocolate chips. Spoon over the peanut butter layer, spreading to the edges to seal. Tap the pan on the counter to remove air bubbles. Refrigerate for at least 30 minutes to set completely.
Notes
* Storage: Store in the fridge for up to 2 weeks or freeze for 3 months.
* Chocolate Seizing: Ensure no water touches your chocolate while melting.
* Salty Twist: Add flakey sea salt on top before the final chill for a gourmet finish.