good gluten free desserts are often considered the holy grail of modern baking, and after 40 years as an elite culinary strategist, I am finally sharing my ultimate masterclass with you. For decades, the pastry world believed that removing gluten meant sacrificing texture, flavor, and that luxurious mouthfeel we all crave. I am here to tell you that is a myth.
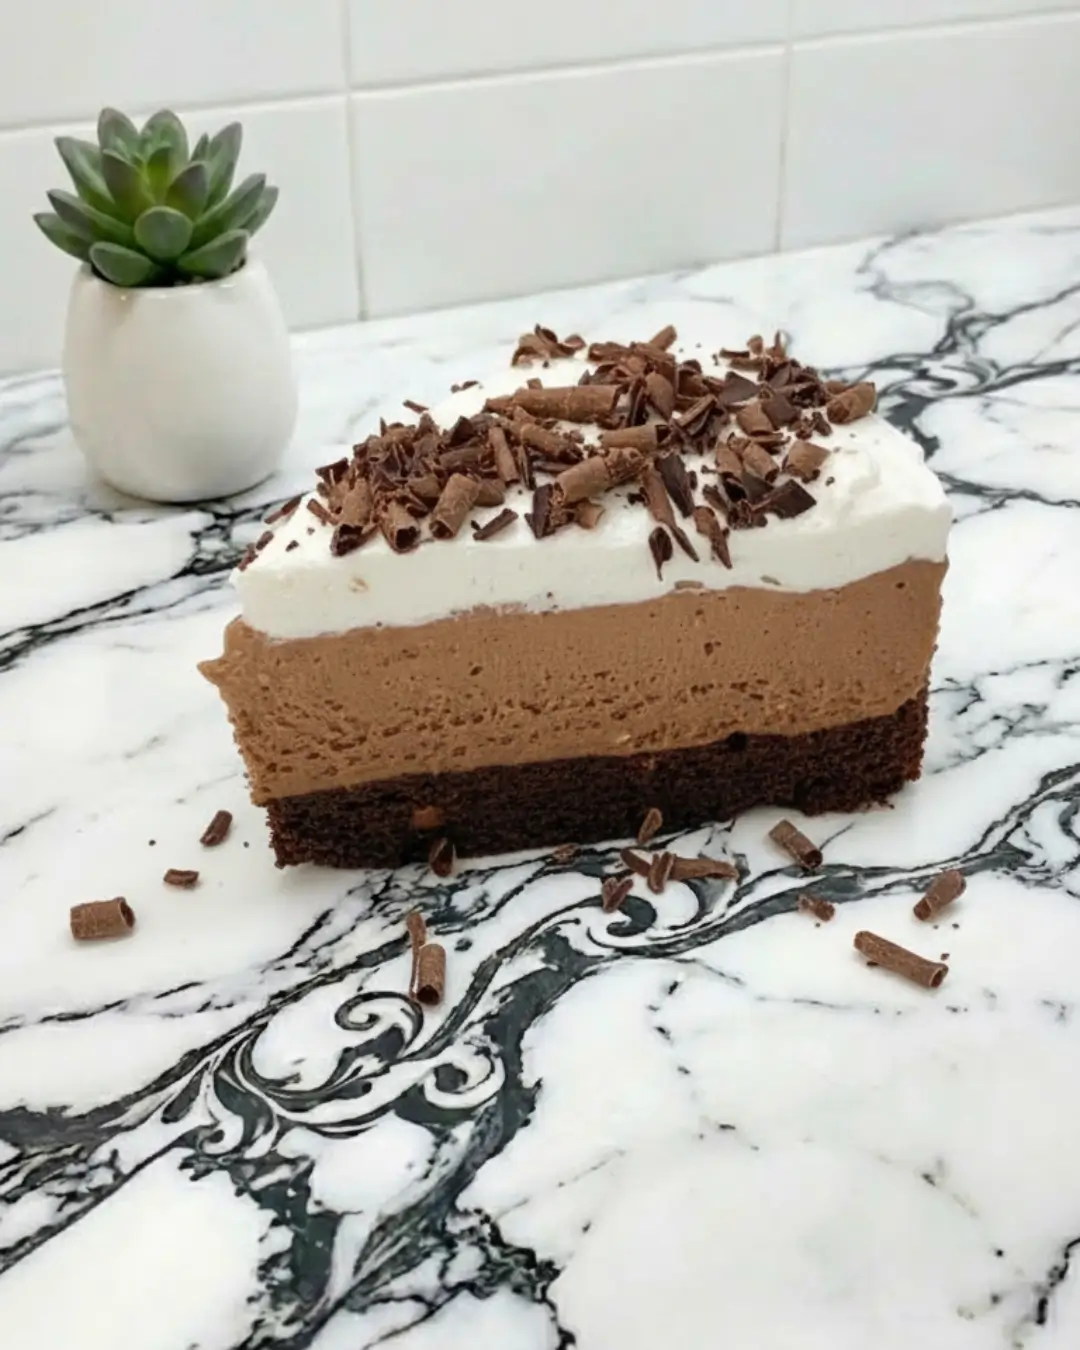
By understanding the science of binding agents and utilizing high-quality ingredients, you can craft show-stopping sweets that rival any traditional wheat-based pastry. Today, we are mastering a recipe that will redefine your standard for healthy dessert alternatives: the ultimate Decadent Molten Chocolate Lava Cake. This isn’t just a compromise; it is a culinary triumph designed to elevate your home baking to professional standards.
Table of Contents
Why You Will Love These good gluten free desserts
Finding truly spectacular recipes in this category can be a frustrating journey of dense cakes and crumbly cookies. However, this specific recipe changes the game entirely. Here is why this will become your forever go-to:
- Foolproof Texture: By utilizing premium gluten free baking flour blended with natural starches, we achieve a crumb that is impossibly tender, completely eliminating the gritty texture commonly found in lesser recipes.
- Intensely Chocolatey: We don’t mask the lack of gluten with excess sugar; we elevate the flavor profile using high-cacao chocolate, creating a gourmet gluten free chocolate cake experience.
- Incredibly Fast: From bowl to oven to plate, this elegant dessert takes under 45 minutes, making it remarkably simple for both beginners and seasoned chefs.
- Naturally Rich: The reliance on high-quality fats and eggs creates a luxurious mouthfeel that makes these the ultimate celiac safe treats without any textural compromises.
Perfect for Hosting and Parties
When you are entertaining, the last thing you want is to make two separate desserts to accommodate dietary restrictions. These lava cakes are so spectacular that your guests will never even guess they are missing the wheat. The presentation is so elegant and the flavor so profound that it genuinely rivals the best gluten free dessert delivery services available in the country. It brings the exclusivity and refinement of high end gluten free catering right into your home kitchen, ensuring every single guest at your table feels thoroughly pampered.
Ingredients You Need
To achieve greatness, you must respect the ingredients. In my kitchen, precision is non-negotiable. Gather the following for our signature molten cakes:
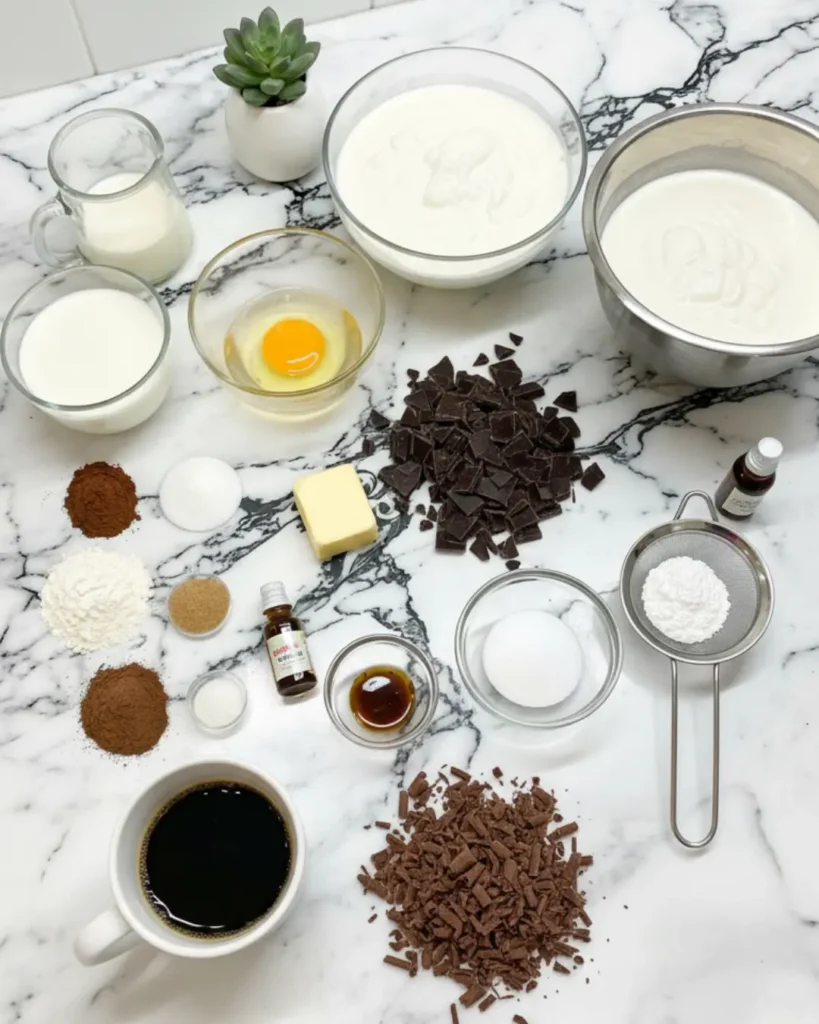
- High-Quality Dark Chocolate: 6 ounces (170g), at least 70% cacao. Do not use chocolate chips; they contain stabilizers that prevent a smooth melt.
- Unsalted Butter: 1/2 cup (113g), cubed.
- Powdered Sugar: 1 cup (120g), sifted to ensure a silky batter.
- Eggs: 2 large whole eggs plus 2 large egg yolks, room temperature.
- Flour: 6 tablespoons (45g) of premium gluten free baking flour (ensure it contains xanthan gum for structure).
- Almond Flour: 2 tablespoons (14g). I highly recommend incorporating this; drawing from my favorite organic almond flour recipes, the subtle nuttiness enhances the chocolate and adds vital moisture.
- Vanilla Extract: 1 teaspoon of pure extract.
- Salt: A generous pinch of kosher salt to enhance the cocoa notes.
How to Make good gluten free desserts
Mastering this dish requires attention to temperature and timing. Follow my steps exactly, and you will achieve culinary perfection.
- Prepare the Ramekins: Preheat your oven to 425°F (218°C). This high heat is crucial for setting the edges while leaving the center molten. Generously butter four 6-ounce ramekins and dust them thoroughly with cocoa powder. This ensures your cakes release flawlessly.
- Melt the Base: Create a double boiler by setting a heatproof bowl over a pot of simmering water. Add the chopped dark chocolate and cubed butter. Stir gently until completely smooth and glossy. Remove from heat and let it cool slightly.
- Whip the Eggs and Sugar: In a separate large mixing bowl, vigorously whisk together the whole eggs, egg yolks, vanilla, and sifted powdered sugar until the mixture becomes pale and slightly thickened. This aeration is key to a light crumb.
- Fold and Emulsify: Slowly pour the slightly cooled melted chocolate mixture into the egg mixture, folding gently with a silicone spatula until thoroughly combined.
- Incorporate the Dry Ingredients: Sprinkle your premium gluten free baking flour, almond flour, and kosher salt over the chocolate batter. Fold gently until just combined. Do not overmix, or you risk making the cakes dense.
- Bake with Precision: Divide the batter evenly among your prepared ramekins. Place them on a baking sheet and bake for exactly 12 to 14 minutes. The edges should look set and firm, but the very center will still jiggle slightly.
- The Release: Remove from the oven and let them rest in the ramekins for precisely 1 minute. Carefully invert each ramekin onto a serving plate. Let it sit for 10 seconds, then lift the ramekin. Serve immediately with a dusting of powdered sugar or a scoop of vanilla bean ice cream.
Expert Tips for Success
After four decades in professional kitchens, I can tell you that the difference between an amateur bake and a masterpiece lies in the details.
- The Temperature Matters: Your eggs absolutely must be at room temperature. Cold eggs will cause the melted chocolate and butter to seize up, ruining your batter’s emulsion.
- Oven Calibration: An uncalibrated oven is a chef’s worst enemy. Because lava cakes rely on precise timing to achieve the molten center, use an independent oven thermometer to ensure you are actually baking at 425°F.
- The Flour Blend is Key: Not all gluten-free flours are created equal. You need a 1-to-1 baking blend that already contains a binder like xanthan gum. This mimics the elasticity of gluten, preventing your cake from crumbling into dust.
Frequently Asked Questions
How long does good gluten free desserts stay fresh?
While these molten lava cakes are absolute perfection when served fresh out of the oven, the raw batter can be stored in the refrigerator for up to 2 days. If you bake them entirely, they will lose their molten center in the fridge, becoming a dense (though still delicious) brownie-like cake. They will stay fresh in an airtight container for up to 3 days.
Can I make this ahead of time?
Absolutely, and this is my secret weapon for dinner parties. You can prepare the batter, fill the prepared ramekins, cover them tightly with plastic wrap, and refrigerate them up to 48 hours in advance. When your guests are ready for dessert, simply pop them directly into the preheated oven. You may need to add 1 to 2 extra minutes to the baking time since the batter will be cold.
Conclusion
Creating good gluten free desserts does not require magic; it requires culinary respect, the right techniques, and a passion for flavor. By utilizing these methods, you have elevated simple ingredients into a sophisticated, high-end experience that anyone can enjoy, regardless of dietary restrictions. I encourage you to get into your kitchen, embrace the process, and bake with confidence. Please leave a rating and share your beautiful creations in the comments below I read every single one, and I can’t wait to see your culinary success.
good gluten free desserts
Ingredients
Method
- Preheat your oven to 425°F (218°C). Generously butter four 6-ounce ramekins and dust them thoroughly with cocoa powder to ensure an easy release.
- Melt the dark chocolate and cubed butter together in a double boiler over simmering water until completely smooth. Remove from heat and let cool slightly.
- In a large bowl, whisk the whole eggs, egg yolks, vanilla extract, and powdered sugar until pale and slightly thickened.
- Gently fold the melted chocolate mixture into the egg mixture using a silicone spatula until well combined.
- Sprinkle the premium gluten free baking flour, almond flour, and kosher salt over the batter. Fold gently until just incorporated. Do not overmix.
- Divide the batter evenly among the prepared ramekins. Bake for 12 to 14 minutes until the edges are firm but the centers still jiggle slightly.
- Let the cakes rest in the ramekins for 1 minute before carefully inverting them onto serving plates. Serve immediately.