If you love decorating sugar cookies but don’t want a complicated icing, this recipe is for you. It’s quick to mix, dries smooth and shiny, and has a clean, sweet flavor that lets your Sugar Cookie Icing Recipe Easy shine. You can flood, pipe, or write with it using just a few simple tweaks.
No meringue powder, no stand mixer just pantry basics and a whisk. Whether you’re baking for holidays, birthdays, or a rainy afternoon project, this icing keeps decorating fun and stress-free.
Table of Contents
What Makes This Sugar Cookie Icing Recipe Easy So Good
- Simple ingredients: Powdered sugar, milk, corn syrup, and vanilla—nothing fancy, all easy to find.
- Shiny finish: A touch of corn syrup gives a glossy, professional look and helps the icing set without becoming rock hard.
- Versatile consistency: Make it thicker for outlining and thinner for flooding with just a splash more milk.
- Fast drying: Sets enough to handle in about an hour, and fully dries overnight for stacking or packaging.
- Kid-friendly: No raw egg whites or special equipment, and it takes color well for creative designs.
Shopping List
- Powdered sugar (also called confectioners’ sugar) – 2 cups, sifted for the smoothest icing
- Milk (or water, if you prefer) – 3 to 4 tablespoons, plus more as needed
- Light corn syrup – 1 to 2 tablespoons for shine and smoothness
- Pure vanilla extract – 1 teaspoon (or almond extract for classic bakery flavor)
- Pinch of salt – optional, to balance the sweetness
- Gel food coloring – optional, for vibrant shades without thinning the icing
How to Make It

- Sift the sugar: Add powdered sugar to a medium bowl and sift to remove lumps. This helps you get a velvety icing without clogging tips.
- Whisk the base: Stir in 3 tablespoons milk, 1 tablespoon corn syrup, vanilla, and a tiny pinch of salt.
Whisk until smooth and glossy.
- Adjust consistency: Add milk a teaspoon at a time until the icing is thick but pourable. For outlining, aim for toothpaste consistency. For flooding, aim for honey consistency that settles back into a smooth surface in about 10–12 seconds.
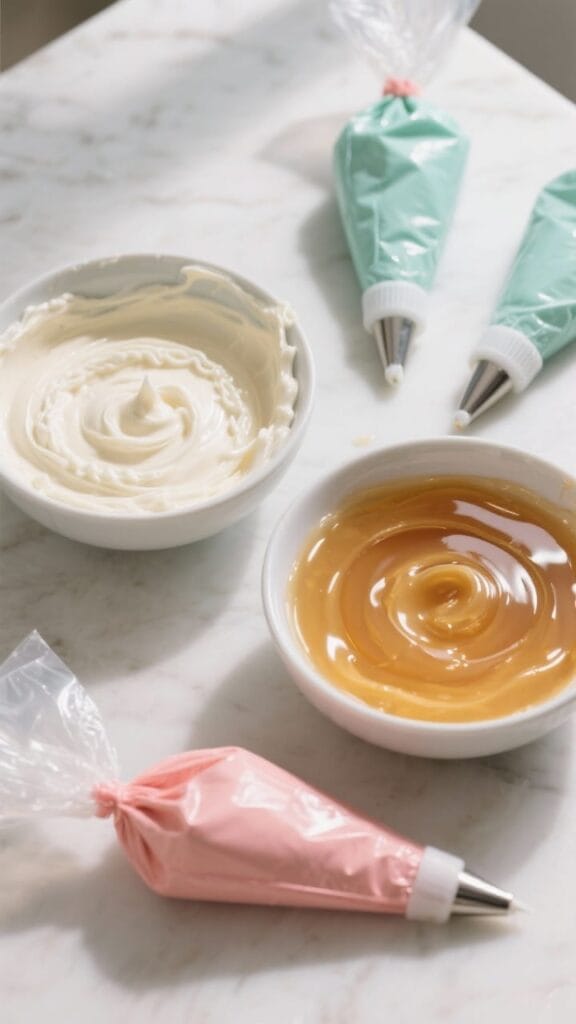
- Divide and color: Separate icing into bowls and add gel color a little at a time.
Stir well to avoid streaks. Keep bowls covered with plastic wrap touching the surface so a crust doesn’t form.
- Prep your tools: Use piping bags with small round tips (No. 2–3) or squeeze bottles for flooding. You can also snip a very small corner off a zip-top bag in a pinch.
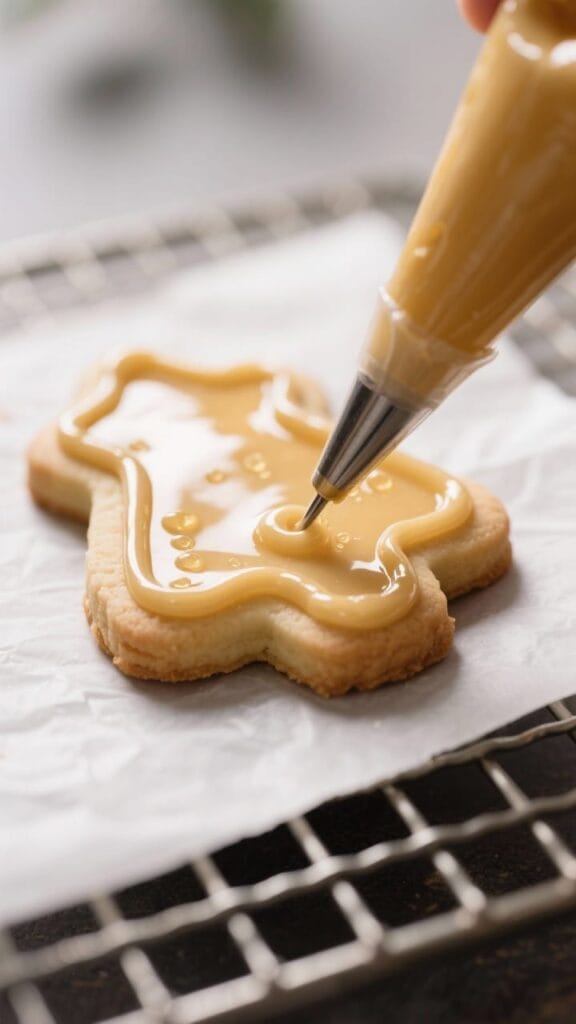
- Outline the cookies: Pipe a thin border around the edges.
This acts like a fence to hold in the flood icing.
- Flood the center: Thin your icing slightly if needed. Fill the outlined area, then use a toothpick or scribe tool to nudge icing into corners and pop any bubbles.
- Add details: For wet-on-wet effects (like polka dots or hearts), add contrasting colors while the base is still glossy. For crisp details, wait 20–30 minutes until a light crust forms.
- Let it dry: Allow cookies to dry at room temperature.
They’re surface-dry in about 1 hour, safe to move carefully after 3–4 hours, and fully dry after 8–12 hours.
- Finish and store: Once dry, add any edible glitter or luster dust if you like. Store as directed below.
Storage Instructions
- Fresh icing: Keep in an airtight container at room temperature for up to 3 days. Press plastic wrap directly on the surface to prevent crusting.
- Refrigerator: Store for up to 1 week.
Stir well before using; add a few drops of milk if it thickens.
- Freezer: Freeze icing in piping bags or containers for up to 2 months. Thaw in the fridge, then bring to room temp and stir smooth.
- Decorated cookies: Once fully dry, layer between parchment in an airtight container at room temperature for up to 5 days. For longer storage, freeze in a rigid container up to 2 months.
Benefits of This Sugar Cookie Icing Recipe Easy
- Beginner-friendly: No special skills or equipment required.
- Reliable setting: Dries firm enough for stacking but stays pleasant to bite.
- Customizable flavor: Swap vanilla for almond, lemon, or clear vanilla to keep colors bright white.
- Budget-friendly: Pantry staples stretch a long way for big batches of cookies.
- Kid-approved: Safe, simple, and fun to color and decorate.
What Not to Do
- Don’t skip sifting: Lumps will clog tips and leave bumps on your cookies.
- Don’t over-thin: If your icing runs off the cookie, it’s too thin.
Add more powdered sugar to fix.
- Don’t use liquid food coloring heavily: It can water down the icing. Use gel colors instead.
- Don’t rush drying: Stacking too soon leads to smudges and dents. Let cookies set fully.
- Don’t leave bowls uncovered: Icing forms a crust fast.
Keep it covered when not piping.
Alternatives
- Dairy-free: Use water or a non-dairy milk like almond or oat. Flavor with almond or lemon extract if desired.
- Corn-syrup-free: Replace with honey or glucose syrup. The shine will be slightly different but still smooth.
- Royal icing style: For sharper edges and firmer dry, add meringue powder and water instead of corn syrup.
This is a different method but great for detailed piping.
- Flavor twists: Try lemon juice and zest, peppermint extract for winter cookies, or clear vanilla to maintain bright white icing.
- Glaze version: Skip corn syrup and thin with milk plus a touch of melted butter for a softer, matte glaze.
FAQ
How do I know the right consistency for flooding?
Aim for icing that flows off the spoon and settles back into a smooth surface in about 10–12 seconds. If it takes longer, add a few drops of milk. If it runs, whisk in a bit more powdered sugar.
Can I make this icing bright white?
Use clear vanilla instead of regular vanilla, which can tint icing slightly.
You can also add a tiny dot of violet gel color to counteract any yellow tones.
Why does my icing look dull?
A small amount of corn syrup helps maintain shine. Humidity can also reduce gloss, so let cookies dry in a cool, low-humidity room away from steam or heat.
How can I avoid color bleeding between sections?
Let the first color crust for 20–30 minutes before adding a second color. Keep colors on the thicker side, and avoid overflooding edges.
Is this icing safe for mailing cookies?
Yes, once fully dry.
Let cookies cure overnight, then layer with parchment in a snug, rigid container. Add padding to prevent shifting during shipping.
Can I use this icing on other treats?
Absolutely. It’s great on shortbread, graham crackers, and simple cakes for drizzle designs.
Thin slightly more for a smooth pour-over glaze.
What if my icing develops bubbles?
Gently stir (don’t whip) to avoid creating bubbles. After flooding, use a toothpick to pop any surface bubbles right away.
How do I fix icing that’s too thick?
Add milk or water a few drops at a time and stir until it loosens. It changes quickly, so go slow.
Can I flavor the icing without changing the color?
Use clear extracts, like clear vanilla, almond, or lemon.
Start with 1/4 teaspoon at a time and taste as you go.
What’s the best way to store leftover colored icing?
Seal each color in a piping bag with a clip, or spoon into airtight containers with plastic wrap touching the surface. Label colors and dates for easy use later.
Wrapping Up
This easy sugar cookie icing keeps the focus on simple steps and dependable results. With a few pantry ingredients and light mixing, you’ll get a smooth, shiny finish that’s perfect for outlining, flooding, and fun designs.
Make it your own with flavors and colors, and let the cookies dry fully for neat, professional-looking treats. Keep a batch on hand during the holidays, birthdays, or any time you want a sweet, creative project. Happy decorating!

Sugar Cookie Icing Recipe Easy – Smooth, Shiny, and Quick
Ingredients
Method
- Sift the sugar: Add powdered sugar to a medium bowl and sift to remove lumps. This helps you get a velvety icing without clogging tips.
- Whisk the base: Stir in 3 tablespoons milk, 1 tablespoon corn syrup, vanilla, and a tiny pinch of salt.Whisk until smooth and glossy.
- Adjust consistency: Add milk a teaspoon at a time until the icing is thick but pourable. For outlining, aim for toothpaste consistency. For flooding, aim for honey consistency that settles back into a smooth surface in about 10–12 seconds.
- Divide and color: Separate icing into bowls and add gel color a little at a time.Stir well to avoid streaks. Keep bowls covered with plastic wrap touching the surface so a crust doesn’t form.
- Prep your tools: Use piping bags with small round tips (No. 2–3) or squeeze bottles for flooding. You can also snip a very small corner off a zip-top bag in a pinch.
- Outline the cookies: Pipe a thin border around the edges.This acts like a fence to hold in the flood icing.
- Flood the center: Thin your icing slightly if needed. Fill the outlined area, then use a toothpick or scribe tool to nudge icing into corners and pop any bubbles.
- Add details: For wet-on-wet effects (like polka dots or hearts), add contrasting colors while the base is still glossy. For crisp details, wait 20–30 minutes until a light crust forms.
- Let it dry: Allow cookies to dry at room temperature.They’re surface-dry in about 1 hour, safe to move carefully after 3–4 hours, and fully dry after 8–12 hours.
- Finish and store: Once dry, add any edible glitter or luster dust if you like. Store as directed below.