Sweet Mini Loaf Pan Cake Recipes spot between cupcakes and a full-sized cake. They’re easy to bake, cute to gift, and just the right size for a small dessert or afternoon snack. If you’ve got a mini loaf pan, you can turn basic pantry staples into charming little cakes with big flavor.
This guide covers one reliable base recipe plus tasty variations, so you can make a batch that fits your mood. Whether you’re baking for brunch, a bake sale, or just because, these mini loaves are a sure win.
Table of Contents
What Makes This Sweet Mini Loaf Pan Cake Recipes
Mini loaf cakes bake quickly and evenly, giving you tender crumbs and golden edges without fuss. They’re also perfect for portion control and freezing make several now and save some for later.
With one base batter, you can create many flavors by swapping in citrus, chocolate, spices, or fruit. Plus, they hold up well to glazes and toppings, which makes them look polished with minimal effort.
What You’ll Need For Sweet Mini Loaf Pan Cake Recipes
- 1 3/4 cups (220 g) all-purpose flour
- 1 cup (200 g) granulated sugar
- 1/2 cup (110 g) light brown sugar, packed
- 1 1/2 teaspoons baking powder
- 1/2 teaspoon baking soda
- 1/2 teaspoon fine sea salt
- 1/2 cup (115 g) unsalted butter, melted and slightly cooled
- 1/3 cup (80 ml) neutral oil (such as canola or grapeseed)
- 2 large eggs, room temperature
- 1 cup (240 ml) buttermilk, room temperature
- 2 teaspoons vanilla extract
- Optional add-ins: 1 cup chocolate chips, fresh berries, chopped nuts, or dried fruit
- For the glaze (optional): 1 cup (120 g) powdered sugar + 2–3 tablespoons milk or lemon juice
- Equipment: 8-cavity mini loaf pan (or two 4-cavity pans), cooking spray or softened butter, parchment strips
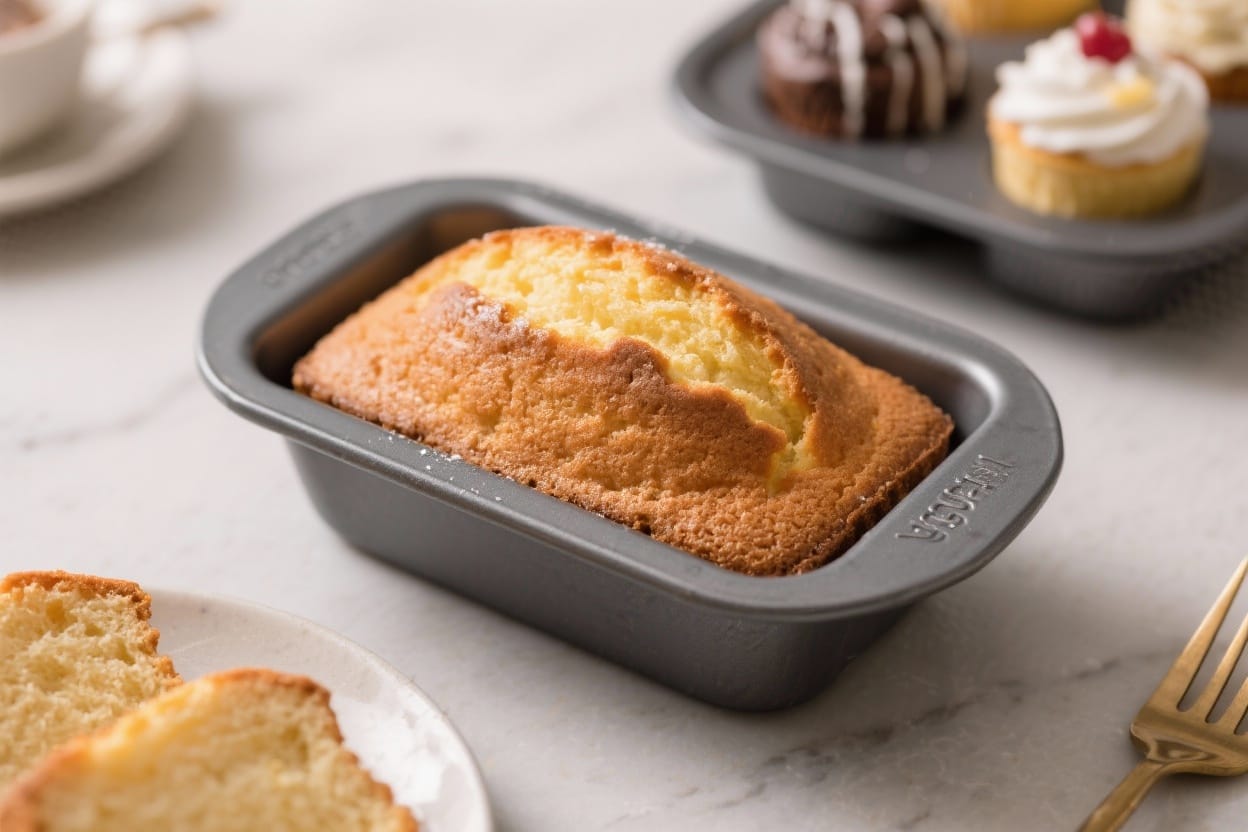
How to Make It Sweet Mini Loaf Pan Cake Recipes
- Prep your pan. Heat the oven to 350°F (175°C). Grease each mini loaf cavity well, then line with a parchment strip for easy lifting.
This helps prevent sticking and keeps edges neat.
- Combine dry ingredients. In a large bowl, whisk flour, granulated sugar, brown sugar, baking powder, baking soda, and salt until there are no sugar clumps.
- Mix the wet ingredients. In a separate bowl, whisk melted butter, oil, eggs, buttermilk, and vanilla until smooth. The mix should look creamy and uniform.
- Bring it together. Pour the wet mixture into the dry ingredients. Stir with a spatula until just combined. Do not overmix a few small lumps are fine and keep the crumb tender.
- Fold in add-ins (if using). Gently stir in chocolate chips, berries, nuts, or dried fruit.
Aim for even distribution without stirring too much.
- Fill the pan. Divide the batter evenly among the cavities, filling each about 2/3 to 3/4 full. This gives them room to rise without overflowing.
- Bake. Place the pan on the center rack and bake for 18–24 minutes, depending on your oven and pan size. The loaves are done when a toothpick comes out with a few moist crumbs, not wet batter.
- Cool. Let the mini loaves rest in the pan for 8–10 minutes, then lift out using the parchment strips and transfer to a wire rack to cool completely.
- Glaze or finish. Whisk powdered sugar with milk or lemon juice until pourable.
Drizzle over cooled loaves. For extra flair, add lemon zest, chopped nuts, or a few chocolate shavings on top.
Storage Instructions
- Room temperature: Keep glazed or unglazed loaves in an airtight container for 2–3 days. Add a small sheet of parchment between layers to prevent sticking.
- Refrigerator: Store for up to 5 days.
Let come to room temperature before serving for the best texture.
- Freezer: Wrap each loaf tightly in plastic, then place in a freezer bag for up to 2 months. Thaw at room temperature, then glaze if desired.
- Re-crisping: Warm in a 300°F (150°C) oven for 5–7 minutes to refresh the crumb.
Health Benefits
- Portion awareness: Mini loaves make it easier to serve measured portions compared to cutting a large cake.
- Balanced fats: Using a blend of butter and oil provides both flavor and moisture with fewer dry crumbs, which can help reduce the urge to overeat.
- Customizable add-ins: Fold in nuts for healthy fats, berries for antioxidants, or whole-grain flour for extra fiber (swap up to 1/2 cup of the flour).
- Less sugar option: You can cut total sugar by about 15% without compromising structure, especially if you add fruit for natural sweetness.
Pitfalls to Watch Out For
- Overmixing the batter: This leads to tough, tunneling crumbs. Stop stirring as soon as the flour disappears.
- Overfilling the pan: More than 3/4 full can cause overflow and uneven baking.
Use a scoop for consistency.
- Baking too long: Mini loaves dry out quickly. Start checking at 18 minutes and pull them as soon as crumbs, not batter, stick to the tester.
- Skipping the parchment strips: Even with grease, loaves can stick at the corners. Parchment makes clean removal easy.
- Glazing while hot: Warm loaves will melt the glaze, making it thin and sticky.
Cool completely for neat drips.
Variations You Can Try
- Lemon Poppy Seed: Add 1 tablespoon lemon zest, 2 tablespoons lemon juice, and 1 tablespoon poppy seeds. Glaze with lemon juice and powdered sugar.
- Double Chocolate: Swap 1/3 cup of flour for cocoa powder. Fold in 3/4 cup chocolate chips.
Finish with a light chocolate glaze.
- Apple Cinnamon: Add 1 teaspoon ground cinnamon and fold in 1 cup finely diced apple. Sprinkle turbinado sugar on top before baking for crunch.
- Banana Walnut: Replace buttermilk with 3/4 cup mashed ripe banana plus 1/4 cup buttermilk. Fold in 1/2 cup chopped walnuts.
- Berry Vanilla: Fold in 1 cup fresh blueberries or raspberries tossed with 1 teaspoon flour to prevent sinking.
Add a vanilla bean to the batter for extra flavor.
- Carrot Spice: Add 1 teaspoon cinnamon, 1/4 teaspoon nutmeg, and fold in 1 cup finely grated carrot. Top with a light cream cheese glaze.
- Orange Almond: Add 1 tablespoon orange zest and 1/2 teaspoon almond extract. Sprinkle sliced almonds on top before baking.
FAQ
How many mini loaves does this recipe make?
This batter makes about 8 standard mini loaves (each cavity roughly 5.5 x 3 inches).
If your pan is smaller or larger, adjust bake time by a few minutes and keep an eye on doneness.
Can I use regular milk instead of buttermilk?
Yes. Mix 1 tablespoon lemon juice or white vinegar with 1 cup milk, let stand for 5 minutes, and use as a buttermilk substitute. The acidity helps create a tender crumb.
How do I prevent berries from sinking?
Toss berries with a teaspoon of flour before folding them into the batter, and avoid overmixing.
Thicker batter also helps keep fruit evenly suspended.
Can I bake this as one large loaf instead?
Yes. Pour into a greased 9 x 5-inch loaf pan and bake at 350°F (175°C) for 45–60 minutes. Cover loosely with foil if the top browns too quickly, and test for doneness in the center.
What’s the best way to gift these?
Cool completely, drizzle glaze, and let it set.
Wrap each loaf in parchment and tie with twine, or use mini loaf boxes. Add a label with the flavor and date for a polished touch.
Why use both butter and oil?
Butter brings rich flavor, while oil keeps the crumb moist for days. The combo gives you the best of both: taste and tenderness, especially in small-format cakes.
Can I reduce the sugar?
You can reduce total sugar by about 15% without affecting structure.
For fruit-heavy versions, you can go up to 20% reduction. Note that texture and browning may be slightly lighter.
Do I need a stand mixer?
No. A whisk and spatula work perfectly.
Overmixing is less likely when you mix by hand, which helps maintain a soft crumb.
In Conclusion
Sweet mini loaf pan cakes are the kind of bake that always feels special yet stays effortless. With one reliable base recipe and a handful of easy twists, you can turn out loaves that fit any season, craving, or occasion. Keep a few in the freezer, play with flavors, and don’t forget a simple glaze for shine.
Small cakes, big payoff these mini loaves are ready to become your new go-to treat.
Sweet Mini Loaf Pan Cake Recipes – Simple, Shareable Treats
Ingredients
Method
- Prep your pan. Heat the oven to 350°F (175°C). Grease each mini loaf cavity well, then line with a parchment strip for easy lifting.This helps prevent sticking and keeps edges neat.
- Combine dry ingredients. In a large bowl, whisk flour, granulated sugar, brown sugar, baking powder, baking soda, and salt until there are no sugar clumps.
- Mix the wet ingredients. In a separate bowl, whisk melted butter, oil, eggs, buttermilk, and vanilla until smooth. The mix should look creamy and uniform.
- Bring it together. Pour the wet mixture into the dry ingredients. Stir with a spatula until just combined. Do not overmix—a few small lumps are fine and keep the crumb tender.
- Fold in add-ins (if using). Gently stir in chocolate chips, berries, nuts, or dried fruit.Aim for even distribution without stirring too much.
- Fill the pan. Divide the batter evenly among the cavities, filling each about 2/3 to 3/4 full. This gives them room to rise without overflowing.
- Bake. Place the pan on the center rack and bake for 18–24 minutes, depending on your oven and pan size. The loaves are done when a toothpick comes out with a few moist crumbs, not wet batter.
- Cool. Let the mini loaves rest in the pan for 8–10 minutes, then lift out using the parchment strips and transfer to a wire rack to cool completely.
- Glaze or finish. Whisk powdered sugar with milk or lemon juice until pourable.Drizzle over cooled loaves. For extra flair, add lemon zest, chopped nuts, or a few chocolate shavings on top.