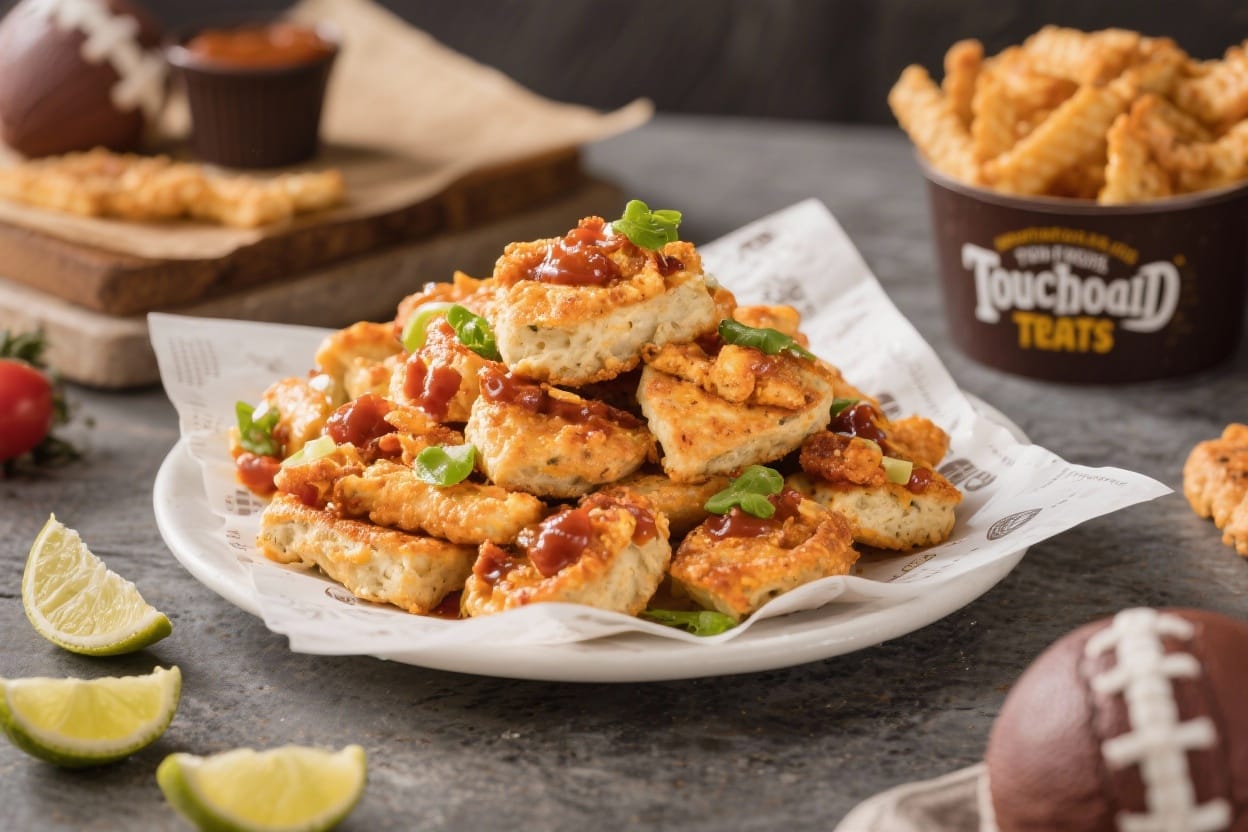
Big game on? These Touchdown Treats are the kind of snack that disappears fast and wins over every guest, even the picky ones. Think crispy, cheesy, saucy, and a little bit spicy everything you want on a snack platter.
They’re easy to prep, easy to bake, and easy to share. No deep fryer needed, no fuss, and no fancy ingredients. Just bold flavor and satisfying crunch, right from your oven.
Table of Contents
What Makes This Touchdown Treats
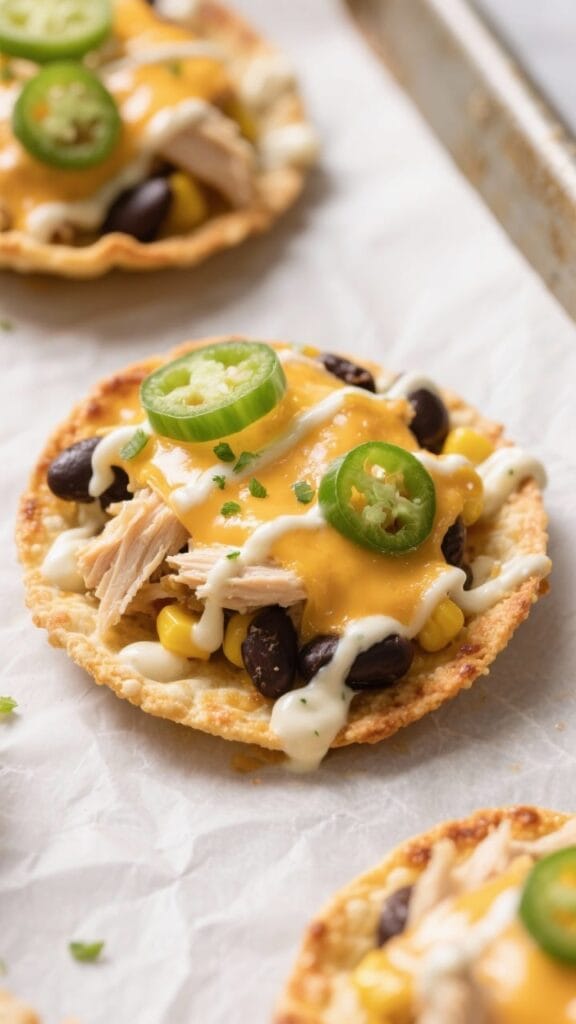
These Touchdown Treats take the best parts of nachos and stuffed potato skins and roll them into one crave-worthy bite.
They’re built on mini flour tortillas that crisp up like chips but hold more toppings. A seasoned chicken-and-bean filling packs protein and flavor, while melty cheese and a punchy jalapeño-ranch drizzle seal the deal. They look impressive, taste indulgent, and require minimal cleanup.
Best of all, you can customize the heat, the cheese, and the toppings to match your crowd.
Shopping List
- Mini flour tortillas (street taco size, about 12)
- Cooked chicken (2 cups, shredded; rotisserie works great)
- Black beans (1 can, drained and rinsed)
- Corn kernels (1 cup; canned and drained, or frozen and thawed)
- Shredded cheese (2 cups; cheddar, Monterey Jack, or a blend)
- Cream cheese (4 ounces, softened)
- Sour cream (1/2 cup)
- Mayonnaise (2 tablespoons)
- Ranch seasoning (1 tablespoon)
- Pickled jalapeños (1/4 cup, finely chopped; plus extra for topping)
- Hot sauce (1–2 teaspoons, to taste)
- Taco seasoning (1 tablespoon)
- Green onions (3, thinly sliced)
- Fresh cilantro (1/4 cup, chopped; optional)
- Lime (1, for zest and juice)
- Olive oil (2 tablespoons)
- Salt and pepper (to taste)
- Optional toppings: diced tomatoes, avocado, salsa, crumbled bacon
Instructions
- Heat the oven: Preheat to 400°F (200°C). Lightly oil two large baking sheets or line with parchment for easy cleanup.
- Crisp the tortillas: Brush both sides of each mini tortilla with olive oil and sprinkle with a pinch of salt. Arrange on the baking sheets and bake for 5–7 minutes until they start to bubble and turn lightly golden.
Remove and set aside.
- Make the filling: In a mixing bowl, combine shredded chicken, black beans, corn, taco seasoning, half the green onions, and a squeeze of lime. Add a few grinds of black pepper. Toss until everything is evenly coated.
- Make the jalapeño-ranch drizzle: In a small bowl, mix sour cream, mayonnaise, ranch seasoning, chopped pickled jalapeños, hot sauce, and 1–2 teaspoons of lime juice.
Adjust salt and heat to taste. Chill while you assemble.
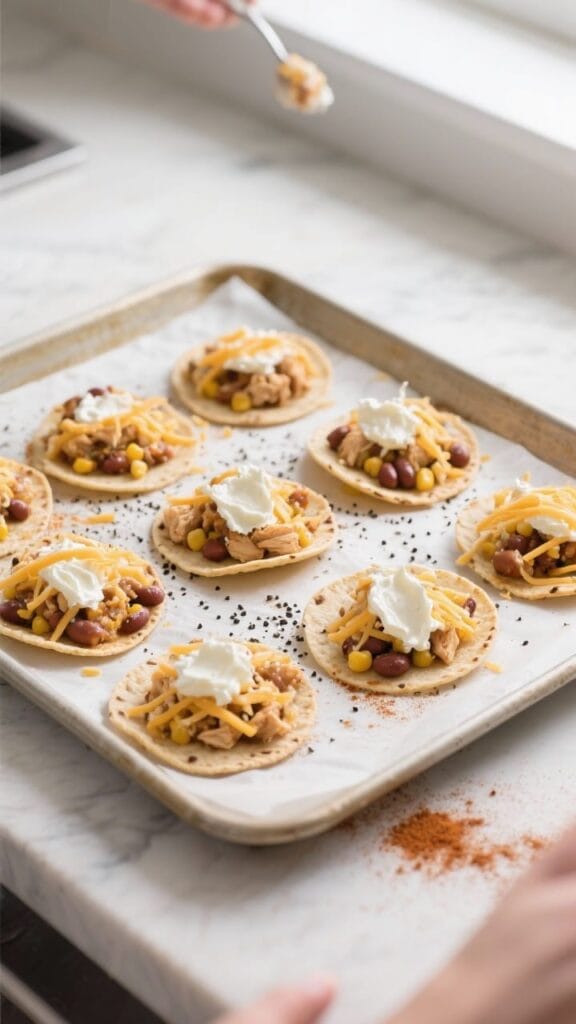
- Layer the bases: Spread a thin smear of softened cream cheese on each toasted tortilla. This creates a creamy barrier and helps the toppings stick.
- Add the filling: Spoon the chicken-bean mixture onto the tortillas, dividing evenly.
Don’t overpack; you want tidy, handheld bites.
- Top with cheese: Sprinkle shredded cheese over each one, covering the filling so it melts into a golden cap.
- Bake until melty: Return to the oven for 6–8 minutes, or until the cheese is fully melted and bubbling around the edges.
- Finish with fresh flavor: Remove from the oven and let them rest 2 minutes. Drizzle with the jalapeño-ranch sauce. Garnish with remaining green onions, cilantro, and extra jalapeños if you like.
Add lime zest for brightness.
- Serve hot: Transfer to a platter and offer optional toppings like diced tomatoes, avocado, salsa, or crumbled bacon on the side.
Storage Instructions
- Refrigerate: Store cooled treats in an airtight container for up to 3 days. Keep the drizzle separate.
- Reheat: Warm on a baking sheet at 350°F (175°C) for 8–10 minutes until crisp. Avoid the microwave; it makes them soggy.
- Make-ahead: Prepare the filling and drizzle up to 2 days early.
Crisp the tortillas and assemble right before baking.
- Freezing: Freeze assembled but unbaked treats on a sheet tray until solid, then transfer to a freezer bag. Bake from frozen at 375°F (190°C) for 12–15 minutes.
Why This is Good for You
- Balanced macros: Chicken and beans add protein and fiber, helping you feel satisfied without overloading on chips.
- Better baking: Baking instead of frying keeps the crunch while cutting back on excess oil.
- Customizable heat: You control the spice level, making it easier to keep sodium and added sauces in check.
- Simple swaps: Whole wheat tortillas, light dairy, or extra veggies can nudge this toward a more nutrient-dense snack.
Common Mistakes to Avoid
- Skipping the pre-crisp: If you don’t toast the tortillas first, they’ll get soggy under the filling.
- Overloading toppings: Too much filling leads to spillover and uneven baking. Keep it to a generous spoonful per tortilla.
- Wet ingredients on top: Add juicy toppings (like tomatoes or salsa) after baking to maintain crispness.
- Using cold cheese: Let shredded cheese sit out for a few minutes.
It melts faster and more evenly.
- Neglecting seasoning: Taste the filling and the drizzle. A pinch of salt or a squeeze of lime can make everything pop.
Alternatives
- Protein swaps: Use ground turkey, pulled pork, or crumbled chorizo. For a vegetarian version, double the beans or add sautéed mushrooms.
- Cheese choices: Try pepper jack for heat, mozzarella for extra pull, or a smoky gouda for depth.
- Tortilla options: Corn tortillas work if you warm them first so they don’t crack.
Pita rounds or naan cut into small pieces also crisp nicely.
- Sauce variations: Swap jalapeño-ranch for chipotle-lime crema, salsa verde, or a simple yogurt-cilantro sauce.
- Add veggies: Fold in diced bell peppers, red onion, or sautéed spinach for color and crunch.
- Gluten-free: Use certified gluten-free corn tortillas and check your seasoning mixes.
FAQ
Can I make these without dairy?
Yes. Use a dairy-free cream cheese and shredded plant-based cheese, and swap the sour cream and mayo for a dairy-free yogurt and vegan mayo. Season the sauce a bit extra to keep the flavor punch.
What if I don’t have mini tortillas?
Cut regular tortillas into quarters and treat each wedge as a base.
Brush with oil, crisp them, and assemble the same way.
How spicy are these?
Mild to medium by default. Reduce or skip the jalapeños and hot sauce for a mild version, or add extra jalapeños and a spicier cheese for more heat.
Can I use leftover roasted veggies?
Absolutely. Chop them small and fold into the filling.
Just avoid very wet vegetables to keep the base crisp.
How do I keep them warm for a party?
Bake in batches and hold the finished treats on a wire rack set over a sheet pan in a 200°F (95°C) oven for up to 30 minutes. Drizzle and garnish right before serving.
What’s the best way to shred the chicken?
Use two forks while the chicken is still warm, or pulse in a food processor a few times. Don’t overprocess or it will turn pasty.
In Conclusion
Touchdown Treats bring big flavor with minimal effort, perfect for game day or any casual get-together.
They’re crispy, cheesy, and easy to customize, so everyone gets what they like. Prep ahead, bake fast, and set them out with a few fresh toppings. You’ll spend less time cooking and more time enjoying the score and the snacks.

Touchdown Treats – A Crowd-Pleasing Game Day Snack
Ingredients
Method
- Heat the oven: Preheat to 400°F (200°C). Lightly oil two large baking sheets or line with parchment for easy cleanup.
- Crisp the tortillas: Brush both sides of each mini tortilla with olive oil and sprinkle with a pinch of salt. Arrange on the baking sheets and bake for 5–7 minutes until they start to bubble and turn lightly golden.Remove and set aside.
- Make the filling: In a mixing bowl, combine shredded chicken, black beans, corn, taco seasoning, half the green onions, and a squeeze of lime. Add a few grinds of black pepper. Toss until everything is evenly coated.
- Make the jalapeño-ranch drizzle: In a small bowl, mix sour cream, mayonnaise, ranch seasoning, chopped pickled jalapeños, hot sauce, and 1–2 teaspoons of lime juice.Adjust salt and heat to taste. Chill while you assemble.
- Layer the bases: Spread a thin smear of softened cream cheese on each toasted tortilla. This creates a creamy barrier and helps the toppings stick.
- Add the filling: Spoon the chicken-bean mixture onto the tortillas, dividing evenly.Don’t overpack; you want tidy, handheld bites.
- Top with cheese: Sprinkle shredded cheese over each one, covering the filling so it melts into a golden cap.
- Bake until melty: Return to the oven for 6–8 minutes, or until the cheese is fully melted and bubbling around the edges.
- Finish with fresh flavor: Remove from the oven and let them rest 2 minutes. Drizzle with the jalapeño-ranch sauce. Garnish with remaining green onions, cilantro, and extra jalapeños if you like.Add lime zest for brightness.
- Serve hot: Transfer to a platter and offer optional toppings like diced tomatoes, avocado, salsa, or crumbled bacon on the side.