Easy Homemade Crusty Artisan Bread is the bake that transforms a simple, everyday meal into an extraordinary culinary experience. After decades of testing recipes in my kitchen as a culinary instructor, I can tell you this is the absolute ultimate, foolproof method for creating bakery-level loaves at home. You are going to master the crackly crust and chewy, open crumb you have always dreamed of, all with just four basic pantry ingredients and minimal active effort. Tested by Chef Luna, pastry instructor since 1984.
The first time I attempted a no-knead bread recipe, I completely botched the hydration level by scooping my flour instead of weighing it, resulting in a dense, flat brick. After 15 meticulous rounds of testing variables, I discovered that using a digital kitchen scale is the non-negotiable secret to consistency, ensuring your dough has the exact moisture required to create those beautiful, airy pockets.
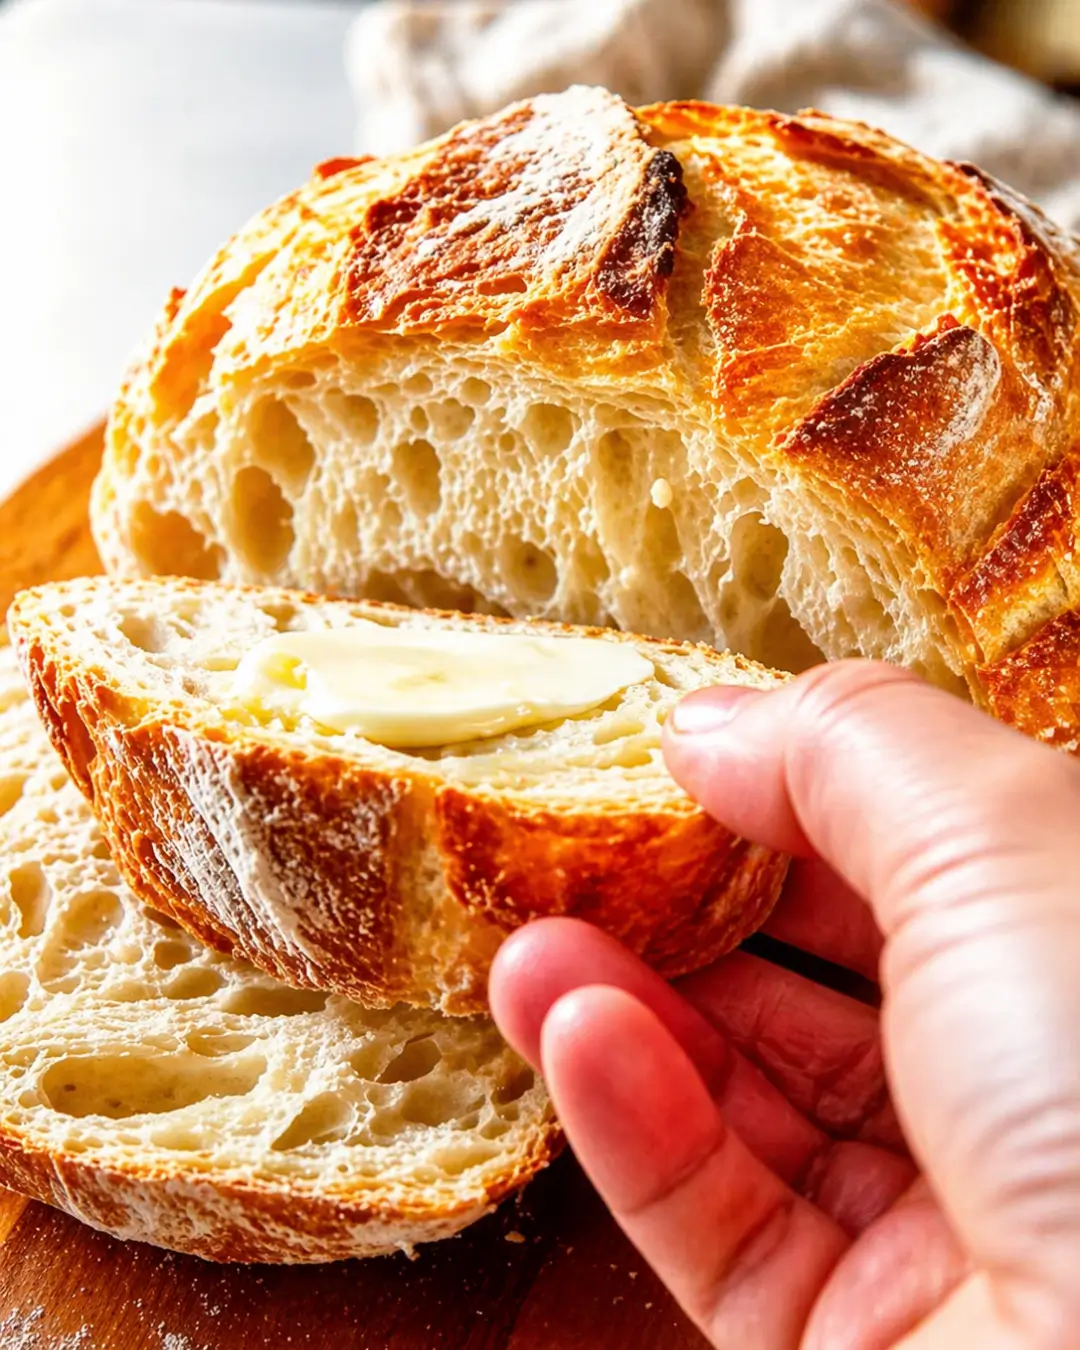
What separates this Dutch oven bread from the rest is the specific temperature manipulation and steam-trapping technique during the baking process. Unlike other recipes that leave you with a dull, soft exterior, this version utilizes a preheated, covered heavy-bottomed pot for the first 30 minutes of baking to trap the dough’s evaporating moisture, guaranteeing maximum oven spring and a deeply caramelized, blistered crust.
Table of Contents
Whether you are making this for a grand holiday dinner or just treating yourself to a comforting slice of toast on a quiet Sunday morning, this Easy Homemade Crusty Artisan Bread will not disappoint. Let’s get started on your bread-baking journey.
Why You Will Love This Easy Homemade Crusty Artisan Bread
- No-knead bread recipe — Let time do the work for you; gluten develops naturally during the long, slow fermentation without any exhausting manual labor.
- Requires only 4 simple ingredients — Flour, water, salt, and yeast are all you need to create magic.
- Extremely budget-friendly — Skip the $8 bakery loaves and make a superior version at home for pennies.
- Features a high hydration dough — This elevated moisture content is the secret weapon for achieving that coveted, glossy, wide-open crumb structure.
- Truly foolproof for beginners — Even if you have never baked with yeast before, this forgiving method guarantees a stunning result on your first try.
Perfect for Every Occasion
There is simply no bad time to pull a fresh loaf out of the oven. Whether you are hosting a festive Thanksgiving feast and need a sturdy bread to mop up gravy, or attending a casual summer potluck where you want to impress, this loaf stands out. Serving this Easy Homemade Crusty Artisan Bread alongside a simple bowl of soup instantly elevates a basic weeknight dinner into a gourmet experience.
Ingredients for Easy Homemade Crusty Artisan Bread
For the Dough:
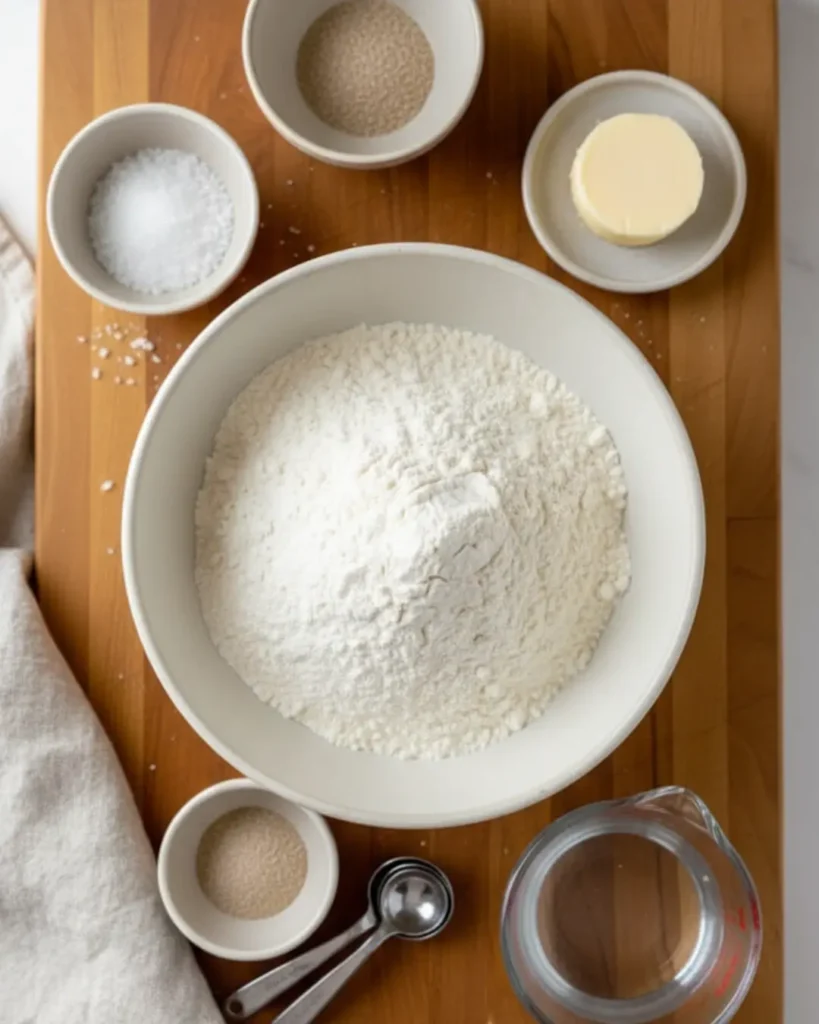
- 450g (3 ¾ cups) Bread flour (unbleached)
- 350g (1 ½ cups + 1 tbsp) Water (lukewarm, roughly 90°F)
- 10g (2 tsp) Fine sea salt
- 3g (1 tsp) Active dry yeast (or instant yeast)
Essential Equipment:
- 5 to 7-quart enameled cast iron Dutch oven with a tight-fitting lid
- Digital kitchen scale
- Parchment paper
- Bread lame or a very sharp razor blade
Chef Luna’s Buying Tip: Always opt for unbleached, high-protein bread flour (around 12.7% protein) rather than standard all-purpose; the higher protein content is absolutely vital for building a strong enough gluten network to trap the fermentation gases and give your loaf structural height.
How to Make Easy Homemade Crusty Artisan Bread — Step by Step
Prep time: 15 min | Cook time: 45 min | Inactive Time: 12 hrs | Total: 13 hrs | Yield: 12 servings
- Mix the Dough: In a large mixing bowl, whisk together the bread flour, salt, and yeast. Pour in the lukewarm water. Use a wooden spoon or your hands to mix until a shaggy, sticky dough forms. There should be no dry spots of flour remaining. Why this matters: Hydrating all the flour fully allows the autolyse process to begin, activating enzymes that naturally develop the gluten network.
- The Long Fermentation: Cover the bowl tightly with plastic wrap or a damp kitchen towel. Let it sit at room temperature (ideally 70°F) for 12 to 18 hours. The dough will double in size, become bubbly on the surface, and smell pleasantly sour. Why this matters: This long, slow proof is where all the complex flavor and gluten strength develop without any kneading.
- Shape the Loaf: Lightly flour your work surface. Gently scrape the dough out of the bowl. Using floured hands, gently pull the edges of the dough into the center to form a round boule. Place the dough seam-side down on a large piece of parchment paper. Cover loosely with a towel and let it rest for 1 hour.
- Preheat the Dutch Oven: While the dough rests, place your empty Dutch oven (with the lid on) into your oven and preheat to 450°F (232°C). Let the pot heat up for at least 45 minutes. Why this matters: Baking the dough in a screaming-hot, enclosed environment mimics a professional bakery’s steam-injection oven, resulting in rapid expansion (oven spring).
- Score and Bake: Carefully lift the dough using the edges of the parchment paper. Scoring bread dough is critical: use a sharp razor blade to make one swift, deep slash (about 1/2-inch deep) across the top of the dough. Lower the parchment and dough into the hot Dutch oven. Cover with the lid and bake for 30 minutes. Why this matters: Scoring dictates exactly where the dough will expand, preventing it from bursting at the weak points.
- The Final Bake: Remove the lid from the Dutch oven. Bake for an additional 15 to 20 minutes until the crust is a deeply caramelized, dark golden brown. Remove the bread from the pot and let it cool completely on a wire rack before slicing.
Visual Tip: See the image above for the exact shaggy consistency you are looking for during step one. Resist the urge to add more flour!
Expert Tips for Success
- Weigh Your Ingredients: Do not rely on measuring cups. Flour easily compacts, and adding just 20 extra grams of flour will drastically alter your hydration percentage, leading to a tight, dense crumb.
- Master the Temperature: Use an instant-read thermometer to check your baked loaf. A fully cooked artisan loaf will register exactly 205°F to 210°F in the dead center.
- Do Not Cut Hot Bread: Slicing into a hot loaf releases steam that is still actively gelatinizing the starches inside. Cutting too early will leave you with a gummy, wet crumb. Wait at least 2 hours.
- Embrace the Dark Crust: Novice bakers often pull their bread out when it’s pale blonde. True artisan flavor lives in the deep, mahogany-brown crust where the Maillard reaction has fully occurred.
- Use the Right Water: If your tap water is heavily chlorinated, use filtered water. High levels of chlorine can actually stunt or kill the yeast, leading to a poor rise and flat bread.
Variations & Substitutions
| Ingredient | Substitution | Notes |
| Bread Flour | All-Purpose Flour | Protein content will be lower; the bread will still taste great but won’t rise quite as high or have as chewy a texture. |
| Active Dry Yeast | Instant Yeast | Fermentation speed may increase slightly. You do not need to activate instant yeast in water first; mix it straight into the dry ingredients. |
| Fine Sea Salt | Kosher Salt | Volume density differs. If using Diamond Crystal Kosher Salt, increase the volume measurement by 50% (but keep the weight at 10g). |
Whole Wheat Version: Substitute up to 150g (about 1 1/4 cups) of the bread flour for whole wheat flour. Because whole wheat absorbs more liquid, add an additional 20g of water to the dough.
Rosemary Garlic Option: Fold in 3 cloves of roasted, minced garlic and 1 tablespoon of chopped fresh rosemary during the initial mixing step for an incredibly savory loaf.
Seeded Artisan Loaf: Add 2 tablespoons each of flax seeds, sesame seeds, and sunflower seeds to the dry ingredients, and press a few extra seeds onto the exterior right before baking.
How to Store, Freeze & Make Ahead
Refrigerator: Never store crusty bread in the refrigerator! The cool environment accelerates starch retrogradation, making your bread go stale up to three times faster than it would on the counter.
Countertop: Store the cooled bread cut-side down on a cutting board, or loosely wrapped in a paper bag, for up to 3 days at room temperature. This preserves the crust.
Freezer: For long-term storage, slice the completely cooled loaf into individual portions. Wrap tightly in a double layer of plastic wrap, then place in a heavy-duty zip-top freezer bag for up to 3 months. Thaw individual slices straight in the toaster.
Make Ahead: You can prepare the dough through Step 2, then place the covered bowl in the refrigerator for up to 3 days. This process (retarding the dough) actually deepens the sourdough-like flavor significantly.
Frequently Asked Questions
How long does Easy Homemade Crusty Artisan Bread last?
Freshly baked Easy Homemade Crusty Artisan Bread is at its absolute peak texture on the day it is baked. However, if stored properly in a paper bag or bread box at room temperature, it will remain delicious for up to 3 days, making excellent toast on days two and three.
Can I make Easy Homemade Crusty Artisan Bread ahead of time?
Absolutely. You can mix the dough and let it undergo its first rise at room temperature, then transfer the tightly covered bowl to the refrigerator for up to 72 hours. When you are ready to bake, shape it while cold, let it rise for two hours, and bake as directed.
Can I freeze Easy Homemade Crusty Artisan Bread?
Yes, this bread freezes beautifully. Once the Dutch oven bread has cooled completely, slice it, wrap it tightly in plastic wrap, and freeze. You can pop frozen slices directly into the toaster for an instant fresh-baked taste.
What can I substitute for a Dutch oven?
If you do not have a Dutch oven, you can bake the loaf on a preheated pizza stone or heavy baking sheet. To recreate the steam effect, place a cast-iron skillet on the bottom rack of your oven while preheating, and carefully pour 1 cup of boiling water into the skillet immediately after putting your bread in the oven.
Why did my Easy Homemade Crusty Artisan Bread come out dense and heavy?
Dense bread is usually the result of three specific errors: under-proofing, using dead yeast, or cutting into the bread while it is still hot. If your kitchen is very cold (below 68°F), your dough may need up to 24 hours to properly ferment. Always ensure your dough is actively bubbling before moving to the shaping phase.
Conclusion
Baking bread from scratch is one of the most rewarding skills you can master in the kitchen, and it is much easier than people think. This recipe is perfect for serving alongside Sunday roast, bringing to holiday gatherings, or simply enjoying with a thick smear of salted butter.
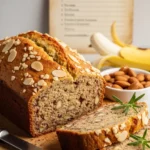
Discover irresistible banana bread recipes that will elevate your baking, from timeless classics to creative twists you’ll love.
Explore now and enjoy easy, delicious recipes guaranteed to turn every bake into a success.Best Ever Banana Bread – Moist & Irresistible
The Ultimate Moist Gluten-Free Banana Bread (Easy & Healthy)
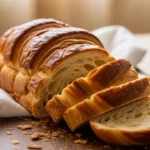
croissant bread loaf: The Ultimate Flaky & Buttery Recipe
Easy Homemade Crusty Artisan Bread
Ingredients
Method
- In a large mixing bowl, whisk together the bread flour, salt, and yeast. Pour in the lukewarm water. Use a wooden spoon or your hands to mix until a shaggy, sticky dough forms. There should be no dry spots of flour remaining. Why this matters: Hydrating all the flour fully allows the autolyse process to begin, activating enzymes.
- Cover the bowl tightly with plastic wrap. Let sit at room temperature for 12 to 18 hours until doubled in size and bubbly. Why this matters: This long, slow proof is where all the complex flavor and gluten strength develop without kneading.
- Gently pull the dough out onto a floured surface. Fold edges into the center to form a boule. Place seam-side down on parchment paper, cover loosely, and rest for 1 hour.
- While resting, preheat a covered Dutch oven in a 450°F (232°C) oven for 45 minutes. Why this matters: The enclosed heat mimics a professional bakery oven.
- Score the top of the dough with a razor blade. Use the parchment paper to lower the dough into the hot Dutch oven. Cover and bake for 30 minutes. Why this matters: Scoring prevents the bread from bursting randomly.
- Remove the lid and bake for 15-20 more minutes until deeply caramelized. Cool completely on a wire rack before slicing.