how to make a chocolate fudge cake step by step is the ultimate culinary question I have spent my 40-year career as a pastry chef answering. Welcome to the only masterclass you will ever need to achieve that deeply dark, intensely rich, melt-in-your-mouth bakery experience right in your own kitchen. I am Chef Luna, and after baking thousands of cakes, I know exactly what separates a good dessert from an unforgettable one.
Tested by Chef Luna, pastry instructor since 1984.
In my 40 years of testing and refining, I remember one catastrophic wedding season in 1992 where my cakes were coming out dry and crumbly. The culprit? I had swapped standard cocoa for dark cocoa without adjusting my leavening agents, causing the structure to collapse. Baking is a precise science. Today, I am giving you my bulletproof method. If you follow this exactly, you will never end up with a dry sponge.
Why This Recipe Works
- Hydration is key: The addition of boiling water at the very end blooms the cocoa, forcing it to release its essential oils for maximum flavor.
- Acidic tenderizing: Using real buttermilk breaks down gluten strands, ensuring the crumb remains delicate and soft.
- Fat balance: A mix of butter for flavor and vegetable oil for sustained moisture keeps this dessert fresh for days.
how to make a chocolate fudge cake step by step at Home
Table of Contents
Why You Will Love This Recipe
- Comes together in under 20 minutes of active prep time.
- Yields a truly moist chocolate cake that stays fresh for up to 4 days at room temperature.
- Freezer-friendly, meaning you can bake the sponges weeks in advance.
- Topped with a foolproof, glossy ganache glaze that requires zero piping skills.
- No special equipment needed beyond standard mixing bowls and a whisk.
Perfect for Every Occasion
Whether you are planning a romantic Valentine’s Day dinner or looking for the ultimate showstopper for a weekend birthday party, this dessert commands the room. The deep, dark cocoa profile paired with the luxurious finish makes it elegant enough for adult dinner parties, yet comforting enough for a family potluck.
Ingredients for how to make a chocolate fudge cake step by step
For the Cake Batter:
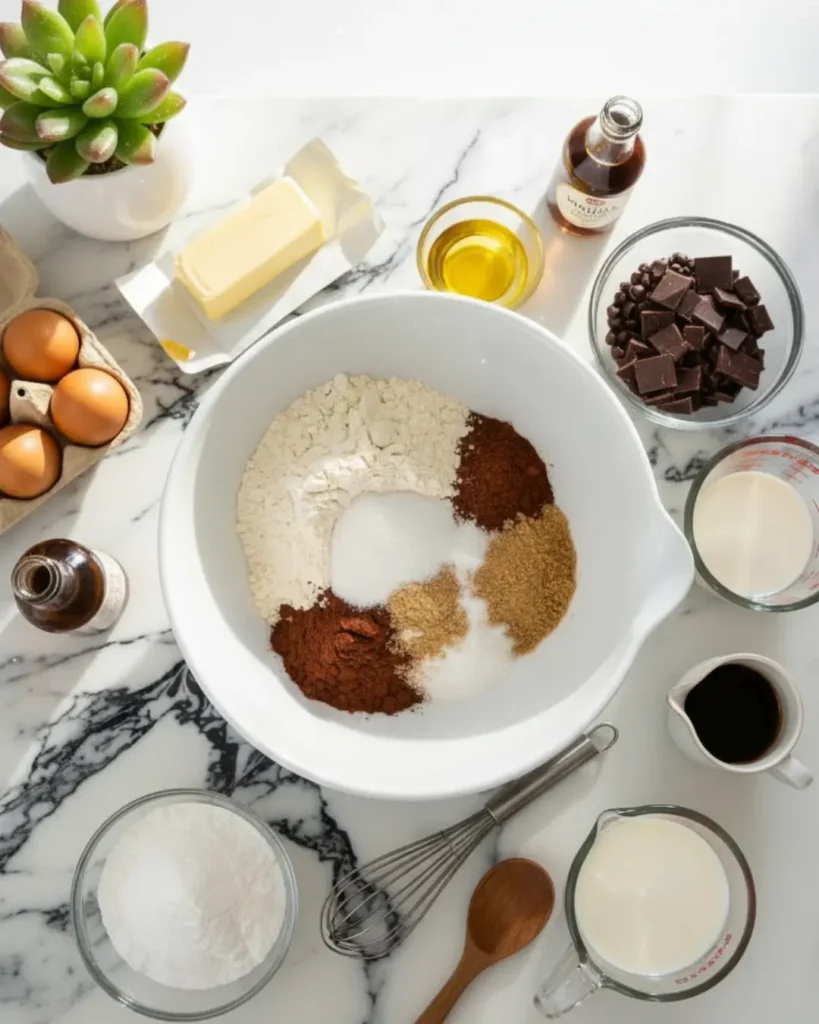
- 2 cups all-purpose flour (spooned and leveled)
- 2 cups granulated sugar
- 3/4 cup high-quality Dutch process cocoa powder
- 2 teaspoons baking powder
- 1 1/2 teaspoons baking soda
- 1 teaspoon kosher salt
- 1 cup whole milk buttermilk, room temperature
- 1/2 cup vegetable oil (canola or sunflower work perfectly)
- 2 large room temperature eggs
- 2 teaspoons pure vanilla extract
- 1 cup fresh boiling water
For the Fudgy Frosting & Ganache Glaze:
- 1 1/2 cups unsalted butter, softened
- 1 cup Dutch process cocoa powder
- 4 cups powdered sugar, sifted
- 1/2 cup heavy cream (divided)
- 1 teaspoon vanilla extract
- 8 ounces semi-sweet chocolate baking bars, finely chopped
Chef Luna’s Buying Tip: Always buy baking bars rather than chocolate chips for your glaze; chips contain stabilizers that prevent them from melting into a smooth, glossy pool.
Prep time: 20 min | Cook time: 35 min | Total: 55 min | Yield: 12 servings
Step 1: Prepare Your Pans Properly
Preheat your oven to 350°F. Line two 8-inch round cake pans or one large springform pan with parchment paper rounds. Grease the sides and lightly dust with cocoa powder (not flour, which leaves white streaks). Proper prep ensures your cake layers release flawlessly.
Step 2: Whisk the Dry Ingredients
In a large bowl, sift together the flour, sugar, Dutch process cocoa powder, baking powder, baking soda, and salt. Sifting is non-negotiable here; it aerates the flour and removes hard lumps of cocoa, setting the foundation for a tender crumb.
Step 3: Combine Wet Ingredients
In a separate bowl, whisk together the buttermilk, oil, room temperature eggs, and vanilla extract. Ensure the eggs are not cold; cold eggs will shock the oil and cause the batter to break, ruining the emulsion.
Step 4: Incorporate Wet into Dry
Pour the wet mixture into the dry ingredients. Mix on low speed just until combined. Do not overmix, or you will develop the gluten, leading to a tough, bread-like texture.
Step 5: The Secret Step
Carefully and slowly pour the boiling water into the batter while mixing on the lowest speed. The batter will become extremely thin this is exactly what you want! The hot liquid is blooming the cocoa. Visual Tip: Reference the process image above showing the thin, glossy batter.
Step 6: Bake and Cool
Divide the batter evenly between your prepared pans. Bake for 30-35 minutes. A toothpick inserted into the center should come out clean. Cool in the pans for 10 minutes before turning them out onto a wire rack to cool completely.
Step 7: The Frosting and Assembly
Beat the softened butter until pale. Add the sifted cocoa and powdered sugar alternately with 1/4 cup of the heavy cream. Beat until fluffy. Level your cooled sponges. Apply a thin crumb coat of frosting to trap stray crumbs, chill for 15 minutes, then apply the final layer.
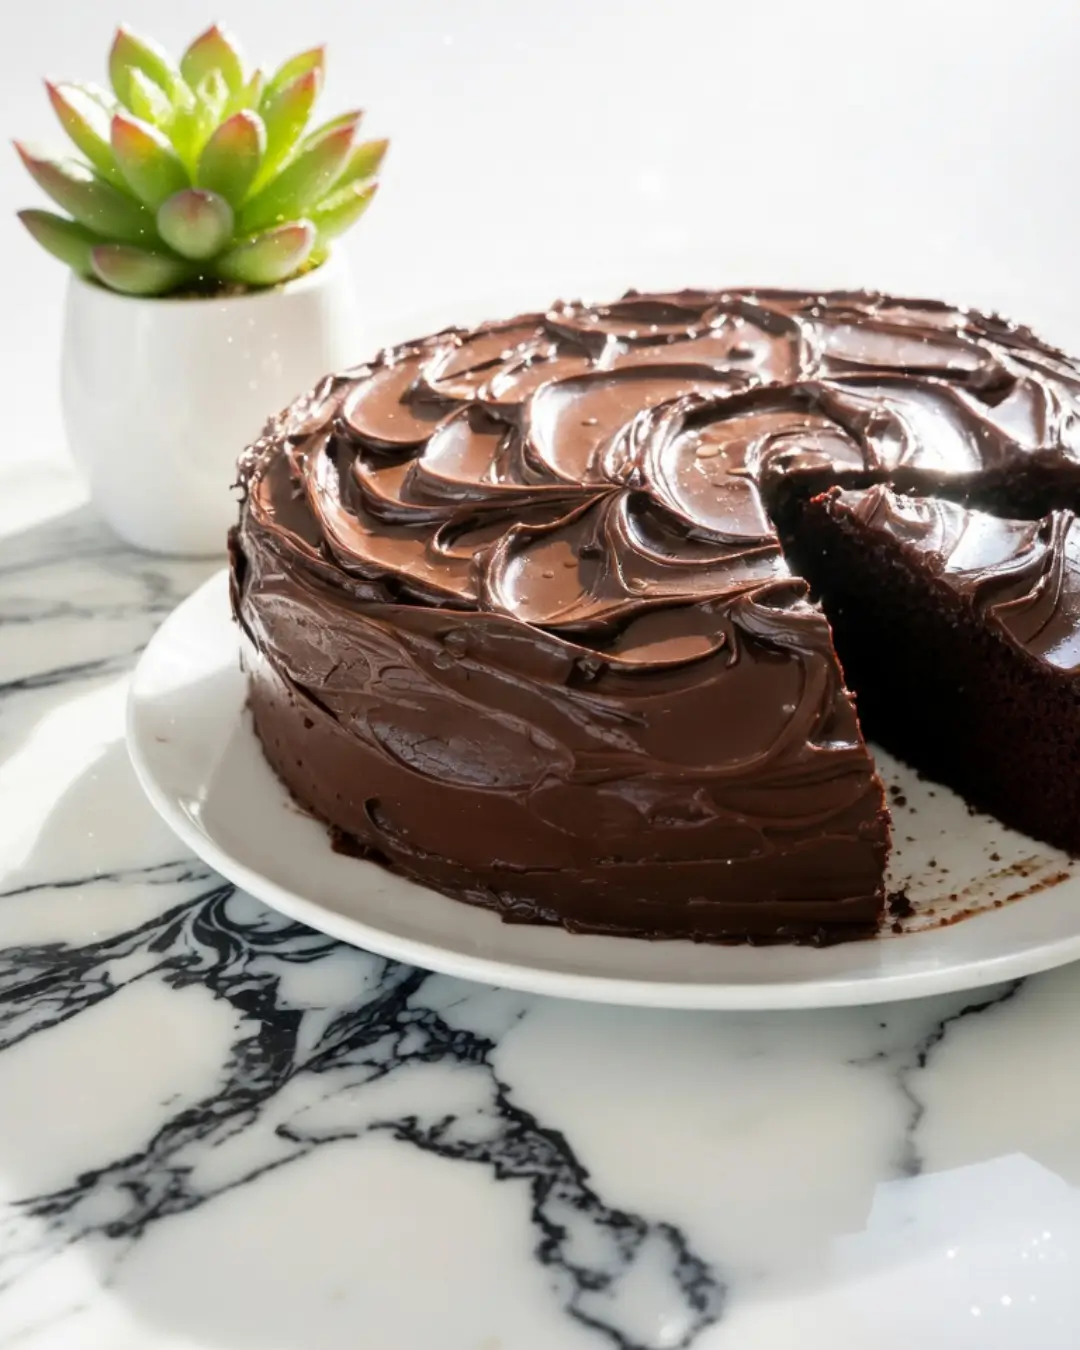
Step 8: The Final Glaze
Heat the remaining 1/4 cup of heavy cream until simmering. Pour over the finely chopped chocolate bars. Let sit for 5 minutes, then whisk into a dark, shiny ganache glaze. Pour gently over the chilled, frosted cake, allowing it to drip down the sides.
Expert Tips for Success
- Measure Flour by Weight: Use a kitchen scale. Scooping flour directly with a measuring cup packs it down, adding up to 30% more flour and resulting in a dry, dense brick.
- Never Skip the Hot Liquid: The boiling water does not just add moisture; it undergoes a chemical reaction with the cocoa, enhancing the deep chocolate flavor profile significantly.
- Wait for a Complete Cool: Never attempt a crumb coat on a warm sponge. Even residual warmth will melt the butter in your frosting, causing the structure to slide apart.
- The Tap Method: Before baking, drop your filled pans flat onto the counter from a height of two inches. This forces trapped air bubbles to the surface, preventing massive craters in your baked layers.
- Don’t Rush the Glaze: Your ganache glaze needs to cool to about 90°F before pouring. If it is too hot, it will melt the frosting underneath; if too cold, it won’t yield those beautiful, professional drips.
Variations & Substitutions
| Ingredient | Substitution | Notes |
| buttermilk | 1 cup milk + 1 tbsp white vinegar | Let sit for 5 minutes before using. Maintains acidic balance. |
| Dutch process cocoa powder | Natural Unsweetened Cocoa | If using natural, omit baking powder and increase baking soda to 2 tsp. |
| room temperature eggs | Flax eggs (for Vegan) | Mix 2 tbsp ground flaxseed with 6 tbsp water. Texture will be slightly denser. |
| boiling water | Hot brewed coffee | Coffee dramatically intensifies the chocolate flavor without making it taste like mocha. |
Dietary Notes: * Gluten-Free: Substitute the all-purpose flour with a high-quality 1:1 gluten-free baking blend that contains xanthan gum.
- Dairy-Free: Swap the buttermilk for almond milk curdled with lemon juice, use vegan butter for the frosting, and ensure your chocolate is dairy-free.
How to Store, Freeze & Make Ahead
- Refrigerator: Store fully frosted slices in an airtight container for up to 5 days. The oil in the batter ensures the moist chocolate cake stays soft even when chilled.
- Freezer: Wrap unfrosted cake layers tightly in a double layer of plastic wrap, then foil. Freeze for up to 3 months. Thaw overnight in the refrigerator before frosting.
- Make Ahead: You can bake the layers 2 days in advance. Keep them wrapped tightly in plastic wrap at room temperature until you are ready to assemble and apply the ganache glaze.
Frequently Asked Questions
How long does how to make a chocolate fudge cake step by step last?
When stored correctly in an airtight container, this dessert retains its decadent moisture for 4 to 5 days at room temperature, or up to a week in the refrigerator. The combination of oil and buttermilk extends its shelf life significantly.
Can I make how to make a chocolate fudge cake step by step ahead of time?
Absolutely. Professional bakers rarely bake and decorate on the same day. I recommend baking the sponges one day, wrapping them tightly, and assembling the final product the next day.
Can I freeze how to make a chocolate fudge cake step by step?
Yes! The unfrosted sponges freeze beautifully for up to 3 months. You can also freeze individual, fully frosted slices wrapped tightly in plastic wrap for those midnight cravings.
What can I substitute for the buttermilk?
If you don’t have it on hand, you can easily make a substitute by adding one tablespoon of fresh lemon juice or white vinegar to a liquid measuring cup, then filling it to the one-cup line with whole milk. Let it sit for five minutes to curdle.
Why did my how to make a chocolate fudge cake step by step sink in the middle?
In my decades of teaching, a sunken center almost always points to an underbaked center or expired baking soda. Ensure your oven is properly calibrated with an internal thermometer, and test the center with a skewer it should come out clean before you remove the pans from the oven.
Conclusion
Mastering this classic is a milestone for any home baker. With its rich crumb and decadent finish, it is the absolute perfect centerpiece for birthdays, anniversaries, or Sunday family dinners. If you tried this how to make a chocolate fudge cake step by step recipe, please leave a ⭐⭐⭐⭐⭐ rating below!
Pin this recipe for later.
how to make a chocolate fudge cake step by step
Ingredients
Method
- Preheat oven to 350°F. Line and grease your cake pans with parchment and cocoa powder to ensure the sponges release perfectly without a floury white crust.
- Whisk together the flour, sugar, cocoa powder, baking powder, baking soda, and salt. Sifting the dry elements prevents dense, bitter lumps in your finished crumb.
- In a separate bowl, combine the buttermilk, oil, room temperature eggs, and vanilla. Room temperature ingredients prevent the oil from seizing, creating a perfectly emulsified batter.
- Combine the wet and dry ingredients on low speed, then carefully stream in the boiling water. The heat blooms the cocoa powder, unlocking its deepest flavor profile.
- Bake for 30-35 minutes until a toothpick comes out clean. Cool fully on a wire rack.
- Beat the softened butter, adding the cocoa, powdered sugar, and 1/4 cup of heavy cream until light and fluffy. Apply a crumb coat to your cooled cakes, chill, and apply the final layer of frosting.
- Heat the remaining heavy cream, pour over chopped chocolate, and whisk into a smooth ganache glaze. Pour over the cold cake for a professional bakery drip finish.