The holiday season is synonymous with baking, and there is one classic that never fails to spark joy: the blossom cookie. While the traditional peanut butter version is a staple, these Mint Chocolate Kiss Blossom Cookies take the concept to a refreshing new level. With a vibrant green hue, a soft, melt-in-your-mouth texture, and the iconic chocolate center, they are the perfect addition to any Christmas cookie tray or St. Patrick’s Day celebration.
Combining the cool, refreshing taste of mint with the rich, creamy indulgence of milk chocolate, these cookies are as visually stunning as they are delicious. In this guide, we’ll walk through everything you need to create professional-quality cookies that look like they came from a high-end bakery.
Table of Contents
Why You’ll Love This Mint Chocolate Kiss Blossom Cookies
There are plenty of reasons why this recipe will become a permanent fixture in your recipe box:
- The Perfect Flavor Pairing: Mint and chocolate is a timeless duo. The mint extract provides a clean, cooling sensation that perfectly balances the sweet chocolate.
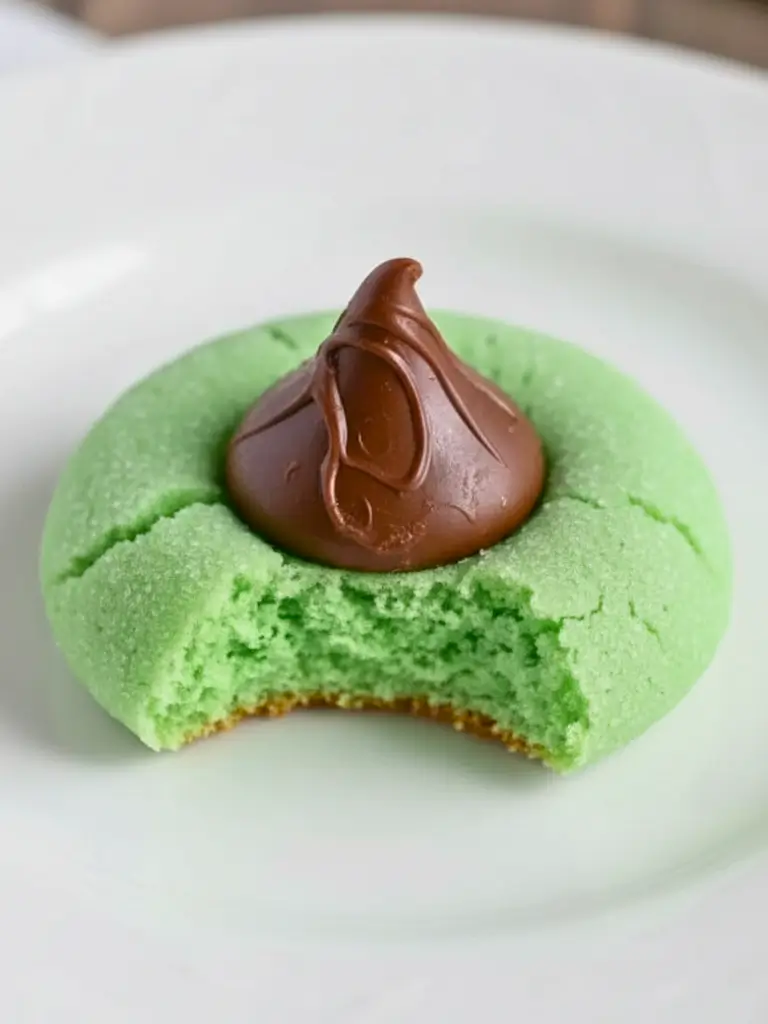
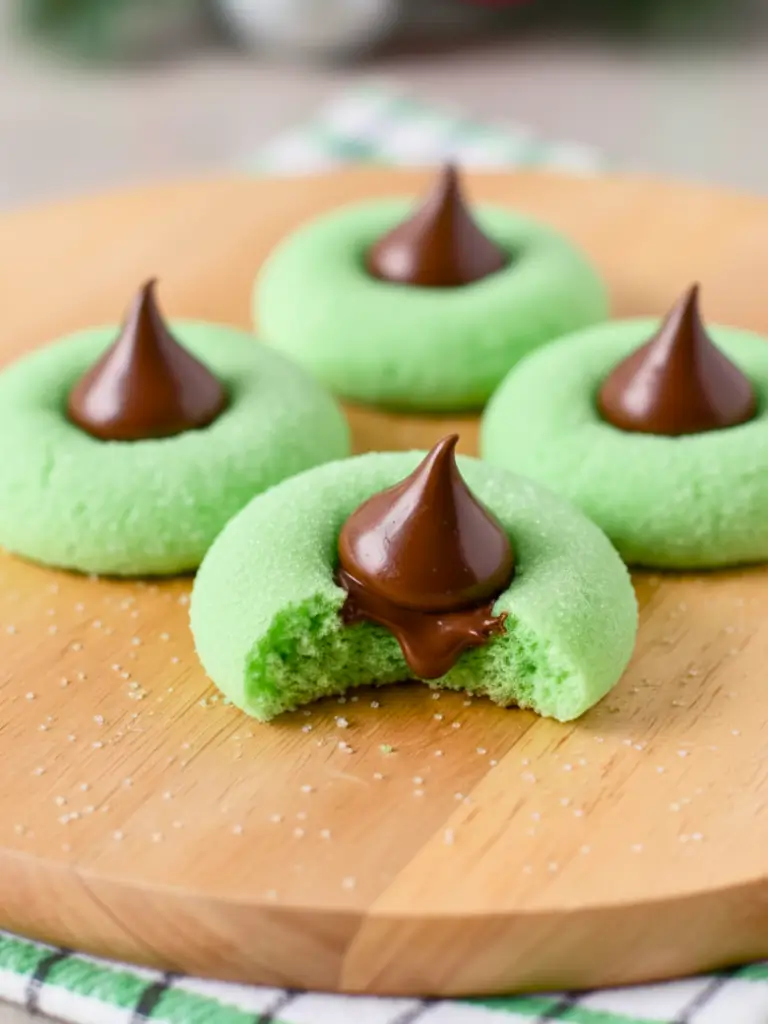
- Stunning Visuals: The bright green dough rolled in granulated sugar creates a “sparkling” effect that pops against the brown chocolate kiss.
- Ideal Texture: We’ve perfected the ratios to ensure these cookies are soft and chewy, not dry or crumbly.
- Kid-Friendly: From unwrapping the chocolate kisses to pressing them into the warm cookies, this is a fantastic recipe to make with little kitchen helpers.
- Versatile: While perfect for Christmas, simply changing the shade of green or the type of chocolate kiss (like white chocolate peppermint) makes them work for various holidays.
Ingredients: Mint Chocolate Kiss Blossom Cookies
To achieve the best results, ensure your refrigerated ingredients (butter and eggs) are at room temperature before you begin. This ensures a smooth, emulsified dough.
For the Mint Cookie Base
- Unsalted Butter: 1 cup (2 sticks), softened to room temperature.
- Granulated Sugar: 1 cup, plus an extra 1/3 cup in a small bowl for rolling.
- Large Egg: 1, room temperature.
- Peppermint or Mint Extract: 1 ½ teaspoons (peppermint gives a “candy cane” vibe, while plain mint is more like a thin mint).
- Green Gel Food Coloring: 2–4 drops (gel provides a more vibrant color without thinning the dough).
- All-Purpose Flour: 2 ½ cups, leveled.
- Baking Soda: 1 teaspoon.
- Salt: ½ teaspoon.
For the Topping
- Hershey’s Kisses: 36–40 milk chocolate candies, unwrapped.
- Optional: Festive sprinkles for extra flair.
Instructions
1. Prep and Cream
Preheat your oven to 350°F (175°C) and line two large baking sheets with parchment paper or silicone baking mats. In a large mixing bowl or the bowl of a stand mixer, cream together the softened butter and 1 cup of granulated sugar. Beat on medium-high speed for about 2–3 minutes until the mixture is light, fluffy, and pale in color. This aeration is key to a soft cookie.
2. Incorporate Wet Ingredients
Add the egg, mint extract, and green food coloring to the butter mixture. Beat until well combined, scraping down the sides of the bowl as needed. Start with a small amount of food coloring; you can always add more to reach your desired shade of “minty green.”
3. Mix Dry Ingredients
In a separate medium bowl, whisk together the flour, baking soda, and salt. With the mixer on low speed, gradually add the dry ingredients to the wet ingredients. Mix just until the white streaks of flour disappear. Do not overmix, as this can lead to tough cookies.
4. Roll and Coat
Scoop about 1 tablespoon of dough at a time and roll it between your palms to form a 1-inch ball. Roll each ball in the small bowl of extra granulated sugar until evenly coated. Place the balls on the prepared baking sheets, spaced about 2 inches apart.
5. Bake
Bake for 8 to 10 minutes. The cookies are done when the edges are set and the tops look slightly cracked but not browned. It is important not to overbake, as they will continue to firm up on the hot pan.
6. Serve
Immediately after removing the cookies from the oven, press a chocolate kiss into the center of each cookie. The heat will soften the chocolate, “locking” it into place. Let the cookies cool on the baking sheet for 5 minutes before transferring them to a wire rack. Expert Tip: To prevent the chocolate from melting completely and losing its shape, place the cooling rack in a cool area or even the fridge for 15 minutes once the cookies are no longer hot.
Expert Tips for Success
- Unwrap Early: Unwrap all your chocolate kisses while the cookies are in the oven. You need to work quickly once the cookies come out so they are soft enough to accept the kiss without cracking too much.
- Use Gel Coloring: Liquid food coloring can change the hydration of the dough. Gel colors are concentrated and provide a much deeper green without affecting the bake.
- Chill the Kisses: If your kitchen is very warm, keep the unwrapped kisses in the refrigerator until the moment you need to press them. This helps them hold their “pointy” shape.
- Measure Flour Correctly: Use the “spoon and level” method. Packing flour into a measuring cup leads to dry, crumbly cookies that won’t spread correctly.
Variations
- Double Chocolate Mint: Add 1/4 cup of cocoa powder to the dry ingredients (and reduce flour by 1/4 cup) for a dark green/brown chocolate mint cookie.
- Andes Mint Version: Instead of a Hershey’s Kiss, press an Andes Mint thin or a mint-filled chocolate square onto the top.
- Grinch Cookies: Use a lighter lime-green food coloring and add a single red heart sprinkle next to the chocolate kiss.
- White Chocolate: Use “Hugs” (striped white and milk chocolate) or white chocolate peppermint kisses for a different flavor profile.
Frequently Asked Questions
Can I freeze these cookies? Yes! You can freeze the baked cookies for up to 3 months. However, note that the chocolate kisses may develop a “bloom” (a white powdery look) due to temperature changes. For best results, freeze the dough balls (uncoated) and bake them fresh.
Why did my cookies crack too much when I pressed the kiss? A few small cracks are normal and give the “blossom” look. However, if they crack deeply, the cookies may be slightly overbaked or the dough might have too much flour. Try reducing the bake time by one minute for the next batch.
Do I have to roll them in sugar? While not strictly necessary for the structure, the sugar coating provides a crucial crunch and the “sparkling” aesthetic that defines a classic blossom cookie.
Mint Chocolate Kiss Blossom Cookies
Ingredients
Method
- Preheat your oven to 350°F (175°C) and line baking sheets with parchment paper.
- In a large bowl, cream together softened butter and 1 cup sugar until light and fluffy.
- Beat in the egg, peppermint extract, and green food coloring until fully combined.
- Gradually add the flour, baking soda, and salt, mixing on low until just combined.
- Roll dough into 1-inch balls, coat in granulated sugar, and place 2 inches apart on baking sheets.
- Bake for 8-10 minutes. Immediately press a chocolate kiss into the center of each warm cookie. Cool on a wire rack.