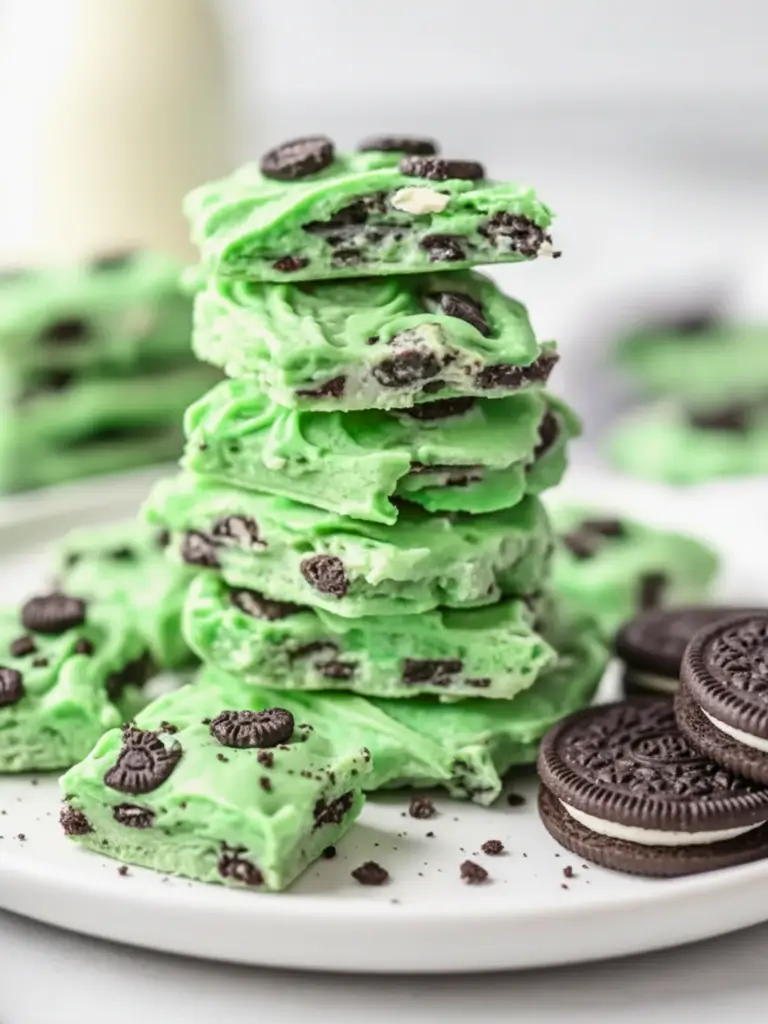
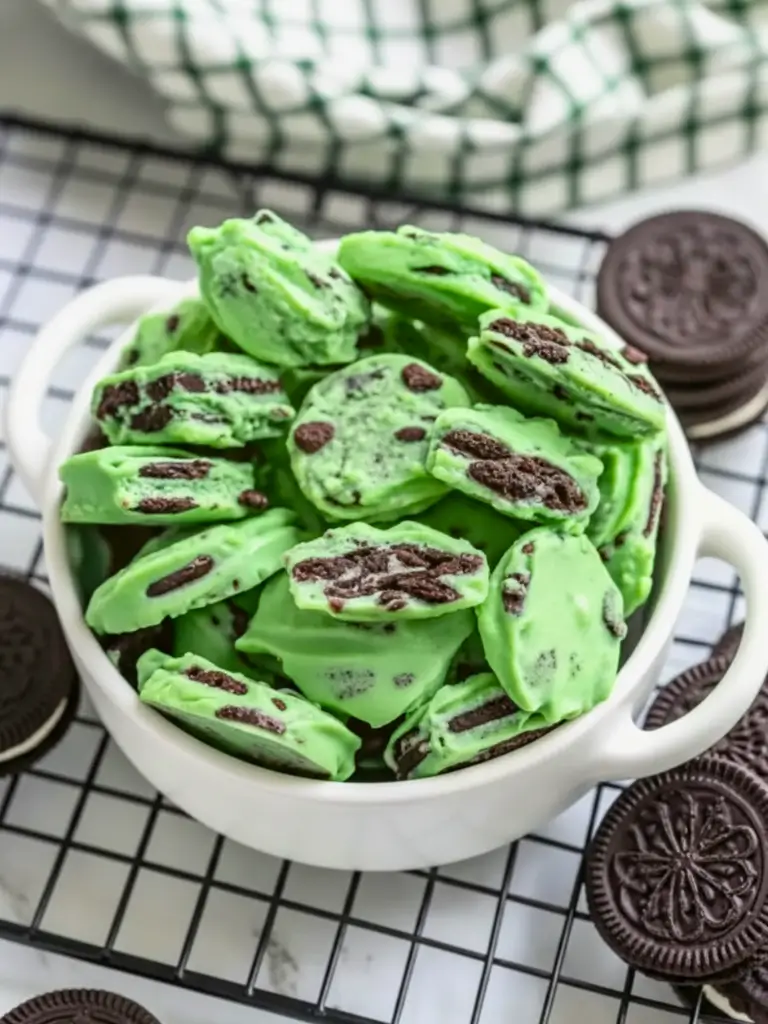
If you are looking for a dessert that is as visually stunning as it is delicious, look no further than this Mint Oreo Bark. With its vibrant mint-green hue and chunky, chocolatey Oreo pieces, it’s the ultimate no-bake treat. Whether you’re prepping for a St. Patrick’s Day celebration, a holiday cookie tray, or just a late-night craving, this recipe delivers maximum flavor with minimal effort.
In this guide, we’ll dive into how to achieve that perfectly creamy texture, the best way to melt your chocolate without it seizing, and how to customize this bark for any occasion.
Table of Contents
Why You’ll Love This Mint Oreo Bark
There are a million “bark” recipes out there, but this one stands out for a few specific reasons:
- Zero Baking Required: When the oven is full or the weather is too hot to bake, this is your go-to. All you need is a microwave or a double boiler.
- The Perfect Flavor Contrast: The coolness of the peppermint paired with the rich, slightly bitter cocoa of the Oreo cookie creates a balanced flavor profile that isn’t cloyingly sweet.
- Incredible Texture: You get a smooth, melt-in-your-mouth candy base contrasted with the crunch of the cookies.
- Visually Striking: That bright “minty” green pops on any dessert table, making it a favorite for gifting in Mason jars.
Ingredient
To make this recipe, you only need a handful of high-quality ingredients. Because there are so few components, the quality of your chocolate/candy coating matters!
For the Mint Base
- 24 oz White Chocolate Chips or Vanilla Candy Melts: Candy melts are easier for beginners as they don’t require tempering, but high-quality white chocolate (like Ghirardelli) offers a richer flavor.
- 1 tsp Peppermint Extract: Ensure you use peppermint extract, not plain mint extract (which can sometimes taste like toothpaste).
- Green Food Coloring: If using white chocolate, use oil-based candy coloring to prevent the chocolate from seizing.
- 1 tbsp Coconut Oil (Optional): Helps the chocolate flow more smoothly and adds a nice sheen.
For the Cookie Crunch
- 1 Standard Package (14.3 oz) Oreo Cookies: I recommend the classic chocolate version, but “Double Stuf” works beautifully too.
- Extra Oreos for Topping: Reserve about 4-5 cookies to crush into fine dust and larger chunks for the final garnish.
Instructions
1. Prepare Your Pan
Line a large 10×15 inch baking sheet with parchment paper or a silicone baking mat. This is crucial for easy removal. If you don’t line the pan, the bark will stick and shatter into tiny pieces when you try to lift it.
2. Prep the Oreos
Place the Oreos in a large Ziploc bag. Use a rolling pin or the back of a heavy spoon to crush them. You want a mix of textures—some fine crumbs and some large, chunky pieces about the size of a nickel. Set aside about 1/2 cup of the “prettier” chunks for the top.
3. Melt the Chocolate
If using a microwave, place your chocolate chips or candy melts in a microwave-safe bowl. Heat in 30-second intervals, stirring thoroughly between each session. Once it’s about 80% melted, stop heating and just stir until the residual heat melts the rest. This prevents the chocolate from burning. If it’s too thick, stir in the coconut oil.
4. Flavor and Color
Once smooth, stir in the peppermint extract. Add your green food coloring one drop at a time until you reach your desired shade of mint. Remember: the color will look slightly darker once it sets.
5. Fold and Spread
Quickly fold the majority of your crushed Oreos into the melted green chocolate. Pour the mixture onto your prepared baking sheet. Use an offset spatula to spread it to an even thickness (about 1/4 to 1/2 inch thick).
6. Garnish and Chill
While the chocolate is still wet, press the reserved Oreo chunks and crumbs into the top. This ensures they stay put. Place the tray in the refrigerator for at least 30-45 minutes until completely firm. Once set, break the bark into irregular pieces by hand or use a sharp knife for cleaner edges. Serve cold or at room temperature.
Expert Tips for Success
- Avoid Water at All Costs: Even a single drop of water in your melting chocolate will cause it to “seize,” turning it into a grainy, clumpy mess. Ensure your bowl and spatula are bone-dry.
- Oil-Based Coloring is Key: Standard grocery store liquid food coloring is water-based. If you drop that into white chocolate, it will seize. Use gel colors or specific oil-based candy colors.
- Don’t Over-Crush: You want those distinct “Oreo windows” visible in the bark. If you pulverize the cookies into dust, the bark will turn a muddy grey-green color rather than staying vibrant.
- Let it Sit: If you have the patience, letting the bark set at room temperature (if your house is cool) results in a better “snap.” However, the fridge is perfectly fine for those in a hurry!
Variations
- The “Thin Mint” Style: Use dark chocolate for the base and add peppermint extract, then top with crushed Oreos for a more sophisticated, less sweet treat.
- Holiday Flare: Add red and white sprinkles or crushed candy canes on top of the green bark for a festive “Grinch” themed Christmas treat.
- Double Chocolate: Drizzle melted dark chocolate over the finished green bark before it sets to create a beautiful marbled effect.
- White Oreo Bark: If you aren’t a fan of mint, skip the green dye and extract and use “Golden Oreos” for a vanilla-cream version.
Frequently Asked Questions
How should I store Mint Oreo Bark? Store the bark in an airtight container. It will stay fresh at room temperature for up to 1 week or in the refrigerator for up to 3 weeks.
Can I freeze this recipe? Yes! This bark freezes beautifully. Place it in a freezer-safe bag for up to 3 months. It’s actually quite delicious to eat straight from the freezer!
Why did my chocolate turn thick and lumpy? This is called seizing. It usually happens because a tiny bit of water got into the bowl or the chocolate was overheated. To fix it, you can try stirring in a teaspoon of vegetable shortening or coconut oil, but it may not return to a perfectly smooth state.
Mint Oreo Bark
Ingredients
Method
- Line a large baking sheet with parchment paper and set aside.
- Place Oreos in a plastic bag and crush into a mix of small crumbs and larger chunks.
- Melt the white chocolate or candy melts in the microwave in 30-second bursts, stirring until completely smooth.
- Stir in the peppermint extract and green food coloring (if using white chips) until the desired mint shade is achieved.
- Fold in the majority of the Oreo pieces, then spread the mixture onto the prepared baking sheet with a spatula.
- Top with remaining Oreo chunks and chill in the refrigerator for 30 minutes before breaking into pieces.