There’s something magical about a plate of colorful Royal Icing Christmas Cookies, and Fun to Decorate on the table. These royal icing Christmas cookies are crisp, buttery, and perfect for decorating with kids or friends. The icing dries smooth and shiny, so your designs look clean and professional.
You don’t need fancy tools, just a little patience and a few simple tricks. Make a batch, put on some holiday music, and enjoy the process as much as the treats.
Table of Contents
What Makes This Royal Icing Christmas Cookies
These cookies hold their shape in the oven, so your stars, trees, and snowflakes look exactly like the cutters. The dough is soft enough to roll easily but bakes into sturdy, tender cookies that don’t crumble.
The royal icing sets firm with a beautiful sheen, making them stackable and giftable. They’re ideal for decorating ahead of time because the icing dries hard and won’t smudge.
Ingredients
For the Sugar Cookies

- 2 3/4 cups (345g) all-purpose flour
- 1/2 teaspoon baking powder
- 1/2 teaspoon fine salt
- 1 cup (225g) unsalted butter, softened
- 3/4 cup (150g) granulated sugar
- 1 large egg
- 2 teaspoons pure vanilla extract
- 1/2 teaspoon almond extract (optional but recommended)
For the Royal Icing
- 4 cups (480g) powdered sugar, sifted
- 3 tablespoons meringue powder
- 6–8 tablespoons water, room temperature (plus more as needed)
- 1 teaspoon pure vanilla extract or clear vanilla (for bright white icing)
- Gel food coloring, assorted colors

Step-by-Step Instructions
- Make the dough: In a medium bowl, whisk the flour, baking powder, and salt. In a large bowl, beat the butter and sugar until light and fluffy, about 2–3 minutes. Add the egg, vanilla, and almond extract.
Mix in the dry ingredients just until combined. The dough should be soft but not sticky.
- Chill: Divide the dough in half, flatten into two disks, and wrap each in plastic. Chill for at least 1 hour. Chilled dough means cleaner edges and less spread.
- Roll and cut: Preheat the oven to 350°F (175°C).
On a lightly floured surface, roll the dough to about 1/4 inch (6 mm) thickness. Cut into shapes with cookie cutters. Re-roll scraps as needed.
- Bake: Place shapes on a parchment-lined baking sheet.
Bake 9–12 minutes, until the edges are just set and pale golden on the bottom. Do not overbake. Let cookies rest on the sheet for 5 minutes, then transfer to a rack to cool completely.
- Make the royal icing: In a stand mixer bowl, whisk powdered sugar and meringue powder.
Add 6 tablespoons water and vanilla. Beat on low to combine, then on medium for 2–3 minutes, until thick, glossy, and slightly stiff. Add water a teaspoon at a time until the icing reaches piping consistency: it should form soft peaks that hold for a few seconds.
- Divide and color: Split icing into bowls.
Add gel colors a little at a time. For outlining, use thicker icing. For flooding (filling in), thin with water until it flows smoothly back into itself in about 10–12 seconds. Keep bowls covered with a damp towel to prevent crusting.
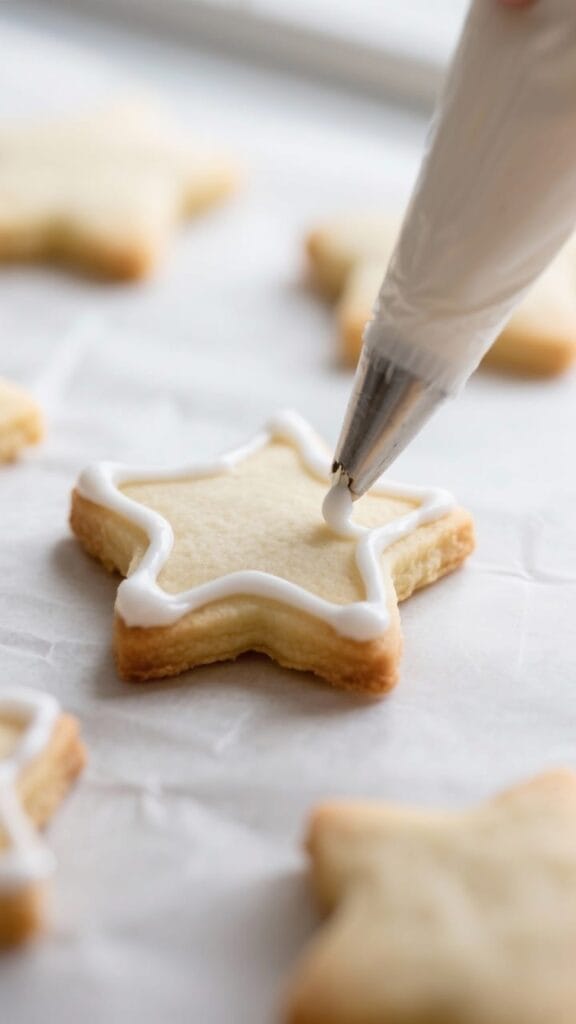
- Outline and flood: Transfer piping-consistency icing to piping bags fitted with small round tips (or use snipped-tip plastic bags).
Outline the cookies and let set for a few minutes. Thin icing for flooding goes into separate bags or bottles. Flood inside the outline, then nudge icing to the edges with a toothpick or scribe tool.
- Add details: For wet-on-wet designs (like polka dots or marbling), add them immediately while the base is still wet.
For sharp details (like lines, snowflakes, or lettering), let the base dry 1–2 hours, then pipe details with thicker icing.
- Dry completely: Let cookies dry uncovered at room temperature until the icing is fully set, 6–12 hours or overnight. Avoid humidity if possible.
- Finish and store: Once dry, add any edible glitter, luster dust, or small sugar decorations. Package for gifting or store as noted below.
How to Store
- Room temperature: Keep decorated cookies in an airtight container for 1 week.
Place parchment paper between layers to protect designs.
- Freezer: Freeze undecorated cookies for up to 2 months. Thaw at room temperature, then decorate. You can also freeze decorated cookies once fully dry; wrap individually and thaw in the container to avoid condensation.
- Icing: Royal icing can be stored airtight in the fridge for up to 1 week.
Stir well before using. For longer storage, freeze in piping bags and thaw in the fridge.
Health Benefits
These are a sweet treat, so enjoy them in moderation. That said, there are a few small advantages. Meringue powder is pasteurized, offering a safer alternative to raw egg whites.
Making cookies at home lets you control the ingredients—you can use real butter, pure vanilla, and limit artificial dyes. Sharing homemade food also supports mindful eating, which often means smaller portions and more satisfaction.
Common Mistakes to Avoid
- Skipping the chill time: Warm dough spreads and loses shape. Chill for at least 1 hour.
- Overmixing the dough: Too much mixing after adding flour makes tough cookies.
Stop when it just comes together.
- Rolling too thin: Thin cookies brown quickly and break. Aim for 1/4 inch.
- Icing too runny or too stiff: Test with the “10–12 second” rule for flood icing. Adjust with water or powdered sugar in tiny amounts.
- Not covering icing: Royal icing crusts fast.
Keep bowls covered with a damp towel and seal piping bags when not in use.
- Decorating warm cookies: Heat melts icing. Make sure cookies are completely cool.
- Rushing the dry time: If you stack or package too soon, designs smudge. Let them dry overnight.
Variations You Can Try
- Spiced sugar cookies: Add 1 teaspoon ground cinnamon and 1/4 teaspoon nutmeg to the flour mixture for warm holiday flavor.
- Lemon-almond twist: Swap vanilla for 1 teaspoon vanilla and 1 teaspoon lemon zest.
Finish with a light lemon icing flavor.
- Cocoa cookies: Replace 1/3 cup flour with cocoa powder for chocolate cut-outs. Add a pinch of espresso powder for depth.
- Gluten-free: Use a 1:1 gluten-free baking blend and chill well. Add an extra tablespoon of milk if the dough seems crumbly.
- Dairy-free: Use plant-based butter with 80% fat and check that your meringue powder is dairy-free.
- Decorating styles: Try plaid patterns, snowflake piping, candy-cane stripes, or metallic accents with edible luster dust mixed into a little clear extract.
FAQ
Can I use egg whites instead of meringue powder?
Yes.
Use 3 large pasteurized egg whites and 4 cups powdered sugar, plus 1 teaspoon vanilla. Beat to glossy peaks, then adjust with water. Pasteurized whites are important for food safety and stability.
Why is my icing dull instead of shiny?
Overbeating, too little water, or high humidity can cause a matte finish.
Mix just until glossy, thin gradually, and let cookies dry in a cool, low-humidity room. A fan on low can help.
How do I prevent air bubbles in the icing?
After mixing, let icing rest 10–15 minutes, then gently stir to pop bubbles. When flooding, avoid over-squeezing the bag and use a scribe tool to release trapped air.
What’s the best way to get bright red and green?
Use gel colors, not liquid.
Color the icing a shade darker than you need, then let it sit 30 minutes—colors deepen as they rest. If needed, add a touch more gel.
How long do decorated cookies last?
At room temperature in an airtight container, they’re best within 7–10 days. For longer storage, freeze fully dried cookies and thaw in the container to prevent condensation marks.
Can I make the dough ahead?
Absolutely.
The dough can chill for up to 3 days or be frozen for up to 2 months. Thaw in the fridge overnight before rolling.
What if I don’t have piping tips?
Snip a very small hole in a disposable piping bag or zip-top bag. For finer lines, cut a tiny opening smaller than you think you need and trim more if necessary.
In Conclusion
Royal icing Christmas cookies bring together a crisp, buttery base and a smooth, shiny finish that looks as good as it tastes.
With a little planning and some simple techniques, you’ll have cookies that are sturdy, stackable, and festive. Keep the dough chilled, watch your icing consistency, and give everything time to dry. Share them at parties, pack them as gifts, or set up a decorating night—these cookies make the season feel special.


Royal Icing Christmas Cookies – Classic, Festive, and Fun to Decorate
Ingredients
Method
- Make the dough: In a medium bowl, whisk the flour, baking powder, and salt. In a large bowl, beat the butter and sugar until light and fluffy, about 2–3 minutes. Add the egg, vanilla, and almond extract.Mix in the dry ingredients just until combined. The dough should be soft but not sticky.
- Chill: Divide the dough in half, flatten into two disks, and wrap each in plastic. Chill for at least 1 hour. Chilled dough means cleaner edges and less spread.
- Roll and cut: Preheat the oven to 350°F (175°C).On a lightly floured surface, roll the dough to about 1/4 inch (6 mm) thickness. Cut into shapes with cookie cutters. Re-roll scraps as needed.
- Bake: Place shapes on a parchment-lined baking sheet.Bake 9–12 minutes, until the edges are just set and pale golden on the bottom. Do not overbake. Let cookies rest on the sheet for 5 minutes, then transfer to a rack to cool completely.
- Make the royal icing: In a stand mixer bowl, whisk powdered sugar and meringue powder.Add 6 tablespoons water and vanilla. Beat on low to combine, then on medium for 2–3 minutes, until thick, glossy, and slightly stiff. Add water a teaspoon at a time until the icing reaches piping consistency: it should form soft peaks that hold for a few seconds.
- Divide and color: Split icing into bowls.Add gel colors a little at a time. For outlining, use thicker icing. For flooding (filling in), thin with water until it flows smoothly back into itself in about 10–12 seconds. Keep bowls covered with a damp towel to prevent crusting.
- Outline and flood: Transfer piping-consistency icing to piping bags fitted with small round tips (or use snipped-tip plastic bags).Outline the cookies and let set for a few minutes. Thin icing for flooding goes into separate bags or bottles. Flood inside the outline, then nudge icing to the edges with a toothpick or scribe tool.
- Add details: For wet-on-wet designs (like polka dots or marbling), add them immediately while the base is still wet.For sharp details (like lines, snowflakes, or lettering), let the base dry 1–2 hours, then pipe details with thicker icing.
- Dry completely: Let cookies dry uncovered at room temperature until the icing is fully set, 6–12 hours or overnight. Avoid humidity if possible.
- Finish and store: Once dry, add any edible glitter, luster dust, or small sugar decorations. Package for gifting or store as noted below.