spiderweb cheesecake cookies are the ultimate combination of rich chocolate cookies, creamy vanilla cheesecake filling, and a dramatic spiderweb design. These irresistible Halloween cheesecake cookies feature a soft, brownie-like chocolate base, a silky cream cheese center, and delicate chocolate lines that transform each cookie into an edible Halloween decoration. They’re perfect for October parties, spooky movie nights, classroom celebrations, or anyone who loves a creative homemade dessert.
When I began developing the concept for these chocolate cheesecake cookies, I wanted something that offered more than a festive appearance. A great Halloween cookie should taste just as impressive as it looks. That means balancing deep cocoa flavor with the slight tanginess of cream cheese and keeping the cookie soft enough to bite without squeezing out the filling. The key baking principle is simple: build a sturdy chocolate cookie base, allow it to cool completely, and decorate with a cheesecake filling thick enough to hold its shape.
What separates these cream cheese filled cookies from ordinary Halloween treats is their combination of contrasting textures and colors. The dark cocoa cookie forms a tender, slightly chewy foundation, while the light cheesecake topping brings sweetness and creaminess. Thin lines of melted chocolate create the signature web design without complicated decorating equipment. The result looks bakery-inspired but uses familiar grocery-store ingredients and approachable baking techniques.
These spiderweb cheesecake cookies are an excellent choice when you’re looking for easy Halloween desserts that can be prepared ahead of a celebration. You’ll learn how to mix the dough, create the perfect cheesecake center, pipe realistic chocolate spiderwebs, and keep every cookie looking beautiful until serving time. Whether you’re baking with kids or preparing an elegant Halloween dessert platter, this recipe offers a delicious balance of chocolate and cheesecake. Let’s get started.
Details
Table of Contents
What Are Spiderweb Cheesecake Cookies?
Spiderweb cheesecake cookies are individual chocolate cookies decorated with a creamy cheesecake-style filling and an edible spiderweb pattern.
Rather than making a traditional cheesecake in a springform pan, this recipe combines three components into one handheld treat:
- A soft, fudgy chocolate cookie base.
- A smooth vanilla cream cheese topping.
- A decorative spiral of melted chocolate transformed into a spiderweb.
Unlike traditional spiderweb cookies that rely entirely on royal icing, this version uses cheesecake filling for both flavor and decoration.
The creamy topping creates a striking white background, making the dark chocolate spiderweb easy to see.
These cookies are particularly appealing for Halloween because they resemble miniature cheesecakes but require no water bath, graham cracker crust, or complicated cheesecake baking process.
They are also convenient for parties. Each cookie is already an individual serving, so guests can enjoy one without slicing or plating a full cheesecake.
Why You’ll Love These Halloween Cheesecake Cookies
A Beautiful Halloween Presentation
The contrast between the dark chocolate cookie, white cheesecake center, and thin chocolate web creates a dramatic appearance.
Arrange several cookies on a black serving platter, and you’ve instantly created a spooky dessert display without spending hours decorating.
Three Delicious Textures
The cookie edges are gently set, the center remains soft, and the cheesecake topping adds a cool, creamy finish.
The chocolate spiderweb provides another layer of chocolate flavor without making the dessert overly rich.
No Complicated Decorating Skills
You don’t need professional piping experience. A small plastic bag and toothpick are enough to transform simple chocolate circles into a recognizable spiderweb.
Even slightly uneven webs look charming and appropriate for Halloween.
Perfect for Parties and Holiday Baking
If you’re collecting Halloween cookie recipes for a party, this dessert provides something different from standard sugar cookies and candy-covered brownies.
The components can also be prepared ahead of time, allowing you to decorate closer to your event.
Spiderweb Cheesecake Cookies Recipe at a Glance
| Detail | Information |
|---|---|
| Preparation Time | 30 minutes |
| Baking Time | 20–24 minutes for two batches |
| Cooling and Chilling | Approximately 40 minutes |
| Total Time | Approximately 1 hour 34 minutes |
| Yield | 16 cookies |
| Serving Size | 1 cookie |
| Oven Temperature | 350°F / 175°C |
| Difficulty | Easy to Moderate |
| Flavor | Rich chocolate, vanilla, tangy cheesecake |
| Texture | Soft, chewy, creamy |
| Best Occasion | Halloween parties and fall baking |
Ingredients for Spiderweb Cheesecake Cookies
You only need a handful of familiar baking ingredients to prepare this recipe.
For the most consistent results, measure flour and cocoa powder with a kitchen scale. Small measuring differences can change how much cookies spread and how well they hold the cheesecake filling.
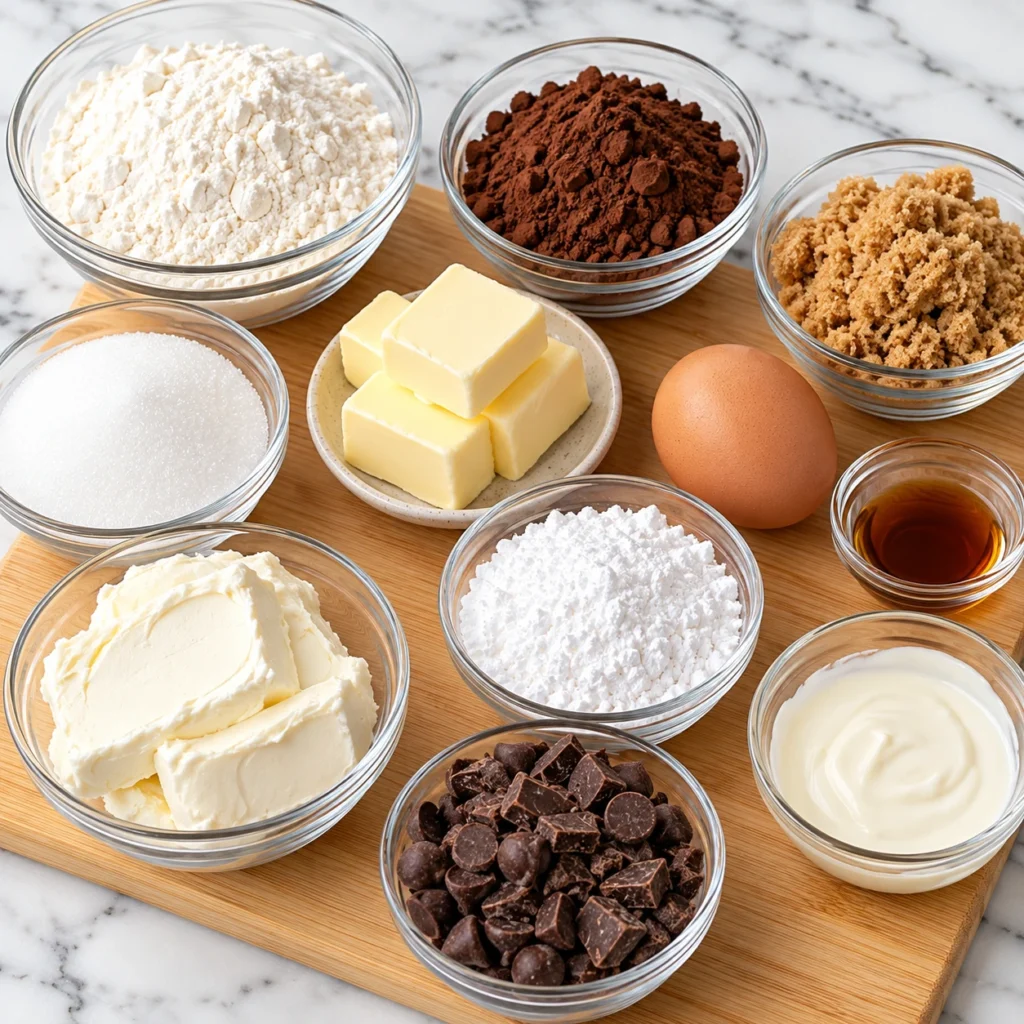
For the Chocolate Cookie Base
| Ingredient | Amount | Purpose |
|---|---|---|
| All-purpose flour | 1½ cups (190 g) | Provides cookie structure |
| Unsweetened Dutch-process cocoa powder | ½ cup (45 g) | Creates deep chocolate flavor |
| Baking soda | ½ teaspoon | Helps the cookies spread and become tender |
| Fine salt | ½ teaspoon | Balances sweetness |
| Unsalted butter, softened | ½ cup (113 g) | Adds richness and tenderness |
| Light brown sugar, packed | ¾ cup (150 g) | Creates chewy texture and moisture |
| Granulated sugar | ¼ cup (50 g) | Adds sweetness and supports spreading |
| Large egg | 1 | Binds the dough |
| Vanilla extract | 1 teaspoon | Enhances chocolate flavor |
Ingredient tip: Dutch-process cocoa offers a smooth, dark appearance. For even darker Halloween cookies, replace 2 tablespoons of the regular Dutch-process cocoa with black cocoa powder, keeping the total cocoa amount the same.
For the Cheesecake Filling
| Ingredient | Amount | Purpose |
|---|---|---|
| Full-fat brick cream cheese | 8 oz (226 g) | Creates the rich cheesecake center |
| Powdered sugar | ⅓ cup (40 g) | Sweetens and smooths the filling |
| Vanilla extract | 1 teaspoon | Adds classic cheesecake flavor |
| Heavy whipping cream | 1 tablespoon (15 ml) | Makes the filling easier to spread or pipe |
Use brick-style cream cheese rather than whipped cream cheese spread. Brick cream cheese provides a firmer consistency and helps the cheesecake centers hold their shape.
For the Chocolate Spiderweb Decoration
| Ingredient | Amount | Purpose |
|---|---|---|
| Semisweet chocolate | 2 oz (57 g) | Creates the dark spiderwebs |
| Neutral oil | ½ teaspoon, optional | Helps thin the melted chocolate |
Mini chocolate chips or candy eyes are optional decorations if you’d like to add little spiders to your finished cookies.
Essential Equipment
One of the best things about this recipe is that it doesn’t require specialty baking molds or advanced pastry tools.
You’ll need two mixing bowls, an electric hand mixer or stand mixer, measuring cups or a digital kitchen scale, parchment paper, baking sheets, a cookie scoop, and a cooling rack.
A small offset spatula or teaspoon helps spread the filling evenly. For the spiderwebs, use a disposable piping bag, a small zip-top bag, or a decorating bottle with a fine tip.
Keep wooden toothpicks or thin skewers nearby. These are essential for dragging the chocolate into its web pattern.
Equipment warning: Avoid using a piping bag with a large opening. Thick chocolate lines can spread together and obscure the spiderweb design.
How to Make Spiderweb Cheesecake Cookies
Follow these instructions in order for the best appearance and texture.
Step 1: Prepare the Oven and Baking Sheets
Preheat your oven to 350°F (175°C).
Line two large baking sheets with parchment paper. Position the oven rack in the center for even baking.
Measure all your ingredients before starting. Make sure the butter is softened but not melted, and let the cream cheese soften enough to mix smoothly.
If your kitchen is very warm, keep the butter slightly cool to help control cookie spreading.
Step 2: Mix the Dry Ingredients
In a medium mixing bowl, whisk together the flour, cocoa powder, baking soda, and salt.
Continue whisking until the cocoa powder is evenly distributed and no visible lumps remain.
This step is particularly important when using dark cocoa, which can form small clumps.
Combining the dry ingredients separately also helps prevent pockets of baking soda from remaining in the finished cookie dough.
Step 3: Cream the Butter and Sugars
In a large bowl, beat the softened butter, brown sugar, and granulated sugar together using an electric mixer.
Mix on medium speed for approximately 2 minutes, until the mixture looks creamy and evenly combined.
Add the egg and vanilla extract.
Beat again until smooth, scraping down the sides of the bowl as necessary.
The butter mixture should look cohesive rather than oily or separated.
Step 4: Make the Chocolate Cookie Dough
Add the dry ingredients to the butter mixture in two additions.
Mix on low speed just until the flour and cocoa disappear into the dough.
Avoid excessive mixing once the flour is added.
The finished dough should be soft, chocolatey, and thick enough to scoop.
If it feels unusually sticky or warm, refrigerate it for 10–15 minutes before shaping. This short rest can make the dough easier to handle.
Step 5: Scoop and Shape the Cookies
Divide the dough into 16 portions, approximately 2 tablespoons or 37–40 g each.
Roll the portions gently into balls.
Arrange eight cookie dough balls on each prepared baking sheet, leaving about 2 inches of space between them.
Do not flatten the balls excessively. Allow the oven to create the natural cookie shape.
Keeping the portions similar in size helps the cookies bake evenly.
Step 6: Bake Until the Edges Are Set
Bake one sheet at a time for 10–12 minutes.
The edges should look set, but the centers may still appear slightly soft and puffed.
Dark chocolate cookies can be difficult to judge by color, so use their texture rather than waiting for visible browning.
Remove the cookies from the oven and immediately press the center of each one gently with the back of a rounded tablespoon.
You want a shallow indentation that will hold the cheesecake topping without pushing all the way through the cookie.
Let the cookies rest on the baking sheet for 5 minutes before transferring them to a wire rack.
Repeat with the second batch.
Cool completely, approximately another 20 minutes, before adding the filling.
Expert failure warning: If you bake the cookies until their centers feel completely firm, they may become dry after cooling. Remove them when the edges are set and the centers are still slightly soft.
Step 7: Make the Creamy Cheesecake Filling
Place the softened cream cheese in a clean mixing bowl.
Beat with an electric mixer until smooth and free of visible lumps.
Add the powdered sugar and vanilla extract, then continue mixing until incorporated.
Add the tablespoon of heavy cream and beat briefly until the mixture is thick, creamy, and spreadable.
The correct consistency should resemble a sturdy cream cheese frosting.
It should hold a soft peak on a spoon rather than flow like a sauce.
If the filling is unusually loose, refrigerate it for 10 minutes before using.
Step 8: Fill the Chocolate Cookies
Once the chocolate cookies have cooled completely, add approximately 1 tablespoon of cheesecake filling to the indentation in each cookie.
Use the back of a teaspoon or a small offset spatula to smooth the filling into a neat circle.
Leave a visible chocolate border around the outside of each cookie.
This dark border makes the finished decoration more dramatic and helps keep the filling away from the edges.
Avoid piling the filling too high. A smooth, relatively flat surface is easier to decorate with chocolate spiderwebs.
Step 9: Melt the Chocolate
Place the semisweet chocolate in a microwave-safe bowl.
Microwave in short 15-second intervals, stirring thoroughly after each interval.
Stop heating when only a few tiny pieces remain, then stir until fully melted.
If necessary, add up to ½ teaspoon of neutral oil to improve its flowing consistency.
Allow the melted chocolate to cool briefly. It should remain fluid but should no longer feel hot.
Transfer it to a small piping bag or zip-top bag and snip a very tiny opening in one corner.
Step 10: Create the Spiderweb Pattern
Working with one cookie at a time, pipe a small chocolate circle in the center of the cheesecake topping.
Add two or three larger concentric circles around the first, keeping a small amount of space between each ring.
Take a clean toothpick and gently drag it from the center of the cookie toward the outer edge.
Repeat this movement six to eight times around the circle, wiping the toothpick clean between each stroke.
As the toothpick passes through the chocolate rings, it pulls them outward and creates the recognizable spiderweb shape.
Repeat for all remaining cookies.
Work while the chocolate is still soft so the lines move easily.
Step 11: Chill and Serve
Place the decorated cookies in the refrigerator for approximately 15 minutes, or until the topping is firmer and the chocolate has set.
Transfer them to a serving platter once chilled.
For the best texture, serve them cool rather than frozen.
The dark chocolate base, creamy cheesecake center, and decorative spiderweb should remain clearly visible.
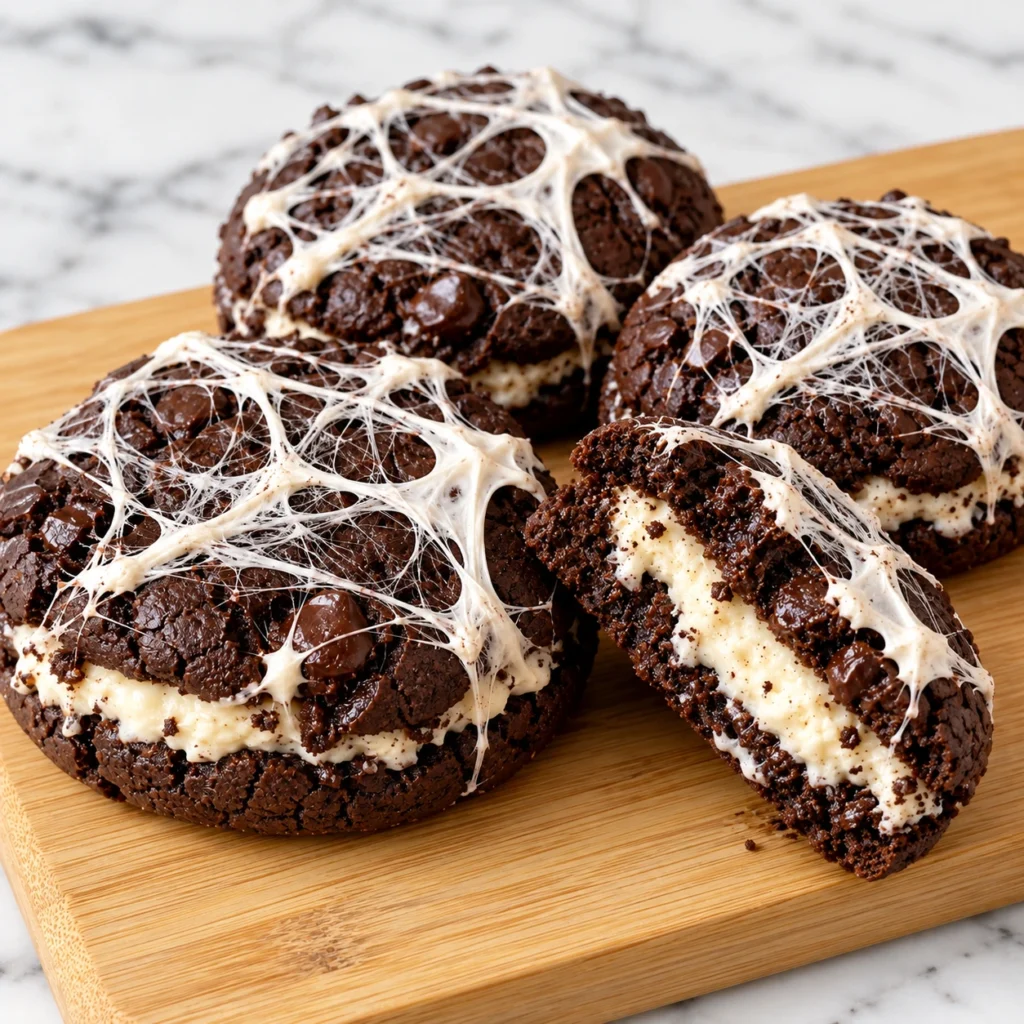
How to Make Perfect Chocolate Spiderweb Designs
The spiderweb is the most distinctive feature of these cookies, but the technique is surprisingly forgiving.
The trick is to work with thin, evenly spaced chocolate circles.
Start With a Smooth Cheesecake Surface
Before piping chocolate, smooth the cream cheese filling with the back of a small spoon.
A flat surface keeps your rings from becoming distorted.
Avoid rough peaks or deep ridges in the filling.
Pipe Thin Chocolate Circles
Create several circles rather than one thick spiral.
Leave a little white space between them so the web has a clear contrast.
If the chocolate comes out too quickly, make the piping-bag opening smaller.
Drag From the Center Outward
For a classic spiderweb, make each toothpick stroke in the same direction: center to edge.
Pulling back toward the center without cleaning the toothpick can smear the design.
Wipe the toothpick after every stroke for sharper lines.
Add a Tiny Chocolate Spider
For an extra Halloween touch, place a miniature chocolate chip near one side of the web and add short chocolate lines for legs.
Keep decorations small so the cheesecake and web remain the focus.
Expert Tips for the Best Spiderweb Cheesecake Cookies
Use Room-Temperature Cream Cheese
Cold cream cheese is more difficult to beat smoothly.
Small lumps can make the finished filling look uneven and interfere with chocolate decoration.
Let the cream cheese soften before mixing, but don’t leave it unrefrigerated for an extended period.
Measure Flour Carefully
Adding too much flour makes chocolate cookies dry and dense.
If you’re measuring by cups, loosen the flour first, spoon it into the cup, and level the surface.
A kitchen scale provides more consistent results.
Avoid Melted Butter
Butter that is too soft or partially melted can encourage excessive spreading.
Your butter should yield slightly when pressed but maintain its shape.
Never Frost Warm Cookies
This is one of the most important details in the recipe.
Warm cookies soften cream cheese filling, which can slide away from the center or become too runny to decorate.
Wait until the cookie bases have cooled completely.
Choose Good Chocolate
Semisweet chocolate provides enough contrast against the white filling without overwhelming the cheesecake flavor.
Dark chocolate also works, but it produces a less sweet decoration.
Keep the Decoration Simple
Three chocolate rings and six to eight outward strokes are often enough.
Adding too many rings or lines makes the design look crowded.
A clean, recognizable spiderweb is more attractive than excessive detail.
Common Mistakes and How to Fix Them
| Problem | Likely Cause | Solution |
|---|---|---|
| Cookies spread too much | Butter or dough was too warm | Chill dough 10–15 minutes before baking |
| Cookies are dry | Excess flour or overbaking | Weigh flour and reduce baking time |
| Cookies crack when indented | Centers cooled too much | Press gently while cookies are warm |
| Cheesecake filling is runny | Cream cheese was too soft or excess liquid was added | Chill filling briefly and avoid extra cream |
| Filling has lumps | Cream cheese was too cold | Soften and beat cream cheese before adding sugar |
| Chocolate lines are too thick | Piping opening is too large | Cut a smaller opening |
| Spiderweb design looks smeared | Toothpick wasn’t cleaned between strokes | Wipe after every outward stroke |
| Chocolate hardens before decorating | Decoration was delayed | Pipe and drag webs one cookie at a time |
The most common mistake is attempting to decorate every cookie with chocolate rings before creating the web patterns.
Instead, finish one complete web before moving to the next cookie. This keeps the chocolate workable and makes the decoration more consistent.
Delicious Spiderweb Cheesecake Cookie Variations
Once you’re comfortable with the original recipe, several variations can create different flavors and Halloween color combinations.
1. White Chocolate Spiderweb Cheesecake Cookies
Replace the semisweet decorating chocolate with 2 ounces of melted white chocolate.
For the clearest contrast, tint the cheesecake filling with a tiny amount of black gel food coloring or use the white chocolate lines directly over a dark chocolate topping.
Because white chocolate can be sensitive to overheating, melt it slowly and stir frequently.
This variation creates a beautiful high-contrast Halloween presentation.
Variation note: This is a suggested adaptation for future testing, not a physically verified batch.
2. Cookies-and-Cream Cheesecake Cookies
Fold 2 tablespoons of finely crushed chocolate sandwich cookies into the cheesecake topping.
Keep the crumbs very small so the filling can still be smoothed.
This produces a speckled cheesecake center with a familiar cookies-and-cream flavor.
For a cleaner spiderweb design, reserve a little plain cheesecake filling for the surface.
3. Pumpkin Spice Cheesecake Cookies
Add ¼ teaspoon of pumpkin pie spice to the cheesecake mixture.
The warm cinnamon and nutmeg flavors complement chocolate and make the cookies especially appropriate for fall gatherings.
For a stronger pumpkin character, a small quantity of pumpkin puree could be incorporated after reformulating the filling to maintain its thickness. Simply adding several tablespoons of puree to the original filling may make it too loose.
4. Extra-Dark Halloween Cookies
Replace 2 tablespoons of the regular cocoa powder with black cocoa powder.
The resulting cookie base will look nearly black, creating an even stronger contrast with the white cheesecake topping.
Black cocoa also adds a flavor reminiscent of dark chocolate sandwich cookies.
5. Orange and Black Halloween Cookies
Tint half the cheesecake filling with orange gel food coloring.
Leave the other half white.
Decorate both versions with dark chocolate spiderwebs and alternate them on a Halloween serving platter.
Use gel food coloring rather than large quantities of liquid coloring to avoid thinning the cream cheese mixture.
How to Store Spiderweb Cheesecake Cookies
Because the finished cookies contain a cream cheese topping, they should be refrigerated.
Refrigerator Storage
Place the cookies in a single layer inside an airtight container.
If stacking is unavoidable, wait until the chocolate has fully hardened, then separate layers with parchment paper and use a container that won’t crush the decorations.
Store in the refrigerator for up to 3–4 days.
Keep the refrigerator at 40°F (4°C) or below.
The cookies taste best when the topping is creamy and the chocolate decoration remains intact.
Can You Freeze Them?
For the best appearance and texture, freeze the undecorated chocolate cookie bases rather than the finished cheesecake-topped cookies.
Allow the baked cookies to cool completely, then arrange them in a freezer-safe container with parchment between layers.
Freeze for up to 2 months for best quality.
Thaw the cookies in their container before adding freshly prepared cheesecake filling and spiderweb decorations.
Freezing the assembled cookies is possible, but the cream cheese topping may become grainy or release moisture after thawing.
How Long Can They Sit Out at a Halloween Party?
Treat the finished cookies as a refrigerated dessert.
For food safety, don’t leave them at room temperature for more than 2 hours in total, or 1 hour when the temperature exceeds 90°F (32°C).
For longer parties, display a small batch and keep the remaining cookies chilled until needed.
Can You Make Spiderweb Cheesecake Cookies Ahead of Time?
Absolutely. This recipe works particularly well when you divide the preparation across two days.
One day before serving: Bake the chocolate cookies and let them cool completely. Store them in an airtight container.
Prepare the cheesecake filling separately and refrigerate it in a covered container.
On the day of serving: Give the cold filling a brief stir if necessary, then spread it over the cookies. Pipe the chocolate webs and refrigerate until set.
You can also fully assemble the cookies the night before serving, provided they remain properly refrigerated.
Making the components ahead is especially helpful when you’re preparing multiple Halloween desserts or organizing a large party.
How to Serve Spiderweb Cheesecake Cookies
These cookies are striking enough to become the centerpiece of a Halloween dessert table.
Arrange them on a black or dark purple platter to highlight the white cheesecake centers.
For a colorful display, surround them with orange-frosted cupcakes, chocolate-dipped strawberries, or pumpkin-shaped sugar cookies.
You can also place individual cookies in decorative cupcake liners for easier serving.
For adult gatherings, serve them with coffee, espresso, or hot chocolate. The slight bitterness of coffee pairs nicely with the rich chocolate and cheesecake.
For children, pair them with milk or a warm vanilla drink.
If you’re building a Halloween dessert board, alternate the cheesecake cookies with fresh fruit, chocolate-covered pretzels, and small candies.
Avoid covering the cookie tops with other treats, as pressure can damage the spiderweb decorations.
Frequently Asked Questions ( FAQ )
Can I make spiderweb cheesecake cookies without a piping bag?
Yes. A small zip-top sandwich bag works well.
Fill the bag with melted chocolate, push the chocolate toward one corner, and cut a tiny opening.
Pipe the concentric circles slowly and use a toothpick to create the web.
You can also use a fine-tip squeeze bottle.
Can I use regular cocoa powder instead of Dutch-process cocoa?
Yes, although the flavor, color, and spreading behavior may change slightly.
Dutch-process cocoa generally provides a darker, smoother chocolate flavor.
Natural cocoa powder is typically lighter and more acidic, so the results may not look identical.
For the most predictable outcome, use the cocoa specified in the ingredient list.
Can I use low-fat cream cheese?
Full-fat brick cream cheese is strongly recommended.
Reduced-fat versions often contain more moisture and may create a softer filling.
If you choose a lighter version, expect a less firm cheesecake center and consider testing a small batch before preparing cookies for a party.
Why are my cheesecake cookie centers too soft?
The filling may be warm, the cream cheese may have a high moisture content, or too much liquid may have been added.
Use full-fat brick cream cheese and measure the heavy cream carefully.
Refrigerating the finished cookies should help the filling become firmer.
Can I make these cookies gluten-free?
You can try replacing the all-purpose flour with a 1:1 gluten-free baking flour blend designed for cookies.
Choose a blend that already contains an appropriate binder, if required by its manufacturer.
The cookies may spread differently or have a slightly different texture, so this substitution should be tested before a special event.
Make sure the cocoa, chocolate, and other ingredients also meet your gluten-free requirements.
Do I need to bake the cheesecake filling?
No. This recipe uses a sweetened cream cheese topping rather than a baked cheesecake batter.
The chocolate cookie base is fully baked first, and the cheesecake mixture is added after the cookies cool.
This makes the recipe simpler than traditional baked cheesecake.
How can I make the spiderweb pattern more visible?
Start with a smooth, pale cheesecake topping.
Use dark chocolate, make thin rings, and drag a clean toothpick outward through each ring.
A darker cookie border also helps frame the design.
Avoid mixing chocolate into the cheesecake surface before piping, which would reduce the contrast.
Can kids help decorate these cookies?
Yes. The spiderweb technique is a fun baking activity for older children.
Adults should handle the hot oven, warm baking sheets, and melted chocolate.
Once the chocolate is cool enough to work with safely, children can help pipe circles and drag toothpicks through the designs.
The webs don’t need to be perfect to look festive.
Can I use store-bought chocolate cookies?
Yes, for a shortcut version.
Choose thick, sturdy chocolate cookies with relatively flat tops.
Spread a small amount of cheesecake filling on each one, then add the chocolate spiderweb decoration.
The texture will differ from the homemade version, but the decorating technique remains the same.
What makes these different from ordinary chocolate cookies?
The creamy cheesecake topping gives them a richer texture and tangy flavor that contrasts with the sweet, fudgy base.
The spiderweb pattern adds the Halloween presentation, making the cookies suitable for themed parties and special occasions.
Final Thoughts
Spiderweb cheesecake cookies combine everything that makes Halloween baking enjoyable: rich chocolate flavor, creamy cheesecake filling, and a decoration that looks impressive without requiring advanced pastry skills.
Their soft chocolate bases and smooth vanilla centers provide a satisfying contrast, while the delicate chocolate spiderwebs turn ordinary cookies into festive homemade treats.
The biggest secrets are measuring your ingredients carefully, avoiding overbaking, cooling the cookies completely, and making each spiderweb while the melted chocolate is still workable.
Whether you’re planning a Halloween party, preparing treats for friends, or looking for a fun weekend baking project, these cookies deserve a place on your fall dessert menu.
Try these spiderweb cheesecake cookies for your next Halloween celebration, and share your favorite decorating variation in the comments!
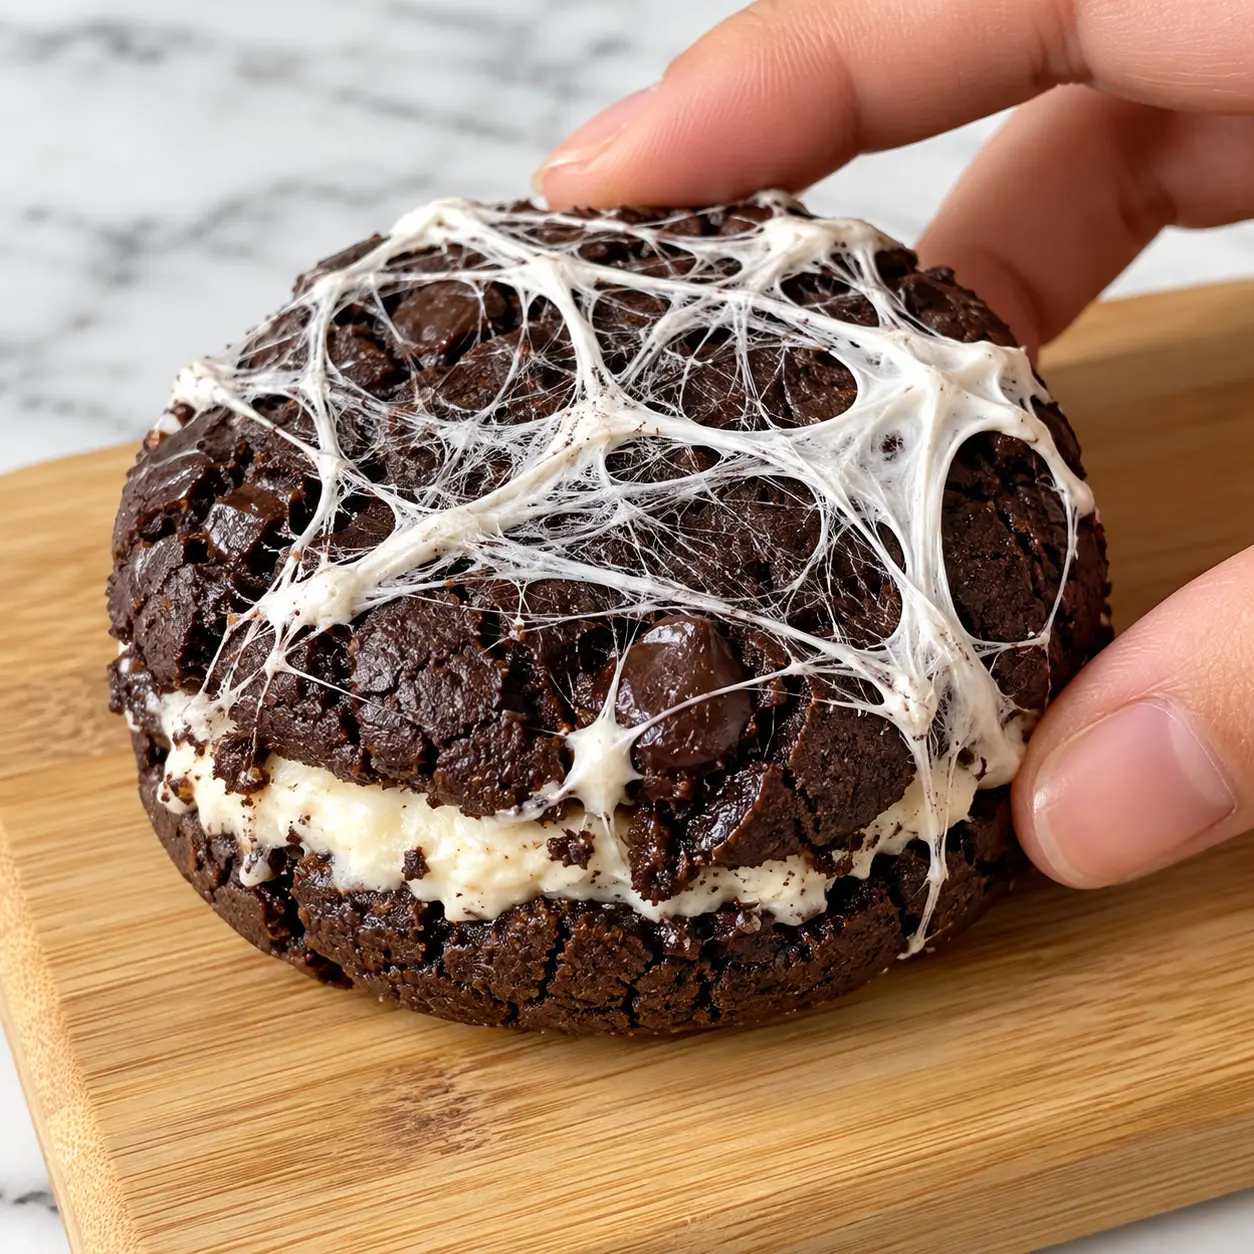
Spiderweb Cheesecake Cookies
Ingredients
Method
- Preheat the oven to 350°F (175°C). Line two large baking sheets with parchment paper and position the oven rack in the center.
- In a medium bowl, whisk together the flour, Dutch-process cocoa powder, baking soda, and salt until evenly combined.
- In a large mixing bowl, beat the softened butter, brown sugar, and granulated sugar for approximately 2 minutes until creamy. Add the egg and vanilla extract, then beat until smooth.
- Gradually add the dry ingredients to the butter mixture. Mix on low speed just until a soft chocolate cookie dough forms. Avoid overmixing. If the dough is unusually sticky, refrigerate for 10 to 15 minutes.
- Divide the dough into 16 equal portions, approximately 2 tablespoons each. Roll into balls and arrange eight portions per baking sheet, leaving about 2 inches between cookies.
- Bake one sheet at a time for 10 to 12 minutes, until the edges are set and the centers remain slightly soft. Immediately press a shallow indentation into each warm cookie with the back of a rounded tablespoon. Cool on the baking sheet for 5 minutes, then transfer to a wire rack. Repeat with the second batch and allow all cookies to cool completely.
- For the cheesecake filling, beat the softened cream cheese until smooth. Add powdered sugar and vanilla extract, then mix until creamy. Add heavy cream and beat briefly until the filling is thick and spreadable.
- Spoon approximately 1 tablespoon of cheesecake filling into the center of each completely cooled cookie. Smooth with a teaspoon or small offset spatula, leaving a visible chocolate border around the filling.
- Melt the semisweet chocolate in a microwave-safe bowl using 15-second intervals, stirring between each interval. Add the optional neutral oil if needed. Let the chocolate cool slightly, then transfer to a piping bag with a tiny opening.
- Working one cookie at a time, pipe three or four thin concentric chocolate circles onto the cheesecake filling. Use a clean toothpick to drag lines from the center outward six to eight times, creating a spiderweb. Wipe the toothpick between strokes. Repeat with the remaining cookies.
- Refrigerate the decorated cookies for approximately 15 minutes, or until the chocolate decorations are set. Serve chilled or cool. Store leftovers in an airtight container in the refrigerator for up to 3 to 4 days.