There’s something magical about biting into a warm, flavor-packed tortilla stuffed with perfectly seasoned chicken, sautéed peppers, and that signature fajita sauce recipe that Applebee’s has made famous. If you’ve ever searched for the perfect Applebees Chicken Fajita Rollup Recipe, you already know exactly what I’m talking about that sizzle, that smoke, that irresistible aroma that hits you the moment it arrives at the table. I still remember the first time I ordered it at my local Applebee’s and thought, I have to figure out how to make this at home.
For years, I tested different marinades, swapped pans, and even tried a flat-top griddle to mimic the Applebee’s Blackstone cooking method. After countless weeknight dinners and a few happy accidents, I finally nailed this Applebee’s Chicken Fajita Rollup Recipe and today, I’m sharing every detail with you.
Table of Contents
Whether you’re a longtime fan of the restaurant or just looking for a bold, satisfying weeknight dinner, this chicken fajita rollup recipe is worth every minute. It’s better than takeout, ready in under 40 minutes, and completely customizable for your family’s tastes.
Quick Recipe Overview
| Recipe Details | Information |
| Recipe Name | Applebee’s Chicken Fajita Rollup Recipe |
| Prep Time | 15 minutes |
| Cook Time | 20 minutes |
| Total Time | 35 minutes |
| Servings | 4 rollups |
| Calories | ~520 per rollup |
| Difficulty | Easy |
Why You’ll Love This Applebees Chicken Fajita Rollup Recipe
- Restaurant-quality flavor at home the smoky, citrusy marinade makes this chicken fajita rollup applebee’s recipe taste just like the real thing
- Ready in 35 minutes faster than delivery, and far more satisfying
- Uses simple pantry staples no exotic ingredients required
- Fully customizable swap proteins, adjust heat, or make it gluten-free
- Kid-friendly and crowd-pleasing great for family dinners or casual entertaining
- Perfectly portioned each rollup is a complete, satisfying meal on its own
- Great for meal prep fillings can be made ahead and assembled fresh
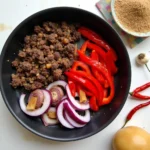
Ingredients
| Ingredient | Amount | Notes |
| Boneless skinless chicken breasts | 1.5 lbs | Sliced thin against the grain |
| Large flour tortillas (10-inch) | 4 | Burrito-size for easy rolling |
| Red bell pepper | 1 large | Sliced into thin strips |
| Green bell pepper | 1 large | Sliced into thin strips |
| Yellow onion | 1 medium | Sliced into half-moons |
| Olive oil | 3 tbsp | Divided |
| Shredded Mexican cheese blend | 1 cup | Or Monterey Jack |
| Sour cream | ½ cup | For serving |
| Fresh cilantro | ¼ cup | Optional, for garnish |
| Lime | 1 | Juice + wedges for serving |
| Fajita Marinade / Sauce | ||
| Chili powder | 2 tsp | Ancho chili powder preferred |
| Cumin | 1 tsp | |
| Garlic powder | 1 tsp | |
| Smoked paprika | 1 tsp | Key for that Applebee’s Blackstone smokiness |
| Onion powder | ½ tsp | |
| Oregano | ½ tsp | Dried |
| Salt | 1 tsp | |
| Black pepper | ½ tsp | |
| Lime juice | 2 tbsp | Freshly squeezed |
| Soy sauce | 1 tbsp | Adds depth and umami |
| Olive oil | 2 tbsp | For the marinade |
| Honey | 1 tsp | Balances the heat |
Ingredient Notes
Chicken Breasts
Thin-sliced chicken breasts cook faster and more evenly, giving you that tender, juicy bite every time. If your breasts are thick, pound them to about ½ inch or slice them horizontally. Thighs work too — they’re fattier and even more flavorful.
Flour Tortillas
Go for the large burrito-size (10-inch) flour tortillas. They’re pliable, hold up to filling without tearing, and toast beautifully in a dry skillet. Avoid corn tortillas here they’ll crack when rolled.
Smoked Paprika
This is the secret weapon that mimics the Applebee’s Blackstone grill flavor. Regular paprika won’t give you that deep, smoky undertone. Smoked paprika is widely available at most grocery stores.
Cheese
A Mexican blend melts quickly and evenly. For a sharper flavor, use freshly shredded Pepper Jack. Pre-shredded bags have anti-caking agents that can affect melt quality, so shredding your own makes a noticeable difference.
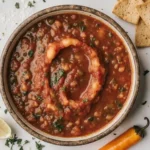
Fajita Sauce
The fajita sauce recipe here doubles as both a marinade and a drizzle. Set aside 2–3 tablespoons before marinating the chicken to use as a finishing sauce at the table.
Soy Sauce
Don’t skip this it adds a salty, savory depth that rounds out the chicken fajita rollup marinade beautifully. Use tamari for a gluten-free option.
Kitchen Tools
| Tool | Why You Need It |
| Large cast iron skillet or heavy pan | Achieves the high heat needed for proper char on peppers and chicken |
| Tongs | For safely flipping chicken and tossing vegetables |
| Cutting board | Large surface for slicing chicken and veggies evenly |
| Sharp chef’s knife | Thin, even slices for quick, uniform cooking |
| Mixing bowl | For combining the fajita marinade |
| Flat griddle or second pan | Optional, for toasting the rollups after assembly |
| Zip-lock bag or shallow dish | For marinating the chicken |
| Meat thermometer | Ensures chicken reaches 165°F safely |
How to Make Applebee’s Chicken Fajita Rollup Recipe
Step 1: Make the Fajita Marinade
In a small mixing bowl, combine chili powder, cumin, garlic powder, smoked paprika, onion powder, oregano, salt, black pepper, lime juice, soy sauce, olive oil, and honey. Whisk until smooth. This is the fajita sauce recipe that makes the whole dish sing.
Set aside 2–3 tablespoons of the marinade in a separate small bowl you’ll use this as a finishing drizzle or dipping sauce. Add the sliced chicken to a zip-lock bag or shallow dish and pour the remaining marinade over it. Toss to coat thoroughly. Let the chicken marinate for at least 15 minutes at room temperature, or up to 4 hours in the refrigerator for deeper flavor.
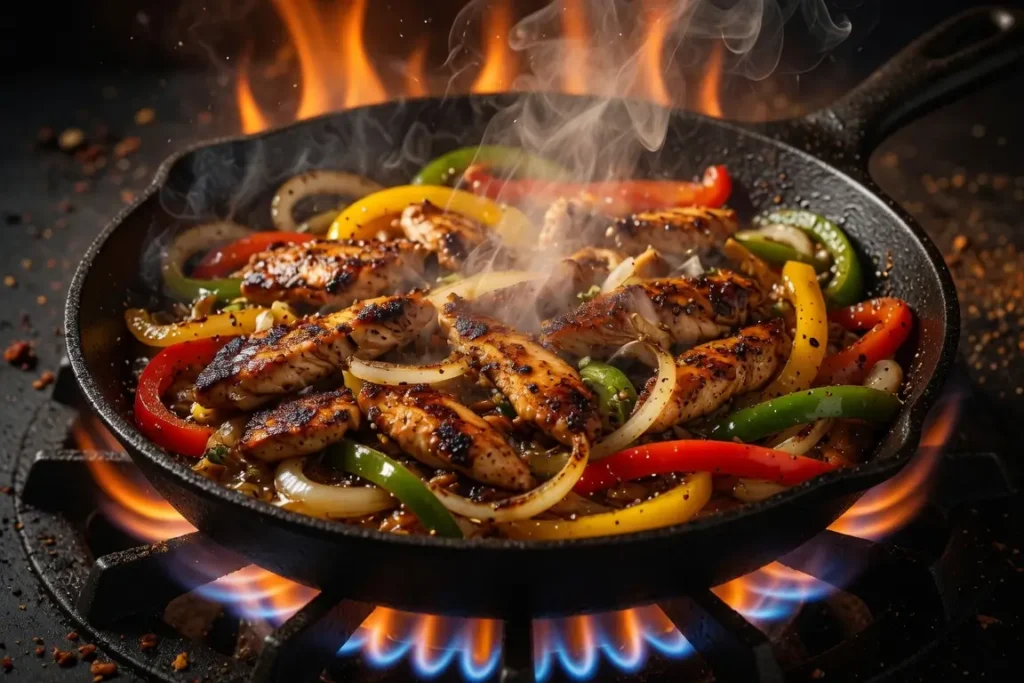
Step 2: Cook the Chicken
Heat 1.5 tablespoons of olive oil in a large cast iron skillet over medium-high heat until shimmering. Remove the chicken from the marinade, letting any excess drip off, and add it to the pan in a single layer. Do not crowd the pan cook in batches if needed.
Sear the chicken for 4–5 minutes without moving it, then flip and cook for another 3–4 minutes until cooked through (internal temperature of 165°F). The chicken should have a beautiful golden-brown char on the outside. Transfer to a cutting board and let it rest for 3 minutes before slicing into strips.
Step 3: Sauté the Peppers and Onions
In the same skillet (don’t wipe it out those fond bits are gold), add the remaining 1.5 tablespoons of olive oil over medium-high heat. Add the sliced onions first and cook for 2 minutes until they begin to soften. Add the red and green bell peppers and toss everything together.
Cook the pepper-onion mixture for 5–6 minutes, stirring occasionally, until the vegetables are tender with slight caramelized edges. Season lightly with salt and pepper. Squeeze a bit of lime juice over the top and toss.
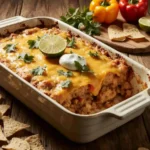
Step 4: Assemble the Rollups
Warm your flour tortillas one at a time in a dry skillet over medium heat for about 30 seconds per side, or wrap them in a damp paper towel and microwave for 20–30 seconds. Warm tortillas are flexible and won’t crack when rolled.
Lay a warm tortilla flat. Layer with a generous handful of shredded cheese, followed by sliced chicken strips, and a scoop of sautéed peppers and onions. Drizzle with a little of your reserved fajita sauce recipe and add a dollop of sour cream if desired. Fold in the sides and roll up tightly from the bottom, like a burrito.
Step 5: Toast the Rollup (Optional but Recommended)
Place the assembled chicken fajita rollup seam-side down in a dry skillet or flat griddle over medium heat. Press gently with a spatula and cook for 1–2 minutes per side until golden and lightly crisp. This seals the rollup and adds a satisfying crunch to the exterior exactly what makes the chicken fajita rollup applebee’s recipe so crave-worthy. Slice in half diagonally and serve immediately.
Expert Tips
Rest the chicken before slicing. Even just 3 minutes of resting time lets the juices redistribute. Cut too soon and all that flavor runs onto the board instead of staying in the meat.
Get your pan truly hot. A properly preheated skillet is the difference between a pale, steamed chicken strip and a deeply seared, caramelized one. Wait until the oil shimmers before adding anything.
Don’t stir the peppers constantly. Let them sit for 90 seconds at a time to get those slightly charred edges. Constant stirring steams instead of sears.
Reserve some marinade before marinating. Once raw chicken touches the marinade, you can’t use the rest for drizzling. Always pull some aside first.
Warm your tortillas. Cold, stiff tortillas crack and tear. Thirty seconds in a dry skillet changes everything pliable, soft, and slightly toasty.
Diagonal cut at the end. Cutting the rollup in half at a 45-degree angle improves presentation and makes it easier to eat. It also shows off the beautiful filling inside.
Recipe Variations
Spicy Version
Add 1 teaspoon of cayenne pepper to the marinade and include sliced jalapeños with the bell peppers. Top with a drizzle of sriracha or your favorite hot sauce.
Gluten-Free Version
Use gluten-free large tortillas (several brands are available at most stores) and replace the soy sauce in the marinade with tamari or coconut aminos. All other ingredients are naturally gluten-free.
Dairy-Free Version
Omit the cheese and sour cream. Instead, add sliced avocado or a scoop of guacamole for creaminess. A squeeze of extra lime juice brightens everything up.
Shrimp Version
Replace the chicken with large shrimp (16/20 count). Use the same marinade but reduce cooking time shrimp cook in about 2 minutes per side. Don’t overcook or they’ll turn rubbery.
Vegetarian Version
Skip the chicken and double the peppers. Add black beans and corn for extra protein and substance. Portobello mushroom strips are also excellent here they take on the marinade beautifully.
What to Serve With Applebee’s Chicken Fajita Rollup Recipe
- Mexican rice seasoned tomato rice is the classic pairing
- Refried beans creamy and hearty alongside the rollup
- Fresh guacamole and tortilla chips a crowd-pleasing starter
- Street corn salad (Elote) sweet, smoky corn with cotija cheese
- Simple green salad dressed with lime vinaigrette to lighten the meal
- Mango salsa sweet heat that complements the smoky chicken
- Black bean soup warming and protein-packed
- Queso dip because more cheese is always the answer
Storage & Freezing
Refrigerator Store cooked chicken and sautéed vegetables separately from tortillas in airtight containers. They’ll keep for up to 4 days. Assemble rollups fresh to avoid soggy tortillas.
Freezer The cooked chicken and pepper mixture freeze well for up to 3 months. Portion into freezer bags, press out the air, and label with the date. Fully assembled rollups can be frozen but the tortilla may become slightly soft upon reheating.
Reheating Reheat chicken and veggies in a skillet over medium heat with a splash of water or chicken broth to prevent drying. Microwave works in a pinch use 50% power and cover with a damp paper towel. If reheating a whole assembled rollup, a skillet over medium-low heat for 3–4 minutes per side works best to maintain texture.
Common Mistakes
Overcrowding the pan When too much chicken is added at once, the pan temperature drops and the chicken steams instead of sears. You lose that caramelized crust that makes the chicken fajita rollup so flavorful. Always cook in batches if needed.
Skipping the marinade time Even 15 minutes makes a difference, but 1–2 hours is ideal. The acid from lime juice and the salt begin tenderizing the chicken while the spices penetrate the surface. Rushing this step results in less flavorful meat.
Using wet tortillas If you microwave tortillas without a damp towel covering them, they dry out. If you over-steam them, they get soggy and tear. Thirty seconds in a dry skillet is the most reliable method quick, even, and slightly toasty.
Not resting the chicken Cutting into chicken immediately after cooking forces all the moisture out. Three minutes of resting time is all you need, and it makes a significant difference in juiciness.
Rolling too loosely A loose rollup falls apart when you pick it up. Keep tension as you roll, fold in the sides firmly, and finish seam-side down in the pan to seal it shut before serving.
Nutrition Information
| Nutrient | Per Serving (1 rollup) |
| Calories | ~520 kcal |
| Protein | 38g |
| Carbs | 42g |
| Fat | 21g |
| Saturated Fat | 7g |
| Fiber | 4g |
| Sugar | 6g |
| Sodium | 980mg |
Nutrition values are estimates based on standard ingredients. Toppings like sour cream and extra cheese will increase totals.
Frequently Asked Questions
Can I make this recipe ahead of time?
Yes! The chicken and vegetables can be cooked up to 3 days in advance and stored separately in the refrigerator. When ready to serve, reheat in a skillet and assemble the rollups fresh. This makes it perfect for meal prep.
Can I freeze the chicken fajita filling?
Absolutely. The cooked chicken and pepper mixture freezes beautifully for up to 3 months. Let it cool completely, then freeze in labeled zip-lock bags. Thaw overnight in the refrigerator before reheating.
What makes this taste like the Applebee’s version?
The combination of smoked paprika, soy sauce, and lime juice in the fajita sauce recipe closely mimics the smoky, tangy flavor profile of the restaurant’s signature chicken fajita rollup. Toasting the assembled rollup in a dry skillet also replicates the slight crispness of the restaurant preparation.
Can I use chicken thighs instead of breasts?
Yes, and many cooks actually prefer thighs for their richer flavor and higher fat content. Boneless, skinless thighs work perfectly with the same marinade and cooking method just add 2–3 minutes to the cooking time.
What if I don’t have a cast iron skillet?
A heavy-bottomed stainless steel pan or even a good quality non-stick skillet will work. The key is high heat retention. Avoid thin pans that lose temperature when food is added.
How spicy is this recipe?
As written, this applebees chicken fajita rollup recipe is mild to medium. The chili powder adds warmth without sharp heat. For more spice, add cayenne or jalapeños. For a milder version, reduce chili powder to 1 teaspoon.
Can I make this without the soy sauce?
Yes. Substitute with tamari for a gluten-free option, or use Worcestershire sauce for a similar depth. If you omit it entirely, add a pinch more salt to compensate.
Can I use store-bought fajita seasoning instead of making my own?
You can, though homemade gives you better control over salt and heat levels. If using store-bought, use about 2 tablespoons of seasoning in place of the individual spices, and still add lime juice, olive oil, and a splash of soy sauce for the marinade.
Why did my peppers turn mushy?
Mushy peppers result from overcrowding the pan or cooking on too low a heat. Use high heat, don’t add too many vegetables at once, and avoid stirring constantly. You want them to have a slight bite and some charred edges not fully soft.
Is this the same as the chicken fajita rollup applebee’s recipe served at the restaurant?
This is a closely inspired homemade version that captures the same flavor profile and presentation. While the exact proprietary recipe isn’t public, this copycat version nails the key elements: smoky marinated chicken, sautéed peppers and onions, melted cheese, and a toasted flour tortilla.
Final Thoughts
Making the applebee’s chicken fajita rollup recipe at home is one of those kitchen wins that feels both easy and impressive. You get bold, smoky flavors, tender juicy chicken, and that satisfying bite of crisped tortilla all in under 40 minutes. Once you try it, this is the kind of recipe that earns a permanent spot in your weeknight rotation.
Whether you stick to the classic version or riff on it with shrimp, extra heat, or a gluten-free tortilla, the core of this recipe is versatile and forgiving. The fajita sauce recipe alone is worth saving for grilled meats, tacos, and so much more.
Give it a try this week and when you do, I’d love to hear how it turned out; Leave a comment below, rate the recipe, or tag a photo. There’s nothing more rewarding than seeing someone else fall in love with a dish that’s become a staple in my home.

Applebees Chicken Fajita Rollup Recipe
Ingredients
Method
- In a medium bowl, whisk together the water, soy sauce, sugar, salt, white vinegar, chipotle pepper, hickory smoke, garlic powder, onion powder, and black pepper until the sugar dissolves. Add the chicken breasts, cover, and chill in the refrigerator for 2 hours (do not exceed 2 hours).
- While the chicken marinates, combine all the Mexi-Ranch Dipping Sauce ingredients in a small bowl. Stir well, cover, and refrigerate to let the flavors develop.
- In another bowl, mix the diced tomatoes, red onion, jalapeno, lime juice, fresh cilantro, salt, and pepper to create the Pico de Gallo. Cover and refrigerate.
- Preheat a grill or grill pan to medium-high heat. Remove the chicken from the marinade and discard the liquid. Grill the chicken for 5-7 minutes per side, or until the internal temperature reaches 165°F. Let the chicken rest for 5 minutes, then slice it into bite-sized chunks.
- Mix the cheddar and Monterey Jack cheeses together. Place a large skillet over low heat. Place one flour tortilla in the skillet and sprinkle about 1/2 cup of the mixed cheese evenly over the top.
- Once the cheese begins to melt, remove the tortilla from the skillet and place it on a clean cutting board. Layer 1 cup of shredded lettuce, 3 tablespoons of the drained Pico de Gallo, and a quarter of the chopped grilled chicken in the center.
- Fold the sides of the tortilla inward slightly, then roll it up tightly from the bottom. Slice the rollup diagonally and serve immediately with a side of the Mexi-Ranch dipping sauce. Repeat for the remaining wraps.