Classic Best Sugar Cookies Icing deserve icing that sets smooth, dries with a clean sheen, and actually tastes good. This simple icing hits all those marks without needing meringue powder or special tools. It’s easy to mix, easy to color, and it dries firm enough to stack while staying pleasantly soft to bite.
Whether you’re decorating with kids or piping delicate designs, this recipe gives you control. You’ll get predictable results, bright colors, and a finish that makes your cookies look bakery-level.
Table of Contents
Why This Recipe Works (Best Sugar Cookies Icing)
This icing is a basic confectioners’ sugar icing balanced with milk and light corn syrup. The sugar provides sweetness and structure, while the corn syrup gives a smooth, glossy finish and helps the icing dry without cracking.
A small amount of vanilla or almond extract adds flavor without overpowering the cookie.
Adjusting the liquid creates two useful consistencies: thick for outlining and details, and slightly thinner for flooding. That control makes it beginner-friendly but still sharp enough for advanced designs. It also hardens enough for stacking and packaging, which is a must during the holidays.
What You’ll Need
- 2 cups (240g) confectioners’ sugar (powdered sugar)
- 2–3 tablespoons milk (whole or 2%; use water for dairy-free)
- 2 tablespoons light corn syrup (for shine and smooth set)
- 1 teaspoon pure vanilla extract (or 1/2 teaspoon almond extract)
- Pinch of fine salt (balances sweetness)
- Gel food coloring (optional, for vibrant colors without thinning)
- Piping bags or zip-top bags with small snips; tips like #2 or #3 if using piping tips
- Toothpicks or a scribe tool for moving icing and popping bubbles
How to Make Best Sugar Cookies Icing

- Whisk the base: In a medium bowl, whisk confectioners’ sugar, 2 tablespoons milk, corn syrup, vanilla (or almond), and a small pinch of salt.
Mix until smooth. If it’s too thick to stir, add milk by the teaspoon.
- Check “ribbon” consistency: Lift the whisk and let icing fall back into the bowl. For general use, aim for a slow ribbon that disappears in about 10–12 seconds.
This is a good flooding consistency for smooth coverage.
- Make two consistencies (optional but ideal): Divide the icing. Keep one portion thick (15–20 second ribbon) for outlining and details by adding a bit more sugar. Thin the other portion to 10–12 seconds with drops of milk for flooding.
- Color the icing: Add gel food coloring a little at a time.
Gel keeps the icing stable. Stir fully to avoid streaks. If coloring several shades, split into small bowls and cover each with plastic wrap touching the surface to prevent crusting.
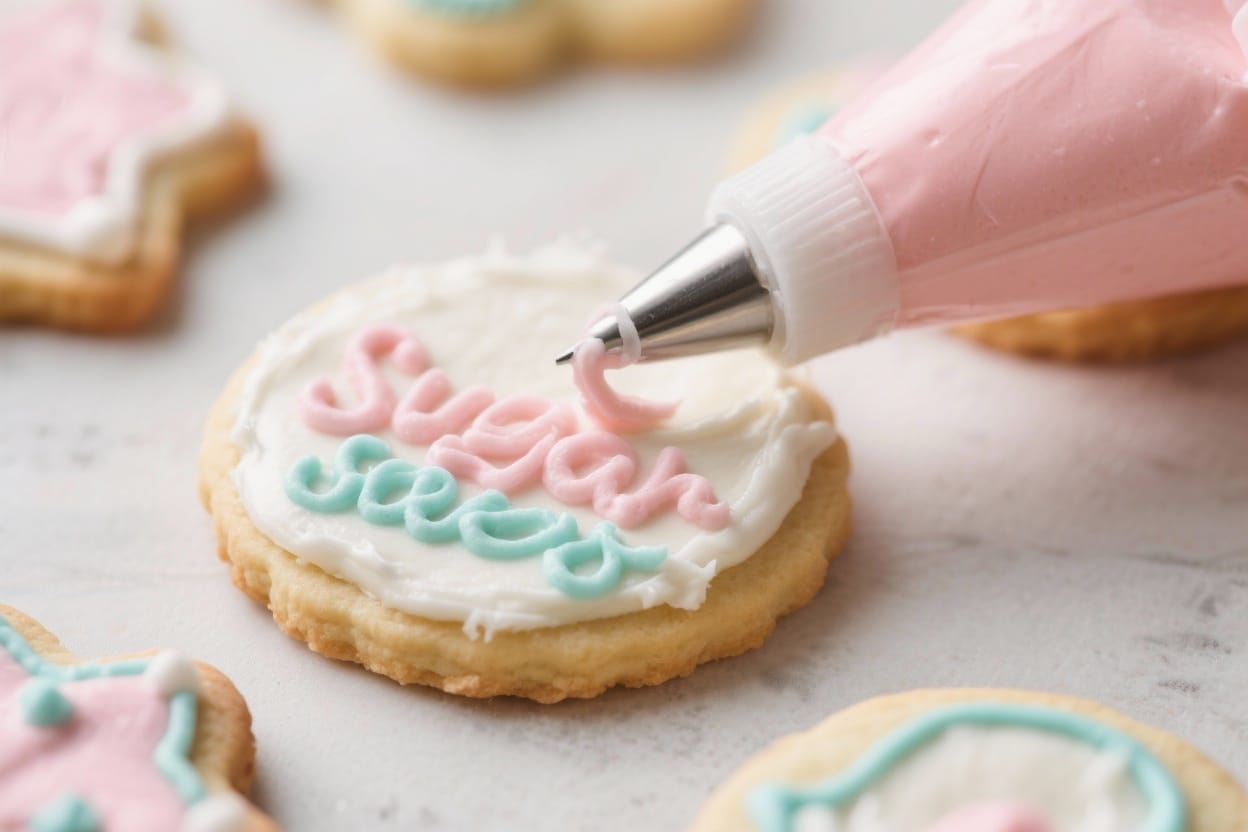
- Bag it up: Transfer icing to piping bags.
For outlining, use a small round tip or snip a tiny opening. For flooding, snip slightly larger. Keep a damp paper towel over open tips to prevent drying while you work.
- Outline first: Pipe a clean border around the cookie’s edge.
This creates a wall to hold flood icing. Let it sit 2–3 minutes to set a little.
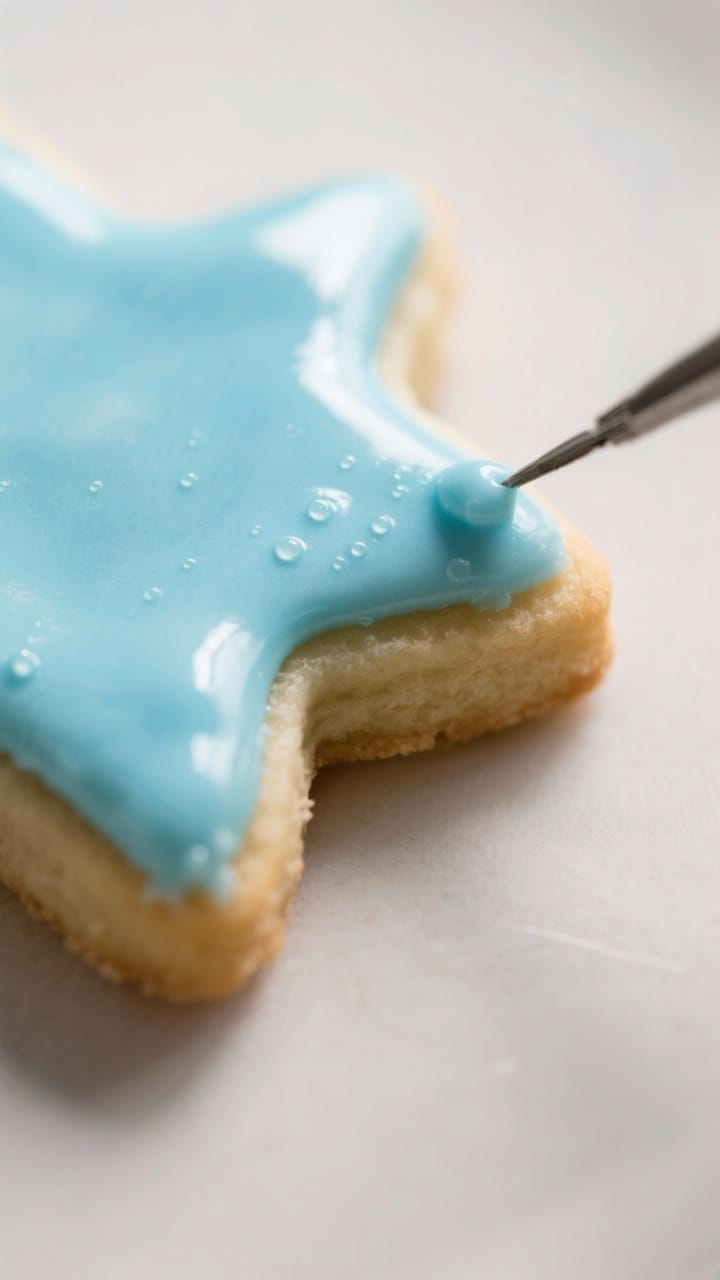
- Flood the cookie: Fill the outlined area with thinner icing. Use a toothpick or scribe tool to nudge icing into corners and pop bubbles.
Work quickly for a smooth finish.
- Add details: For layered designs, let the base dry 20–30 minutes before adding piping on top. For wet-on-wet effects (like dots or hearts), add details immediately while the base is still wet.
- Dry completely: Let cookies dry uncovered at room temperature until set. Surface dry in about 2–4 hours; fully dry for stacking in 8–12 hours, depending on humidity.
How to Store Best Sugar Cookies Icing
- Unused icing: Press plastic wrap directly onto the surface and refrigerate for up to 1 week. Stir well before using.
If too thick, add a few drops of milk; if too thin, add confectioners’ sugar.
- Decorated cookies: After icing is fully dry, store in an airtight container at room temperature for 4–5 days. Place parchment between layers if stacking.
- Freeze: Freeze decorated cookies in a hard-sided container for up to 2 months. Thaw in the closed container at room temp to avoid condensation ruining the finish.

Why This is Good for You
This icing is about control and simplicity.
It uses pantry staples, so there’s no hunting down specialty ingredients. Because you can adjust the thickness easily, you get fewer mistakes and cleaner lines.
It also tastes like a classic bakery sugar cookie—sweet, a little glossy, and lightly flavored. And since it dries firm, you can package cookies for gifts without smudging, which saves time and stress during busy seasons.
Pitfalls to Watch Out For
- Over-thinning: A single extra teaspoon of milk can make flooding runny.
Add liquid very gradually.
- Not sifting sugar: Lumps cause clogs and bumpy icing. If your sugar looks clumpy, sift first.
- Humidity: High humidity slows drying and can dull the shine. Allow extra time and avoid covering while drying.
- Using liquid food color: It can thin the icing too much.
Stick to gel or powder colors.
- Rushing layers: Piping details before the base sets leads to bleeding or sinking. Give it a little time.
- Thick outlines, thin floods: If the outline is much thicker than the flood, you’ll see ridges. Keep consistencies close enough that they settle together.
Alternatives
- Dairy-free: Replace milk with water or unsweetened almond milk.
Same measurements, add liquid slowly.
- No corn syrup: Use 1–2 teaspoons of honey or maple syrup for similar shine. The flavor will be a touch different and drying may be slower.
- Lemon glaze: Swap milk for fresh lemon juice and use lemon extract. Great for spring or tea cookies.
- Vanilla bean icing: Use vanilla bean paste instead of extract for tiny specks and deeper flavor.
- Royal icing style: If you want a rock-hard finish, use meringue powder icing.
It’s sturdier for intricate piping but less soft to bite.
How long does this icing take to dry?
It usually surface-dries in 2–4 hours and fully dries in 8–12 hours at room temperature. In humid environments, plan for 12–24 hours before stacking.
Can I make the icing ahead of time?
Yes. Store it in the fridge with plastic wrap pressed onto the surface for up to a week.
Bring to room temperature and stir well before using. Adjust with a drop or two of milk if it stiffens.
Why is my icing dull, not shiny?
It might be due to low corn syrup, over-mixing with air, or high humidity. Ensure you included the corn syrup, avoid whipping, and let cookies dry uncovered in a cool, dry spot.
How do I prevent color bleeding?
Use gel colors, avoid overly thin icing, let base layers set 20–30 minutes before adding dark details, and dry cookies in a low-humidity room.
Storing before they’re fully dry can also cause bleeding.
What piping tips should I use?
Small round tips like #2 or #3 work for most outlining and flooding. For fine details, use #1. If you don’t have tips, snip a tiny hole in a piping bag or zip-top bag.
Can I flavor the icing differently?
Absolutely.
Try almond, lemon, orange, or vanilla bean paste. Start with 1/2 teaspoon for strong extracts like almond and adjust to taste.
Is this icing safe for mailing cookies?
Yes, once fully dry. The finish is firm enough to stack and wrap.
Layer cookies with parchment in a snug tin or box and cushion the package well.
In Conclusion
This is the best sugar cookie icing for decorating because it’s simple, shiny, and easy to customize. With just a few pantry ingredients, you can make smooth outlines, clean floods, and crisp details that dry reliably. Keep an eye on consistency, use gel colors, and give the cookies time to set.
You’ll end up with beautiful, delicious cookies that hold up to gifting, shipping, and plenty of compliments.

Best Sugar Cookie Icing Recipe for Decorating – Smooth, Shiny, and Easy
Ingredients
Method
- Whisk the base: In a medium bowl, whisk confectioners’ sugar, 2 tablespoons milk, corn syrup, vanilla (or almond), and a small pinch of salt.Mix until smooth. If it’s too thick to stir, add milk by the teaspoon.
- Check “ribbon” consistency: Lift the whisk and let icing fall back into the bowl. For general use, aim for a slow ribbon that disappears in about 10–12 seconds.This is a good flooding consistency for smooth coverage.
- Make two consistencies (optional but ideal): Divide the icing. Keep one portion thick (15–20 second ribbon) for outlining and details by adding a bit more sugar. Thin the other portion to 10–12 seconds with drops of milk for flooding.
- Color the icing: Add gel food coloring a little at a time.Gel keeps the icing stable. Stir fully to avoid streaks. If coloring several shades, split into small bowls and cover each with plastic wrap touching the surface to prevent crusting.
- Bag it up: Transfer icing to piping bags.For outlining, use a small round tip or snip a tiny opening. For flooding, snip slightly larger. Keep a damp paper towel over open tips to prevent drying while you work.
- Outline first: Pipe a clean border around the cookie’s edge.This creates a wall to hold flood icing. Let it sit 2–3 minutes to set a little.
- Flood the cookie: Fill the outlined area with thinner icing. Use a toothpick or scribe tool to nudge icing into corners and pop bubbles.Work quickly for a smooth finish.
- Add details: For layered designs, let the base dry 20–30 minutes before adding piping on top. For wet-on-wet effects (like dots or hearts), add details immediately while the base is still wet.
- Dry completely: Let cookies dry uncovered at room temperature until set. Surface dry in about 2–4 hours; fully dry for stacking in 8–12 hours, depending on humidity.