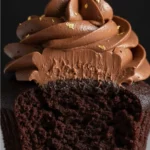
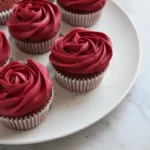
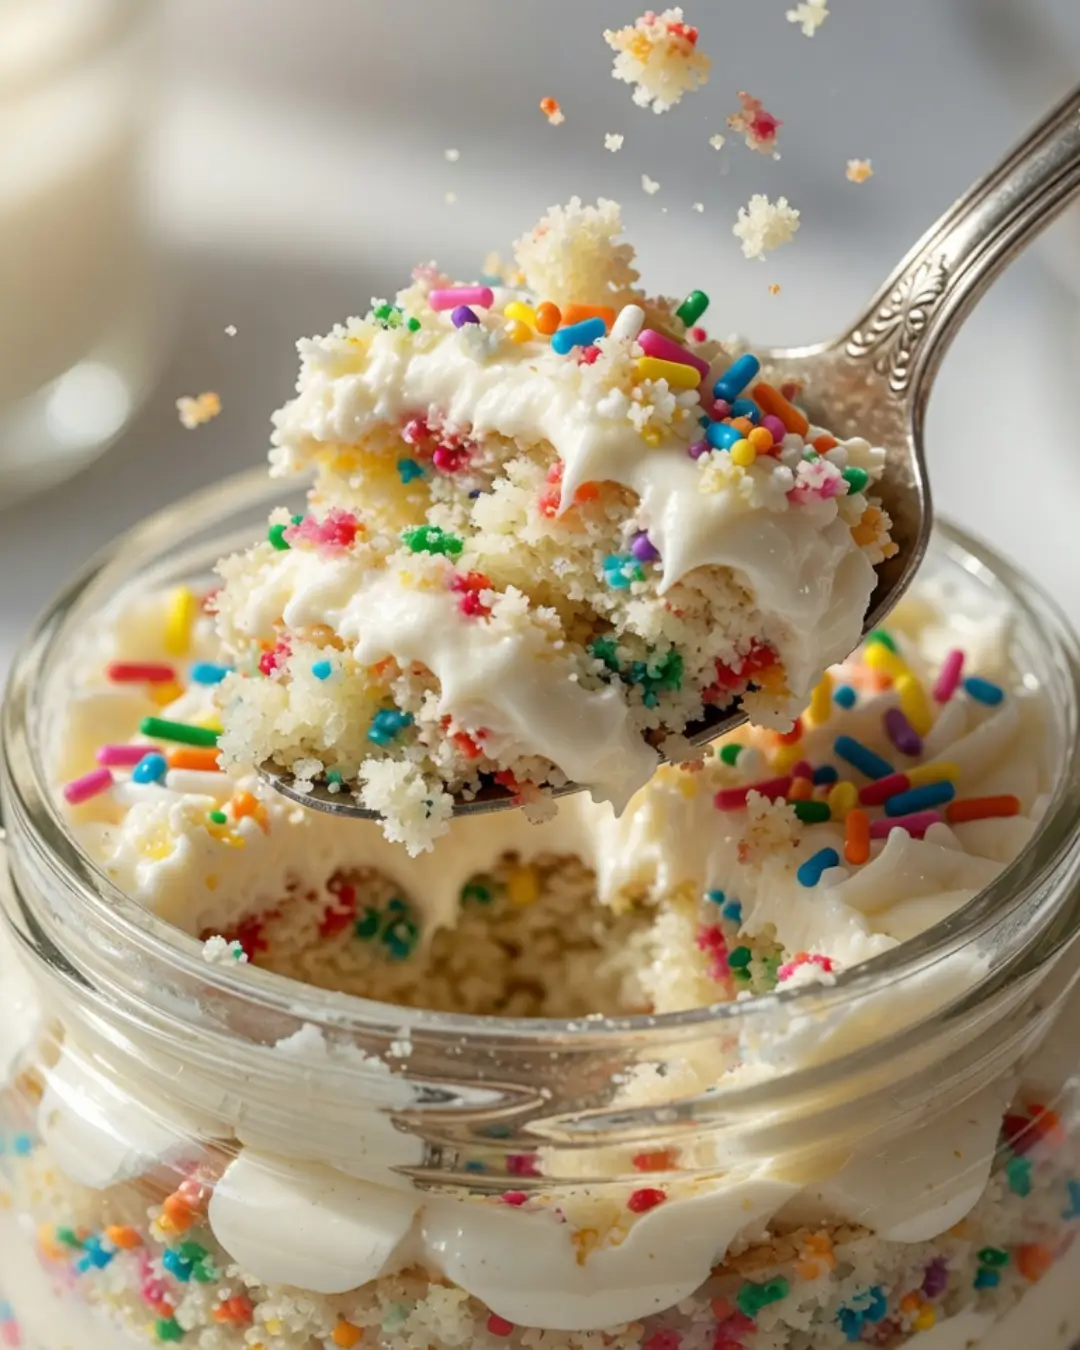
Welcome to my kitchen, sweet friends! If you have been scrolling through your social media feeds lately, you have undoubtedly paused on those mesmerizing, flawlessly smooth, sprinkle-encrusted individual desserts taking over the internet. Yes, I am talking about the viral phenomenon of Homemade Dot Cakes.
With over 40 years of professional baking experience under my apron, I have watched countless food trends come and go, but this one captured my heart immediately. There is something profoundly nostalgic yet brilliantly modern about a personal-sized cake tucked neatly inside a glass jar or ceramic ramekin. Today, I am pulling back the curtain to show you exactly how to recreate this upscale New York City bakery treat right in your own kitchen, saving you a long wait in line and a hefty price tag. Grab your favorite baking pans, and let’s make some magic together.
Table of Contents
Why You’ll Love This Recipe
When you serve these individual treats, you are not just serving dessert—you are creating an unforgettable culinary experience for your family and guests. Here is why this recipe deserves a permanent spot in your handwritten recipe binder:
- The Ultimate Multi-Textural Bliss: Every single bite offers a spectacular contrast between the crisp, satisfying crunch of the outer sprinkle shell, the cloud-like silkiness of the vanilla buttercream, and the melt-in-your-mouth tenderness of the buttermilk sponge.
- Perfect Single-Serving Portioning: Say goodbye to the messy chaos of slicing a traditional cake at parties. These individual cups provide clean, effortless portions that are incredibly easy to serve, display, and transport without ruining a shred of frosting.
- No Advanced Decorating Skills Required: If you struggle with getting smooth sides on a layer cake or piping intricate buttercream borders, this easy cake cup dessert recipe is your saving grace. The clever container method ensures a pristine aesthetic every single time, making you look like an elite pastry chef.
- Unmatched Visual Showstopper: Whether you are setting up a dessert table for a milestone birthday, a bridal shower, or a cozy weekend ladies’ night, these vibrant, polka-dot coated tops bring an instant element of joy and luxury to any gathering.
Ingredients Needed
To achieve a true bakery-quality result that outperforms generic box mixes, we will use wholesome, precisely selected kitchen staples. Each ingredient plays a vital structural and flavorful role in creating the ultimate copycat NYC bakery dot cakes.
For the Ultra-Moist Confetti Cake Base
- 2 cups cake flour: Sifted meticulously to provide a lower protein content, ensuring an exceptionally delicate, soft, and fine-grained crumb structure.
- 1 teaspoon baking powder: Acts as our primary leavening agent to give the sheet cake a gorgeous, uniform rise.
- 1/2 teaspoon baking soda: Reacts beautifully with the acidic buttermilk to create tiny air pockets for maximum fluffiness.
- 1/2 teaspoon fine sea salt: A crucial addition to balance the sugars and enhance the deep vanilla profiles.
- 1/2 cup unsalted butter: Softened to room temperature (around 18-20°C) to allow for flawless air incorporation during creaming.
- 1/4 cup refined coconut oil or neutral vegetable oil: Kept at room temperature; the combination of butter and oil guarantees a cake that stays remarkably moist for days.
- 1 1/4 cups superfine granulated sugar: Dissolves effortlessly into the fats, creating a highly stable structural foundation for the batter.
- 4 large egg whites: Kept at room temperature; using whites exclusively ensures our cake base remains a pristine, bakery-white canvas that makes the internal sprinkles pop.
- 1 tablespoon vanilla bean paste: Infuses the sponge with gorgeous visual black flecks and an intensely rich, aromatic vanilla flavor.
- 1 cup full-fat buttermilk: Room temperature; the natural acids tenderize the flour’s gluten strands for a pillowy mouthfeel.
- 1/2 cup rainbow confetti jimmies: The long, rod-shaped sprinkles work perfectly inside the batter because they hold their shape without bleeding heavily during the baking process.
For the Silky Vanilla Buttercream
- 1 cup unsalted butter: Softened perfectly to room temperature so it whips into a cloud-like consistency.
- 4 cups powdered sugar: Sifted thoroughly to eliminate any stubborn lumps that could ruin your smooth surface.
- 3 tablespoons heavy cream: Cold; adds an opulent, luxurious richness and helps adjust the final spreading texture.
- 1 teaspoon pure vanilla extract: Provides that comforting, classic birthday-cake aroma we all crave.
- A tiny pinch of fine salt: Cuts through the intense sweetness of the sugar to create a balanced, sophisticated frosting.
For the Signature Outer Shell
- 1 cup rainbow nonpareil sprinkles: The tiny, round ball sprinkles are absolutely mandatory here. Their uniform shape creates the tight, iconic mosaic pattern that defines the TikTok sprinkle cake cup recipe.
How to Make Homemade Dot Cakes
Follow these step-by-step instructions closely. Understanding the physical “why” behind each baking technique is the secret to mastering how to make dot cakes at home successfully.
- Prepare the Oven and Baking Sheet: Preheat your oven to 180°C (350°F). Line a standard 9×13-inch baking pan with premium parchment paper, ensuring you leave a 2-inch overhang sling on the long sides.
- Why: The parchment sling allows you to lift the delicate sheet cake out of the pan completely intact, which is vital for stamping out perfectly clean cake rounds later.
- Whisk the Dry Ingredients: In a medium-sized bowl, combine the sifted cake flour, baking powder, baking soda, and fine sea salt. Whisk vigorously for 30 seconds to aerate the blend.
- Why: This step evenly distributes the leavening agents throughout the flour, preventing uneven pockets or sinking while baking.
- Cream the Fats and Sugar: Place the softened unsalted butter, neutral oil, and granulated sugar into the bowl of a stand mixer fitted with the paddle attachment. Beat on medium-high speed for a full 5 minutes until the mixture is incredibly pale, light, and doubled in volume.
- Why: Creaming forces air into the fat molecules. This trapped air expands in the oven, creating an ethereal, light texture that melts instantly on your tongue.
- Emulsify the Egg Whites and Vanilla: Lower the mixer to medium speed. Slowly pour in the room-temperature egg whites one at a time, allowing each addition to fully incorporate before introducing the next. Scrape down the sides of the bowl, then beat in the luxurious vanilla bean paste.
- Why: Adding room-temperature whites gradually prevents the fat emulsion from breaking or curdling, ensuring a cohesive, smooth batter.
- Alternate the Wet and Dry Ingredients: Reduce the mixer speed to its lowest setting. Add one-third of your whisked dry ingredients, followed by half of the smooth buttermilk. Repeat the pattern, alternating wet and dry, finishing with the final third of the flour. Mix just until the white streaks disappear.
- Why: Overmixing at this crucial juncture activates the flour’s gluten networks, turning what should be a tender, delicate cake into a tough, dense, bread-like structure.
- Fold in the Batter Sprinkles: Unclip the bowl from the mixer. Using a flexible rubber spatula, gently fold the rainbow confetti jimmies into the thick batter with a slow, sweeping motion. Pour the batter into your prepared pan and smooth the top with an offset spatula.
- Why: A gentle hand prevents the sprinkle coatings from breaking down and bleeding dye into your pristine white batter, which would otherwise turn it a muddy gray color.
- Bake and Perform the Flash-Chill: Bake for 28 to 32 minutes. You will know it is done when a toothpick inserted directly into the center comes out clean or with a few moist crumbs. Let the cake cool completely in its pan on a wire rack for 45 minutes, then place the entire pan directly into the freezer for 20 minutes.
- Why: Chilling firm’s up the delicate fats and crumb structure within the cake, allowing you to stamp out crisp, sharp circles without the edges tearing or crumbling away.
- Whip the Silk Buttercream: While the cake undergoes its chill, clean your mixer bowl and beat the softened butter for 3 minutes until creamy. On low speed, gradually add the sifted powdered sugar one cup at a time, alternating with splashes of heavy cream. Add the vanilla and salt, then crank the speed to medium-high and whip for an additional 3 minutes until cloud-like.
- Why: High-speed whipping introduces micro-air pockets into the frosting, giving it the perfect spreadable consistency required to seal your cake cups flush.
- Stamp and Assemble the Cake Rounds: Lift the chilled sheet cake out of the pan using the parchment handles. Take your 6-ounce glass jars, ceramic ramekins, or a round cookie cutter of identical diameter, and firmly press down into the cake to stamp out your circles. Gently drop one pristine cake round into the bottom of each container.
- Why: Stamping directly ensures a snug, custom fit against the walls of your serving vessel, preventing frosting from slipping down past the cake base prematurely.
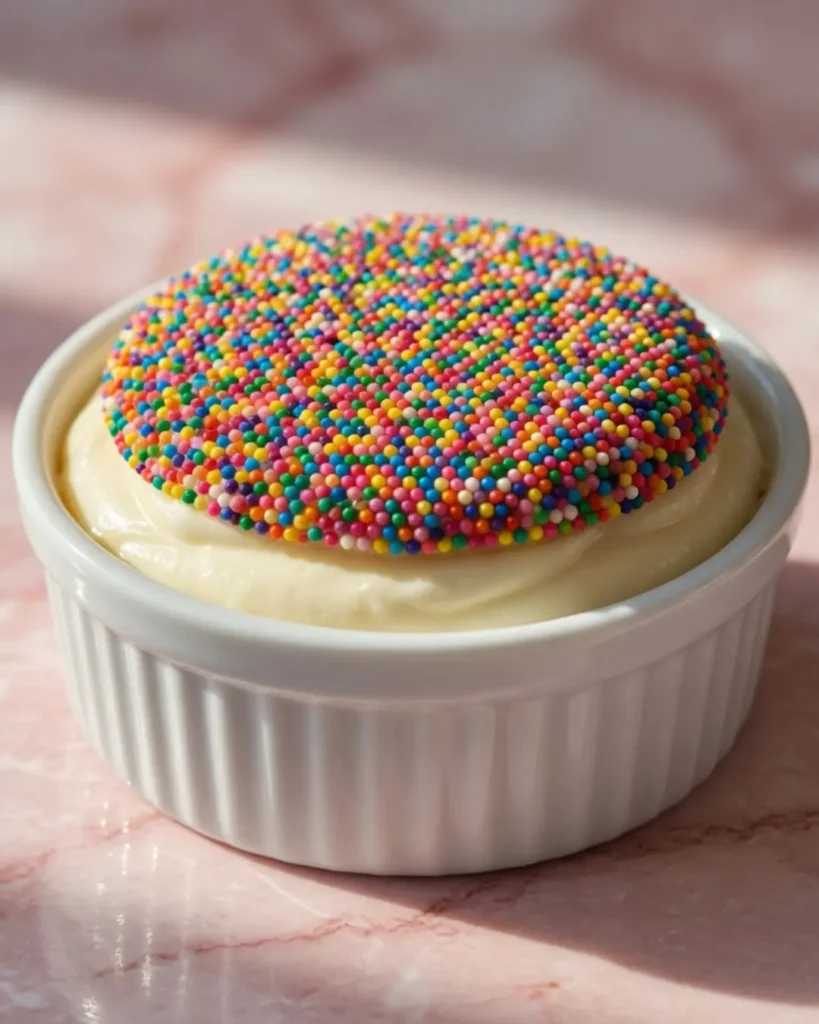
- The Leveling and Dipping Secret: Spoon or pipe a generous amount of vanilla buttercream over the cake round, filling the jar completely to the absolute top. Take a clean, small offset spatula and scrape it firmly across the rim of the jar, cutting away excess frosting to create an impeccably flat, flush, level surface. Pour your rainbow nonpareils into a wide, shallow bowl. Invert your filled jar completely upside down and press the flat frosting headfirst straight into the sprinkles. Give it a gentle twist, lift it back up, and marvel at your masterwork!
- Why: Scraping the frosting flush with the rim creates a perfect seal and uniform surface tension, allowing the nonpareils to adhere in a flawless, flat mosaic without spilling or sliding.
Expert Tips for Success
- The Temperature Golden Rule: Never attempt to assemble these cakes if the sponge is even slightly warm. Warm cake will instantly melt the base of your buttercream, causing the entire top layer to slide off sideways when you attempt to invert the jar into the sprinkle bowl.
- The Nonpareil Mandate: Do not substitute classic rod-shaped sprinkles or coarse sanding sugar for the outer shell decoration. Only tiny, round nonpareils can sit tightly packed against one another to form that signature, crunchy, impenetrable “dot” barrier.
- Achieving the Perfect Frosting Density: If your buttercream feels too soft or runny after whipping, pop the piping bag into the refrigerator for 10 minutes before assembling. A firmer frosting holds its shape beautifully during the crucial inversion process.
Serving and Storage Tips
For the absolute best flavor experience, always serve your Homemade Dot Cakes at room temperature. This allows the butter inside the sponge to soften completely, giving you that iconic melt-in-your-mouth experience.
Storage Guidelines
- Refrigeration: If you are making these ahead of time, place the lids onto your jars or cover the tops of your ramekins tightly with plastic wrap. They will keep beautifully in the refrigerator for up to 4 days.
- The Counter Thaw: Before serving your chilled cakes, set them out on the kitchen counter for 20 to 30 minutes. This brings the rich buttercream back to its luxurious, spreadable texture.
- The Color Bleed Factor: Note that after roughly 24 hours in storage, the moisture in the frosting may cause the intense dyes of the nonpareils to bleed slightly into the white cream underneath. For absolute picture-perfect party aesthetics, I highly recommend stamping and frosting your cakes ahead of time, but saving the exciting sprinkle-dipping step for the day of your big event!
Frequently Asked Questions
Can I use a boxed cake mix for this recipe?
Absolutely! If you are short on time, you can easily substitute a high-quality box of classic white or funfetti cake mix. To ensure it has the structural integrity needed to stamp out clean rounds, swap the water called for on the box for full-fat whole milk, and add an extra egg yolk for richness.
Why are my sprinkles bleeding into the cake batter?
This usually happens if you use tiny nonpareil sprinkles inside the hot cake batter, or if you overmix the batter once the sprinkles are added. Always stick to high-quality rod-shaped jimmies for the interior baking portion, and fold them in gently by hand at the absolute last second.
What are the best containers to use for Homemade Dot Cakes?
Standard 4-ounce or 6-ounce glass Mason jars, clear glass Weck jars, and classic white ceramic souffle ramekins are the absolute best options. If you are hosting a large outdoor party or a children’s birthday bash, shallow, wide paper ice cream cups work magnificently and make clean-up an absolute breeze.
Can I freeze these assembled desserts?
Yes, you can freeze them! The un-dipped, frosted cake cups can be wrapped tightly in plastic wrap and aluminum foil and frozen for up to 2 months. When you are ready to enjoy them, thaw them overnight in the refrigerator, bring them to room temperature, and dip them fresh into your bowl of nonpareils right before serving.
Conclusion
There is a beautiful reason why these individual Homemade Dot Cakes have completely stolen the spotlight this year they combine pure, whimsical childhood nostalgia with a brilliant, clean presentation that modern hostesses adore. By utilizing an ultra-moist buttermilk base and mastering the spatula-rim scraping technique, you can bypass the long city bakery lines and confidently craft an elite, photorealistic dessert right at your kitchen counter. It is a foolproof recipe that promises to bring giant smiles to everyone around your dinner table.
Join the Conversation!
Now, I want to hear from all of you wonderful home bakers! What color combinations of nonpareils are you going to use first to customize these for your next family gathering? Are you sticking with classic rainbow, or trying elegant monochromatic shades? Let me know in the comments below, and please don’t forget to leave this recipe a 5-star rating if it brought joy to your kitchen today! Happy baking.
Homemade Dot Cakes Recipe
Ingredients
Method
- Preheat your conventional oven to 180°C (350°F). Line a 9×13-inch baking pan with premium parchment paper, leaving a 2-inch overhang sling on the long sides.
- In a medium mixing bowl, vigorously whisk together the sifted cake flour, baking powder, baking soda, and fine sea salt to remove all clumps and aerate the blend.
- In the bowl of a stand mixer fitted with a paddle attachment, combine the softened unsalted butter, room-temperature oil, and granulated sugar. Beat on medium-high speed for 5 minutes until exceptionally pale, light, and fluffy.
- Reduce the mixer speed to medium and slowly pour in the room-temperature egg whites one at a time, allowing each to fully incorporate before adding the next. Mix in the rich vanilla bean paste.
- Turn the mixer to low speed. Alternately add the dry flour mixture in three parts and the buttermilk in two parts, beginning and ending with the dry ingredients. Mix just until combined.
- Using a rubber spatula, gently fold the rainbow confetti jimmies into the smooth batter. Pour into the prepared pan, smooth the top evenly, and bake for 28 to 32 minutes until a toothpick inserted into the center comes out clean.
- Cool the cake completely in the pan on a wire rack for 45 minutes, then place the entire pan into the freezer for 20 minutes to firm up the crumb structure.
- Whip the remaining 1 cup of softened butter for 3 minutes until light. On low speed, gradually add the sifted powdered sugar alternating with splashes of heavy cream. Add the vanilla and pinch of salt, then whip on medium-high for 3 minutes until cloud-like.
- Lift the chilled sheet cake out of the pan. Using the rim of your 6-ounce glass jars or ceramic ramekins, firmly stamp out circles from the cake. Drop one custom cake round cleanly into the bottom of each container.
- Pipe or spoon a generous amount of vanilla buttercream over the cake round to fill the container to the top. Use a small offset spatula to scrape firmly across the rim, creating an absolute flat, flush surface. Invert the container headfirst and gently press the flat frosting straight down into a shallow bowl filled with rainbow nonpareils to form the dot shell.