Ezekiel bread recipes are the gold standard of nutrient-dense baking, offering a deeply satisfying, nutty crumb packed with wholesome sprouted grains and legumes. After extensive experience of testing recipes in my kitchen, I can tell you that recreating this biblical, ancient-grain loaf at home is far simpler than commercial bakeries lead you to believe, provided you master proper grain activation and dough hydration.
The first time I made sprouted grain bread, I ended up with a dense, heavy brick because I failed to account for the unique gluten dynamics of sprouted wheat germ. After countless rounds of testing throughout my career, I discovered that balancing sprouted grain flours with a controlled fermentation phase and a precise touch of vital wheat gluten produces a light, sliceable, and deeply aromatic loaf every single time.
What separates this flourless ezekiel bread approach from the rest is its strict adherence to raw, living sprouted ingredients combining hard red wheat, spelt, barley, millet, lentils, and soybeans to form a whole food matrix. By breaking down anti-nutrients like phytic acid through sprouting, this recipe unlocks bioavailable vitamins and minerals while keeping the overall glycemic load remarkably gentle on digestion.
This ezekiel bread recipes guide will not disappoint. Let’s get started.
Table of Contents
The Science Behind Sprouted Grain Baking
Baking with sprouted grains is fundamentally different from using standard commercial flour. When a grain sprouts, enzymatic activity explodes inside the kernel. Amylase enzymes begin converting complex starches into simple maltose sugars, while protease enzymes start breaking down storage proteins.
For the baker, this process yields two major benefits:
- Enhanced Flavor Profile: The natural liberation of simple sugars creates an inherently sweet, nutty taste profile without adding refined sugars or artificial enhancers.
- Superior Nutritional Digestibility: Sprouting neutralizes phytic acid, an antinutrient that binds essential minerals like zinc, iron, calcium, and magnesium. Furthermore, it boosts amino acid availability, turning a simple slice of bread into a complete protein bread containing all nine essential amino acids.
However, because enzyme activity is elevated, sprouted doughs can break down rapidly if over-proofed. Managing your water temperature, dough temperature, and bulk fermentation timing is essential to prevent a gummy or collapsed crumb.
Essential Ingredients & Equipment For Ezekiel Bread Recipes
To execute high-protein sprouted baking successfully, accurate weight measurements and proper equipment make all the difference.
The Grain & Legume Matrix
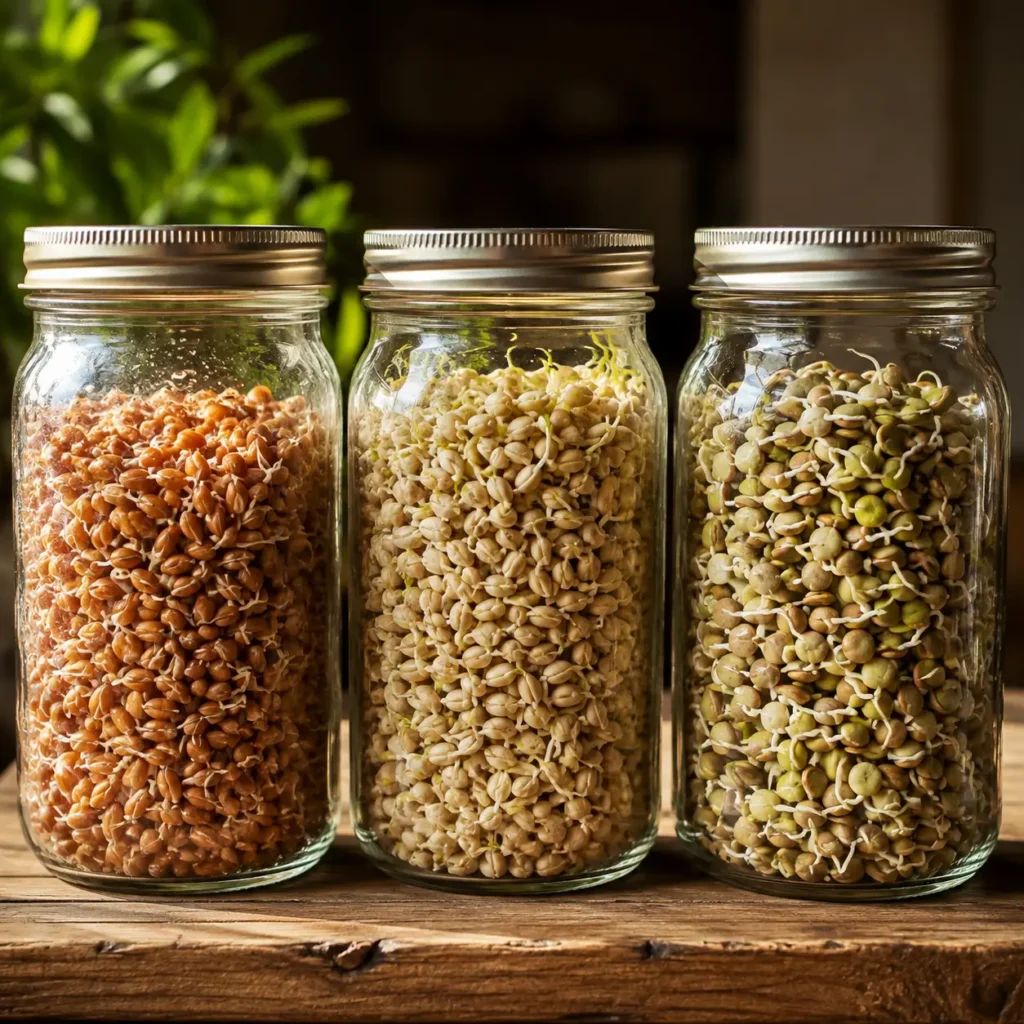
- Hard Red Spring Wheat Berries (or Sprouted Wheat Flour): Provides the fundamental structure and gluten potential.
- Sprouted Spelt Berry/Flour: Adds an ancient, nutty nuance and tenderizes the crumb.
- Sprouted Pearl Barley: Contributes moisture-retention soluble fibers (beta-glucans).
- Sprouted Yellow Millet: Introduces subtle crunch and golden hue.
- Sprouted Brown Rice or Soybeans: Completes the amino acid profile.
- Sprouted Green or Red Lentils: Delivers structural protein and earthy richness.
Liquid & Yeast Base
- Warm Water (105°F to 110°F): Activates yeast without scalding delicate enzymes.
- Active Dry Yeast or Sourdough Starter: Drives aeration.
- Raw Wildflower Honey or Maple Syrup: Feeds the initial yeast bloom and balances leguminous earthy notes.
- Extra Virgin Olive Oil: Softens gluten strands for a tender slice.
- Fine Sea Salt: Regulates yeast fermentation rate and reinforces gluten network stability.
- Vital Wheat Gluten: Highly recommended when working with 100% wet-milled or low-gluten sprouted grains to maintain structure and height.
Required Baking Tools
- Digital kitchen scale (precise to 1 gram)
- Heavy-duty stand mixer equipped with a dough hook
- Two standard 8.5 x 4.5-inch metal loaf pans
- High-powered grain mill or heavy-duty food processor (if sprouting and grinding fresh whole berries)
- Digital instant-read probe thermometer
Step-by-Step Baking Method Ezekiel Bread Recipes
Follow these sequential steps carefully to ensure ideal dough strength, proper gas retention, and an even bake.
Step 1: Grain Activation and Milling
If starting from whole raw berries, soak wheat, spelt, barley, millet, lentils, and beans in filtered water for 12 hours. Drain, rinse, and place in sprouting jars at room temperature for 1 to 2 days until tiny white root tips (about 1/8 inch) emerge. Dehydrate the sprouted grains at low heat (under 115°F) until fully dry, then mill into a fine sprouted wheat flour blend using a grain mill.
(Note: You can also purchase pre-sprouted dry flours to streamline this process without sacrificing quality.)
Step 2: Yeast Blooming
In the bowl of your stand mixer, combine 2 cups of warm water (108°F), honey, and active dry yeast. Whisk gently and let rest for 7 to 10 minutes until a thick, frothy foam forms on the surface.
Step 3: Mixing the Dough
Add the olive oil, sea salt, and vital wheat gluten to the yeast mixture. Slowly incorporate your milled sprouted grain and legume flour blend, one cup at a time, using the paddle attachment on low speed until a shaggy dough forms.
Step 4: Kneading and Gluten Development
Switch to the dough hook attachment. Knead on medium-low speed for 8 to 10 minutes. The dough will feel stickier than standard white bread dough due to the higher soluble fiber content. Resist the temptation to dump excess flour into the bowl; the dough should clear the sides of the bowl while remaining tacky to the touch.
Step 5: First Bulk Fermentation
Lightly oil a large glass bowl. Transfer the dough, turn once to coat with oil, cover securely with a damp kitchen towel or plastic wrap, and place in a warm, draft-free spot (78°F to 82°F) for 60 to 75 minutes, or until doubled in size.
Step 6: Shaping the Loaves
Gently punch down the dough to release accumulated carbon dioxide pockets. Turn out onto a lightly oiled work surface and divide into two equal portions. Roll each portion tightly into a cylinder, tucking the ends under to create top-skin tension. Place into two greased 8.5 x 4.5-inch loaf pans.
Step 7: Final Proof
Cover the loaf pans loosely with a light cloth. Allow to proof for 35 to 45 minutes until the dough crowns approximately 1 inch above the rim of the pans. Do not over-proof, as sprouted doughs lack the structural elasticity of un-sprouted flours and can collapse in the oven.
Step 8: Baking
Preheat your oven to 350°F (175°C). Bake on the center rack for 40 to 45 minutes. If the top crust darkens too quickly, tent the loaves loosely with aluminum foil at the 25-minute mark. The bread is done when the internal core temperature reads between 195°F and 200°F on a digital probe thermometer, and the bottom sounds hollow when tapped.
Step 9: Cooling
Remove loaves from the oven immediately and turn them out onto a wire cooling rack. Allow the loaves to cool completely for at least 2 hours before slicing. Slicing warm sprouted bread will compress the internal crumb and cause a gummy texture.
Expert Baker Tips for Perfect Results sprouted grain bread
- Control Water Temperature Strictness: Sprouted flours contain highly active enzymes that speed up fermentative processes. Keep water between 105°F and 110°F to keep yeast activity predictable.
- Avoid Over-Kneading: High enzyme activity combined with legume proteins means gluten networks are fragile. Stop kneading once the dough achieves moderate extensibility and smooth surface tension.
- Use Metal Loaf Pans: Dark or light aluminum metal loaf pans distribute heat more evenly than glass or ceramic, ensuring crisp side crusts and preventing soggy bottom walls.
- Monitor Internal Temperature: Visual cues can be misleading with whole-grain loaves. Always verify doneness with a digital probe thermometer inserted into the center of the loaf.
Recipe Variations & Substitutions
- 100% Sourdough Sprouted Ezekiel Loaf: Replace commercial active dry yeast with 150 grams of active, mature 100% hydration sourdough starter. Extend bulk fermentation to 4–6 hours.
- Seed-Crusted High-Protein Loaf: Prior to the final proof, brush the top skin of the loaf with water and roll it in raw sunflower seeds, pumpkin seeds, and flaxseeds for added crunch and healthy fats.
- Cinnamon Raisin Ezekiel Loaf: Flatten the dough during the shaping phase, sprinkle generously with ground cinnamon and unsweetened organic raisins, then roll tightly before placing into the loaf pan.
Storage, Freezing, and Toasting Guidelines flourless ezekiel bread
Because true sprouted Ezekiel bread contains no artificial preservatives, chemical dough conditioners, or synthetic shelf-life extenders, proper storage is critical:
- Room Temperature: Store in an airtight linen bread bag or paper bag for up to 3 days at cool room temperature. Avoid plastic bags at room temperature as they trap moisture and encourage mold growth.
- Refrigeration: Store in a sealed container in the refrigerator for up to 2 weeks. Refrigeration slows staling while preventing mold formation on moist whole-grain crumbs.
- Freezing (Recommended): Pre-slice the cooled loaves, place parchment paper separators between slices, and seal in a heavy-duty freezer bag. Freeze for up to 3 months. Toast individual slices straight from the freezer for maximum convenience and fresh-baked texture.
Frequently Asked Questions (FAQ)
Can I make Ezekiel bread completely flourless?
Yes. Authentic flourless Ezekiel bread utilizes wet-milled fresh sprouted grains rather than dry ground sprouted flour. The live sprouted grains and legumes are passed directly through a heavy-duty meat grinder or commercial food processor to form a continuous paste, which is then kneaded with seasonings, yeast, and vital wheat gluten.
Is Ezekiel bread suitable for individuals with Celiac Disease?
No. While sprouting degrades a portion of the gluten proteins, traditional Ezekiel bread contains wheat, spelt, and barley—all of which naturally contain gluten. It is easier to digest for many people with mild grain sensitivities, but it is not safe for those with Celiac Disease.
Why did my sprouted bread turn out dense or gummy?
A dense or gummy crumb usually stems from three issues: cutting the loaf while it was still hot, over-watering the dough during mixing, or over-proofing. Ensure you cool the bread fully so the internal starches set properly, and use an internal probe thermometer to confirm it reaches 195°F–200°F before pulling it from the oven.
Final Thoughts For Ezekiel Bread Recipes
Baking your own sprouted ancient-grain bread brings nutrient-dense, flavorful, and deeply nourishing loaves right to your table. Once you master the delicate balance of hydration and proofing, you will never need to rely on store-bought frozen loaves again. Enjoy your fresh-baked, high-protein slices toasted with fresh avocado, almond butter, or a simple drizzle of raw honey!
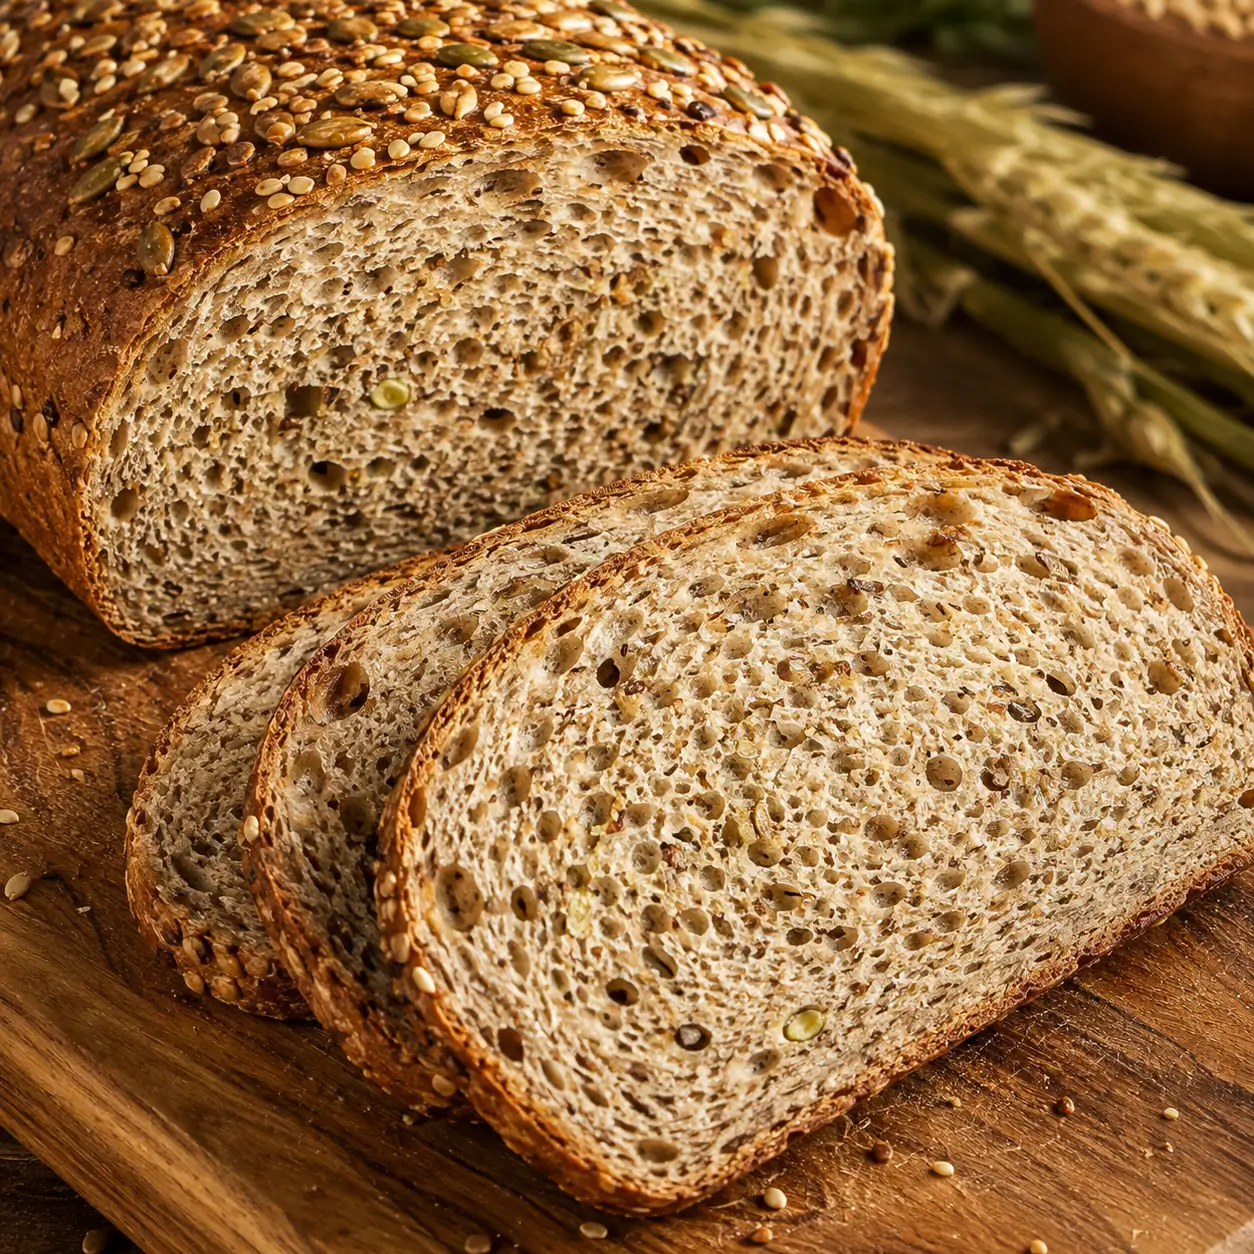
Ezekiel Bread Recipes: Homemade Sprouted Loaf
Ingredients
Method
- In the bowl of a stand mixer, combine warm water (105°F-110°F), honey, and active dry yeast. Let stand for 7-10 minutes until frothy.
- Add olive oil, sea salt, vital wheat gluten, and half of the sprouted flour mixture. Whisk on low speed using the paddle attachment until blended.
- Gradually incorporate the remaining sprouted flour mixture. Switch to the dough hook attachment and knead on medium-low speed for 8-10 minutes until elastic and slightly tacky.
- Transfer dough to a lightly oiled bowl, cover with a damp cloth, and let rise in a warm spot for 60-75 minutes, or until doubled in size.
- Punch down the dough, divide into two equal portions, shape into loaves, and place into two greased 8.5 x 4.5-inch loaf pans.
- Cover loosely and proof for 35-45 minutes until dough rises approximately 1 inch above the pan rims.
- Bake in a preheated oven at 350°F (175°C) for 40-45 minutes until internal core temperature reaches 195°F-200°F.
- Turn out onto a wire rack and cool completely for at least 2 hours before slicing.