In my four decades as a culinary creator, I have found that the most memorable desserts aren’t always the ones that took hours in a hot oven. Sometimes, the most sophisticated flavor profiles come from the simple, cold emulsion of high-quality fats. This No Bake Peanut Butter Pie is a testament to that philosophy.
I designed this recipe for the woman who wants to command the room with a “wow-factor” dessert but only has 15 minutes of active prep time. Whether you’re hosting a summer soirée or a winter holiday dinner, this pie offers a nostalgic, “Reese’s-style” comfort elevated to a gourmet level.
Table of Contents
Why You’ll Love This Gourmet No-Bake Peanut Butter Pie
- Zero Oven Time: Perfect for hot days or when your oven is occupied by a main course.
- The “Clean Label” Upgrade: We skip the frozen whipped topping in favor of stabilized heavy cream for a velvet-smooth finish.
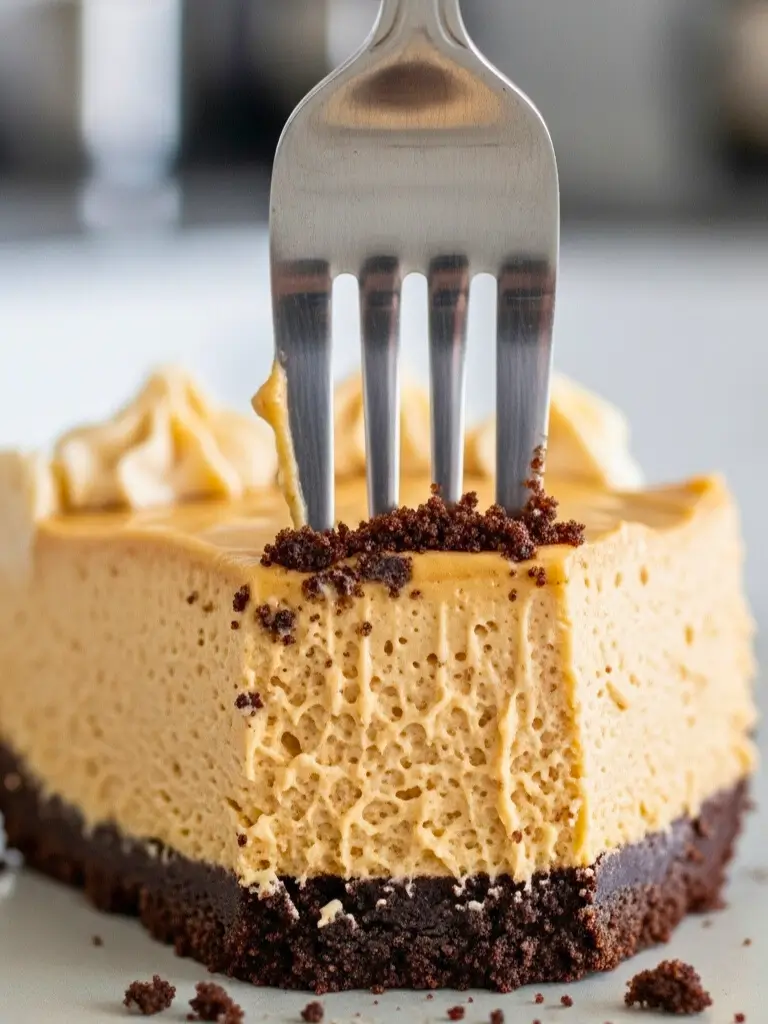
- Triple-Layer Texture: A crunchy cookie base, a silky mousse-like center, and a cloud-like topping.
- Protein-Packed Indulgence: Using natural peanut butter provides a satisfying, nutrient-dense profile that makes this feel like a “smart” treat.
- Make-Ahead Magic: This pie actually improves after 24 hours in the fridge, making it the ultimate stress-free hosting dessert.
Ingredients Needed For Best Oreo Crust Peanut Butter Pie
The Structural Crust:
- 24-26 Chocolate Sandwich Cookies (Oreos): Pulse these into a fine “sand” texture.
- 6 tbsp Unsalted Butter (Melted): Use high-quality European butter for a better “snap” once chilled.
- Pinch of Sea Salt: To cut through the sugar and enhance the chocolate.
The Silky Peanut Butter Filling:
- 8 oz Full-Fat Cream Cheese: Must be softened to room temperature to avoid lumps.
- 1 cup Creamy Peanut Butter: I prefer conventional for stability, but see my “Natural PB Tip” below.
- 1 ¼ cups Powdered Sugar: Sifted to ensure a cloud-like consistency.
- 1 tsp Pure Vanilla Bean Paste: For those elegant black flecks and a deeper aromatic profile.
- 1 ½ cups Heavy Whipping Cream: Chilled. This is our “stabilized” volume builder.
How to Make No Bake Peanut Butter Pie
- The Foundation: Combine cookie crumbs and melted butter. Press firmly into your pie dish. Chef Luna’s Secret: Use the bottom of a measuring cup to compress the crust—this prevents it from falling apart when you slice it later. Chill in the freezer for 20 minutes.
- Cream the Base: In a large bowl, beat the softened cream cheese and peanut butter until absolutely smooth. If the cream cheese is cold, you will have lumps.
- The Sweetener: Gradually add the sifted powdered sugar and vanilla. Beat on medium-high until the mixture looks pale and fluffy—about 3 minutes.
- The “Stabilized” Fold: In a separate chilled bowl, whip your heavy cream to stiff peaks. Gently fold 1/3 of the cream into the peanut butter mixture to “lighten” it, then fold in the remaining 2/3. Why? This prevents the heavy peanut butter from deflating the air bubbles you just whipped into the cream.
- Assembly: Pour the filling into your chilled crust and smooth the top with an offset spatula.
- The Setting Phase: Refrigerate for at least 6 hours, though overnight is best. This allows the fats to marry and the structure to solidify.
Expert Tips for Success
- The Natural PB Trick: If using “oil-sep” natural peanut butter, stir it thoroughly and add an extra 2 tbsp of powdered sugar to help absorb the excess moisture and prevent a “weeping” pie.
- Clean Slices: Dip your knife in hot water and wipe it dry between every single cut. This ensures those sharp, professional-looking layers.
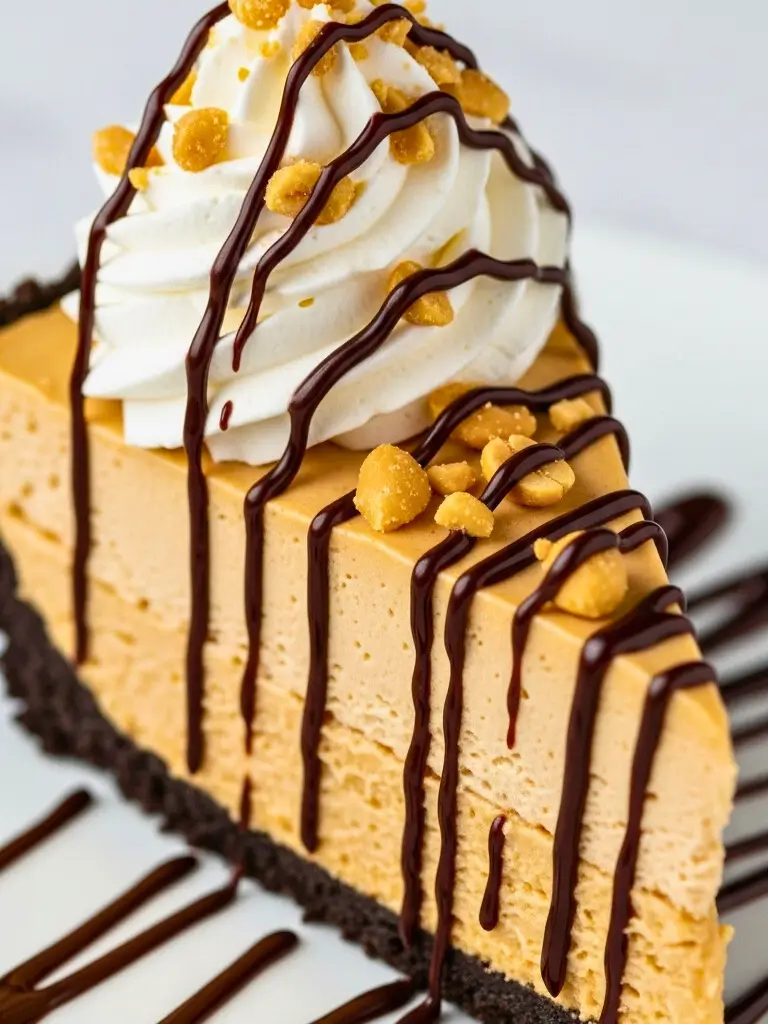
- Texture Contrast: Garnish with chopped salted peanuts and a drizzle of warm dark chocolate just before serving to add a “crunch” that balances the silkiness.
Serving and Storage Tips
This pie is best served straight from the refrigerator. If you prefer a “frozen treat” texture, it can be kept in the freezer just let it sit on the counter for 10 minutes before slicing. Store in an airtight container for up to 5 days.
Frequently Asked Questions
Can I make this vegan?
Absolutely. Substitute the cream cheese and butter with high-quality plant-based alternatives and use a coconut-based whipping cream.
Why is my filling runny?
This usually happens if the cream cheese wasn’t beaten enough with the sugar, or if the whipped cream was under-beaten. Ensure your cream holds a “stiff peak” before folding.
Can I use a graham cracker crust instead?
Yes! Use 1.5 cups of graham crumbs with 6 tbsp of butter for a lighter, honey-toned base.
Conclusion
This No Bake Peanut Butter Pie is a masterclass in texture. It’s the kind of recipe that makes people ask, “How did you do this?” when the truth is your refrigerator did all the heavy lifting. I’ve shared my professional secrets with you because I believe everyone deserves a little “magic” in their kitchen.
Check This recipe: Protein-Rich Peanut Butter Dessert
Do you prefer the dark chocolate Oreo base or a classic honey graham crust? Let me know in the comments below! If this pie becomes a staple in your home, please leave a 5-star rating to help our community grow!
Chef Luna’s Gourmet No-Bake Peanut Butter Pie
Ingredients
Method
- Combine cookie crumbs, melted butter, and salt. Press firmly into a 9-inch pie dish and freeze for 20 minutes.
- Beat softened cream cheese and peanut butter until completely smooth and lump-free.
- Slowly mix in powdered sugar and vanilla until fluffy.
- In a separate bowl, whip heavy cream until stiff peaks form.
- Gently fold the whipped cream into the peanut butter mixture in two stages to maintain air volume.
- Pour into the chilled crust, smooth the top, and refrigerate for at least 6 hours or overnight.